On the 18th February 2022, Storm Eunice arrived bringing disruption to many parts of the country and a record number of Red weather warnings being issued by the Met Office.
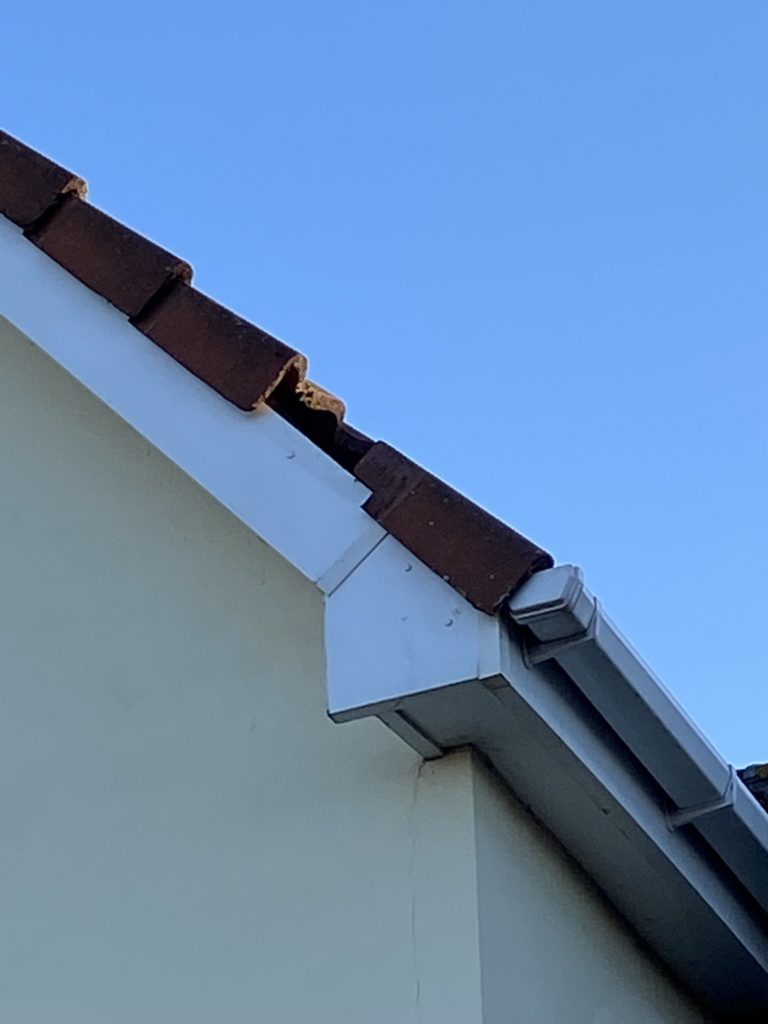
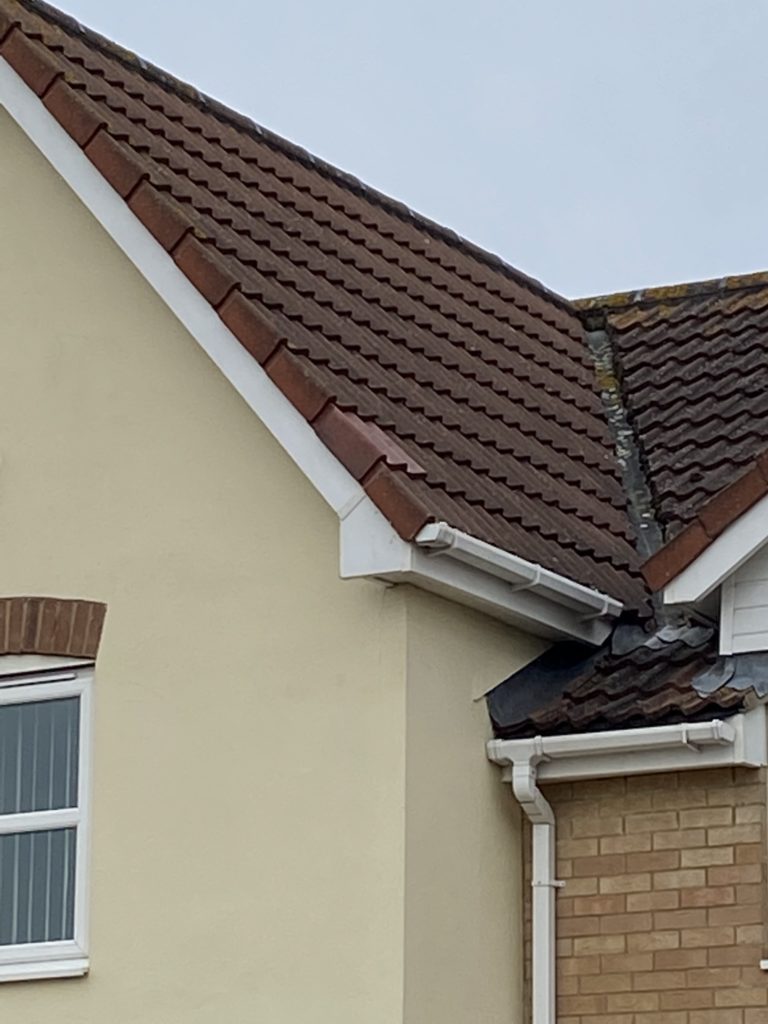
I recorded wind speeds of 52mph and this was enough to dislodge a roof tile which slide off the roof and smashed,
We are lucky in this town to have a distributor for the make of tiles I have, and they ordered a replacement for me.
The type and description of the tile I needed :
Sandtoft concrete double pantile right hand cloaked verge tile Rustic
The tile cost £11.50 and the roofer is due any day to fit it.
Update
15 March 22
I got let down by a roofer from Sommersham who promised they could do the job and in the end just didn’t bother coming or contacting me.
So I called the company I bought the tile from on the off chance they knew a roofer they could recommend, they gave me Matts number, and by 4pm on the same day, the new tile has been fitted.
While he was there I noticed a gap where the ridge tile meets the roof tiles, Matt said the plastic infill is missing so he nipped up and mortared this up, so we are watertight again 🙂
Matt did a great job and charged a very reasonable fee.
Very pleased with the job, the tile I lost was due to it not being secured with a nail, as nailing the replacement would mean removing all the preceding tiles as they overlap each other, so the workaround was to use an adhesive to bond the tile down.
This is a thing I’ve wanted to do for years, in 2016 eRice budget shared hosting service reseller simply went off line, leaving me and hundreds of others unable to gain access to our files and offline sites.
Fortunately, a user managed to get in touch with the data centre and a small window of time opened up where we could download our files, hence I ended up with GoDaddy as I knew of them!
GoDaddy have been a reliable host but the costs are rising, especially as Secure websites are the norm, meaning SSL certification is needed at a renewal price of £71.99 per year, excluding the actual cost of hosting and backup resilience, as a hobby site it was becoming unaffordable.
Any move of host is a daunting prospect as I’m not a scripter, but I bit the bullet and set up an account with Hostgator as they provide free SSL certification and their shared hosting package is quite competitive.
As with most web hosters, the longer the term entered into the lower the costs as does the use of discount coupons; the table below compares my hosts based on what I pay as of April 2022:
Per YearCosts
GoDaddy – 2 Year Term
Hostgator – 3 Year Term
Plan
Economy – £86.25
Baby – £38.47
SSL Certificate
£71.99
Included
Backup
10Gb @ £28.65
1Gb @ £21.93 5Gb @ £17.41
Domain Renewal
£23.89
N/A
Domain Privacy
£9.58
£11.41
Transfer
N/A
£5.39
Total
£220.36
£94.61
I will update this table when I know what the Hostgator Domain renewal costs are.
Migration
My first step was to transfer my domain name to HostGator, I did this as my GoDaddy SSL certificate was coming up for renewal and I didn’t want to pay for a renewal, so this was the trigger for the move.
My domain remained pointing to GoDaddys servers until I had transferred all my files, folders and databases.
Main details to note when setting up a database with a new host are:
Database Name (including any wording automatically inserted in front of it)
Database User
Database Password
I had the most trouble with WordPress, I did try a number of migration tools, but my site seemed too big for them to work and I missed the 30 day window for Hostgator to do a free migration, so I did it all using Filezilla, (links below).
I would be telling a fib if I said it went smoothly, it turned into a bit of a nightmare.
The two key issues were:
I copied the WordPress wpconfig.php file and changed the database details for the new host, but I missed the table prefix type setting, this should have been ‘wp’ but it contained a legacy prefix from GoDaddy
I host the WordPress files on my shared server, rather than use a managed host service provided by HostGator. It looked like both instances were working against each other, I called tech support and they disabled the WordPress managed service, and the blog then fired into life.
I also had a 1Tb USB drive to keep downloaded files on and as a transit drive which worked well.
The process was made easier as I had access to both hosts cPanels for creating database backups, filezilla did the main file transfer work as I’m more familiar with that than some of the cPanel features.
The migration was a good opportunity to weed out files and folders that have amassed after 6 years of change, now its over I feel a whole lot better, I have a better understanding of the process than I did before and the site loads a lot quicker than it did before, so I wouldn’t be so hesitant next time 🙂
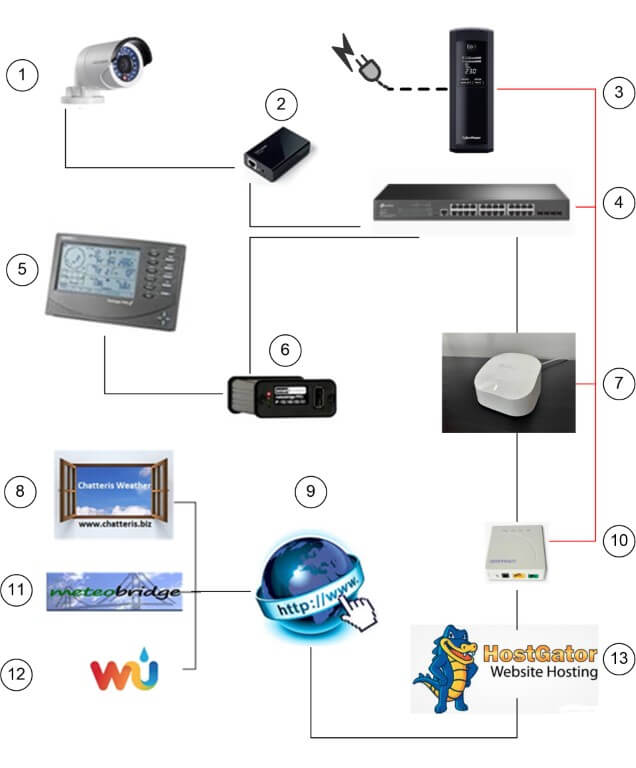
Chatteris Weather uses a high specification Davis Vantage Pro 2 wired weather station, various sensors are connected to the Integrated Sensor Suite, this in turn is connected to the Davis display console. Data is exported continuously from the display console by a data logger which uses a USB to connect to the Meteobridge Pro which was installed in mid December 2016.
The Meteobridge Pro replaced a PC which was running 24/7 in order to keep Weather Display software live and updating to the internet, the Weather Stations hourly power consumption dropped from 250 Watts to just 2 Watts and has paid for itself in energy costs.
The IP Hikvision webcam is powered over ethernet (POE) cable via a POE injection unit, Meteobridge Pro is configured to view the images generated by the webcam, every 5 minutes, the Meteobridge Pro updates my stations image on Weather Underground.
The Meteobridge Pro is also configured to send scheduled data to a wide range of weather site as well as Tweet weather conditions every half hour.
Chatteris Weather uses the Saratoga Template, the displayed Hikvision webcam images is linked back from Weather Underground.
The weather station and all downstream devices are powered via an uninterrupted power supply (UPS), this will run the station independently in the event of a power outage, for approximately 2 Hours before turning off.
Meteobridge Pro is cabled to a TP network switch which is connected to a eero6 router. From January 2022, Fibre to the Premises (FTTP) was installed, (hence the Optical Network Termination), giving a download speed of 75Mbps and upload speed of 20Mbps.
Chatteris Weathers internet service provider is TalkTalk (managed by City Fibre).
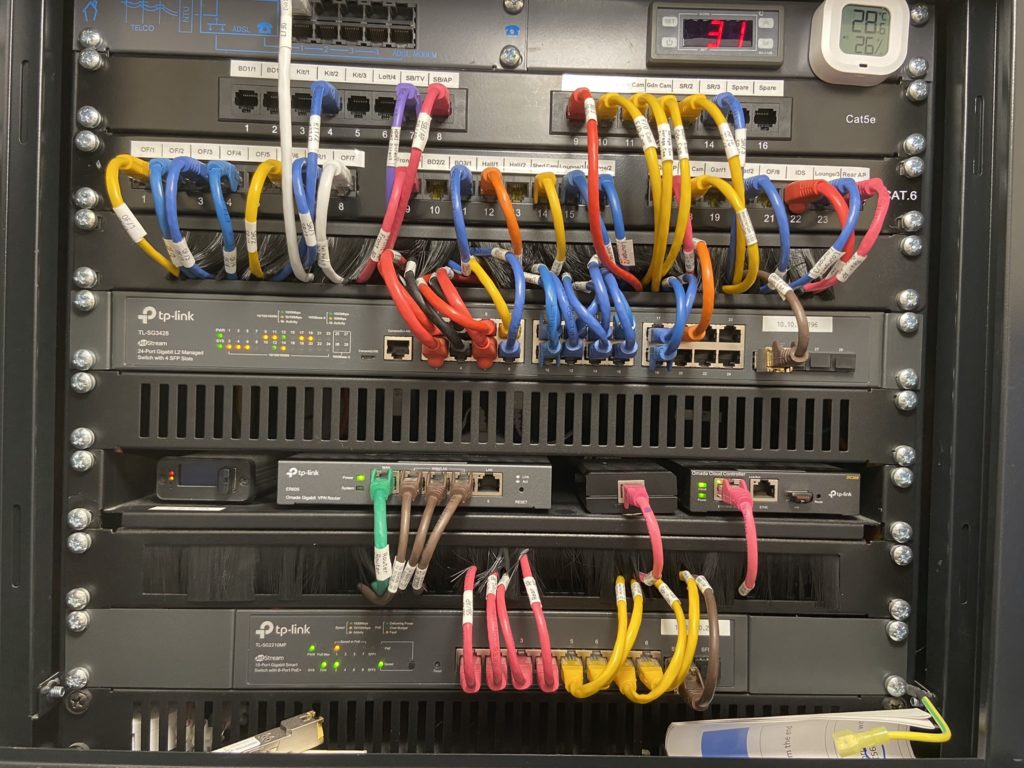
The above wall mounted rack is the central hub for my IT network and weather station hardware.
Project Lightning – Virgin Media Chatteris cabinet location map:
The Pin map shows the position of street cabinets, hovering over each pin will show its location and cabinet number, the see images of the cabinet, click the green circular cross below the map:
GREEN pins are completed VMSD1i Street Cabinets – either L3 or L4 (identifier stenciled on cabinet);
RED pins are not identified Street Cabinets;
PURPLE pins are Main Node locations (VMVH1);
BLUE pins are VMDD3I Double Cabinet;
BLACK pins are Outdoor Fibre Distribution Closure;
Note – The infrastructure is now owned by nexfibre as a wholesaler, the only customer to date being Virgin Media, however, nexfibre are looking to open there network to other service providers….maybe Cityfibre!
This blog is about the roll out of Virgin Media fibre to the home in Chatteris from the civil works through to the delivery of a live service at my house and beyond.
To report insecure or damaged Virgin Media street cabinets: Call 0330 333 0444
26 October 17, Trench tarmacked and construction barriers removed.
5 November 17, I buried 20mm conduit from Toby to house wall and included a draw cord.
26 Nov 18, Cabinet AF0503 made live.
1 Feb 18, Virgin Postcode Checker now shows service available in my street.
4 Feb 18, Ordered VIVID 200 package for installation on Friday 23 Feb 18 between 13:00 – 16:00. Went through to the Virgin Media shop in Peterborough looking for some form of promotion or deal to reduce costs, this didn’t happen, in fact they suggested I could save money ordering in shop as they would waive the installation and F-Secure costs, this was incorrect as the online booking information has these as free, also they wanted £25 up front, £20 activation fee and £5 which would be returned once the service was active, online it is £20 only activation, so I booked online, as an aside, if I had ordered in the shop my statutory rights to cancel is reduced from 14 to 10 days protection which you get when booking online.
11 Feb 18, received two e-mails, the first containing e-sign contract, the other was what to expect on the day of installation.
16 Feb 18, received mobile call from Callum of the Virgin Media installation team wanting to come and install a microduct from the Toby to my house, fit the Omnibox and blow the fibre from the street cabinet to the Omnibox, this is done a week in advance of the engineers on the 23 Feb, I arranged for the following day to meet them as I was 180 miles away! (this part of the process was not known to me and came out of the blue, I assumed it would be a ‘one hit’ visit).
17 Feb 18, James from the installation team rang to cancel as Callums son had a fall and was needed at home, as the install is a two man job I returned his call and rearranged for Monday 19 Feb after 16:00.
19 Feb 18, James & Callum turned up at the appointed time to install the microduct, fibre and Omnibox.
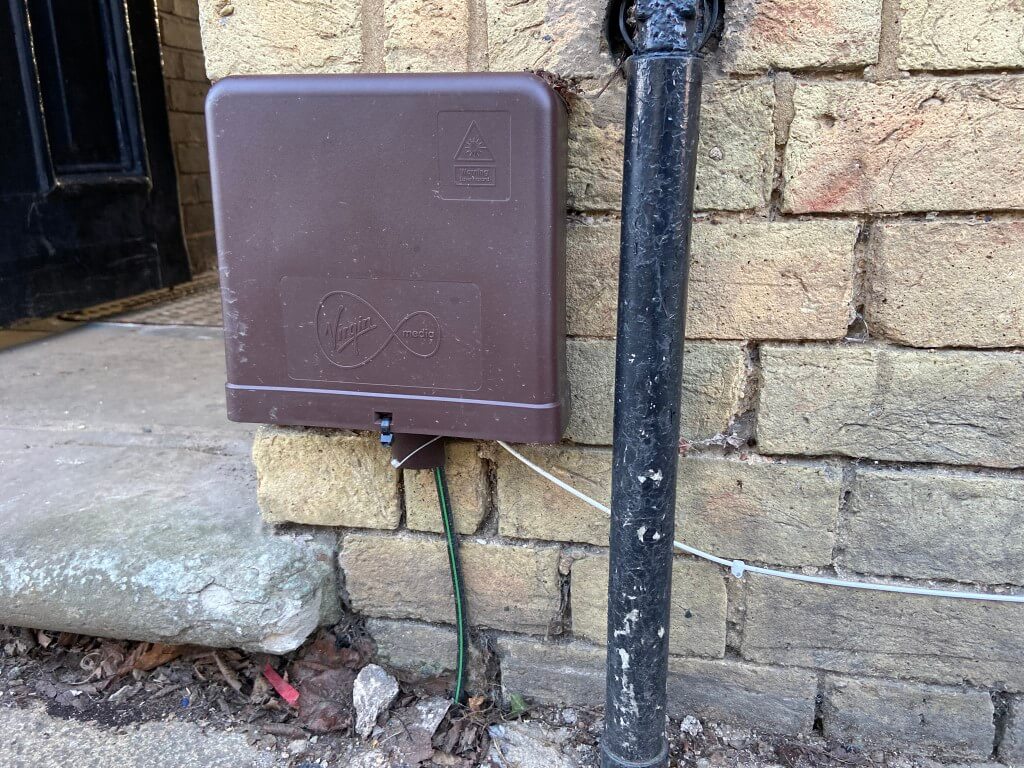
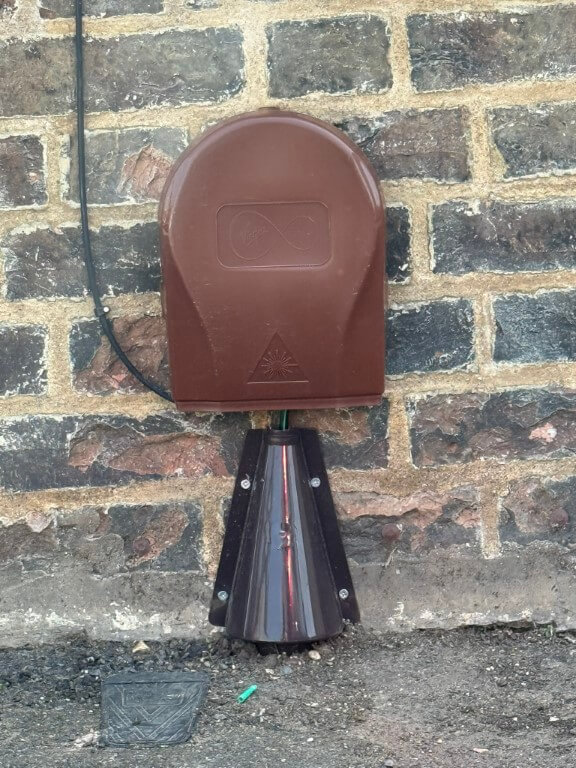
The guys first photographed a laminated sheet showing my address, date and their names next to my open Toby, once this was done they threaded a black microduct pipe from the pavement Toby through the conduit I had previously laid to the house, the brown Omnibox was fixed to the wall with 4 screws and the microduct pipe clipped into place in the Omnibox, at the Toby a coupling was installed transitioning from the green microduct to the black microduct.
Transition coupling, black microduct to house, green microduct to street cabinet.
The distance was measured using a measuring wheel from my Toby to the street cabinet (72.5 m), while the measuring was going on, compressed air was blown down the microduct from the house, this caused the yellow protective cap to be blown off the end of the green microduct in the cabinet, identifying which tube out of many, as coming from my house.
In the cabinet a ‘fibre catcher’ was fitted, at the house end the fibre cassette containing 100m of fibre was fixed on a device which enabled the fibre to be blown into the duct until it was caught by the cabinet catcher.
At the cabinet, the fibre catcher was removed and a protective sleeve was fitted over the fibre and terminated in a connection, this connection was then plugged into a breakout panel in the cabinet.
We were the first in this cabinet.
At the house end, the surplus fibre from the cassette was wrapped within the Omnibox, the house end is pre terminated, once this was done, a reading was taken of light losses (-0.13db) to check they were in an acceptable range, the reading was photographed with the laminated sheet used earlier as proof of service in advance of the technical install scheduled on Friday 23 Feb 18.
Completed Omnibox after first visit ready for the optical media converter and splitter to be fitted.
23 Feb 18, Go Live Day – Engineer Sam arrived between the allotted time of 13:00 to 18:00 to start the installation.
He was quite happy that the hole through the wall into the lounge was already in, as was the dry lining that he could hang the Isolated Power Injector on.
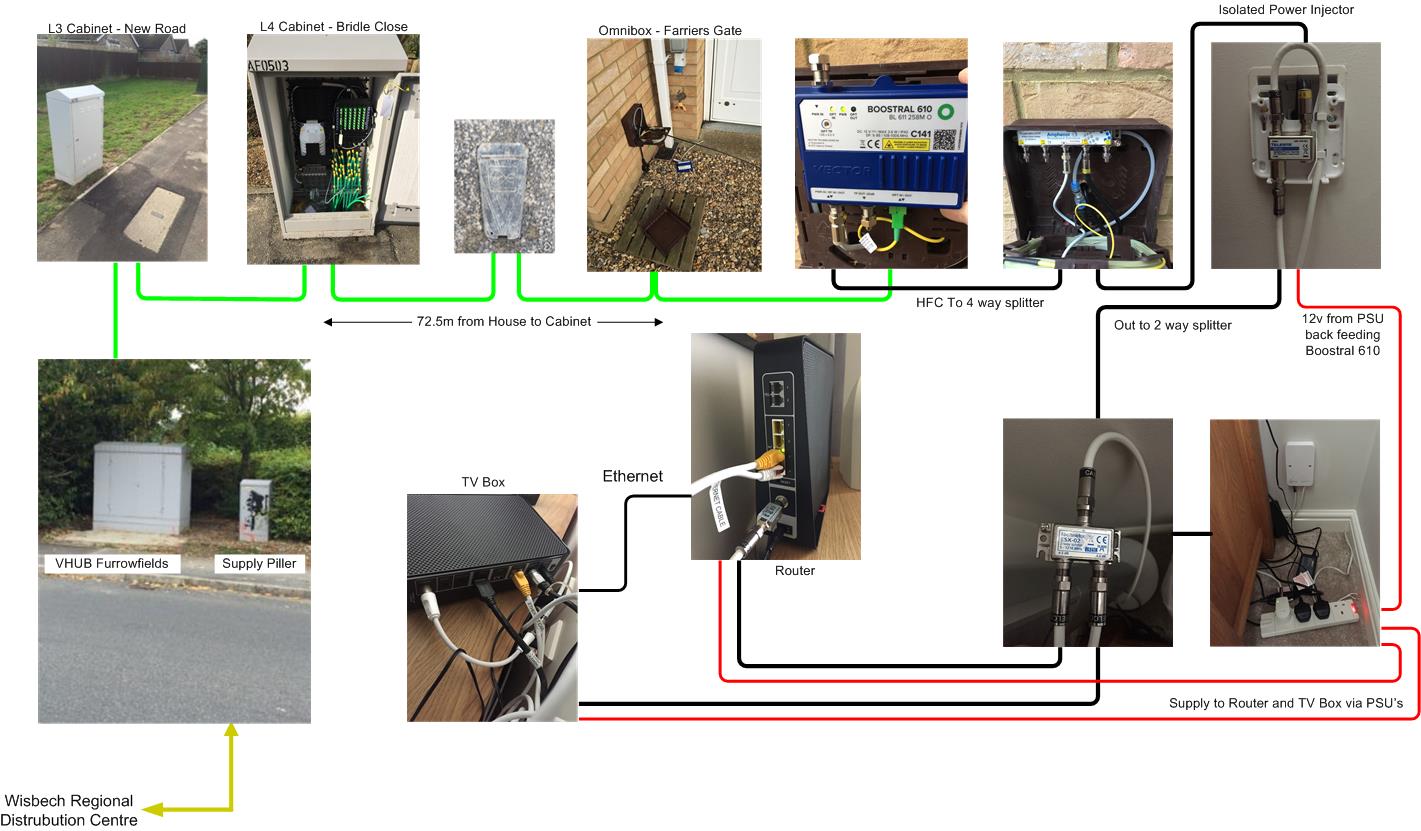
First job was to push a peice of HFC cable though the wall from the Omnibox and put a connector on the end, this was connected to the Isolated Power Injector (IPI) Teleste IP1-G1)), which is mounted within an enclosure on the lounge wall (the screw holes of the enclosure and backplate fit a standard dry lining box), a short length of HFC cable from this goes to a 12v plug in PSU in order to back feed the external optical media converter with power.
The bottom IPI output is connected to a 2 way splitter (Technetix ESX-02), one leg goes to the router (a 3db attenuator was installed to balance the system), the other leg to the TV box.
As the TV box, Router and Optical media converter require power, three 240v sockets are required.
In the Omnibox, the HFC cable was terminated, and plugged into a DC passing port of the 4 way splitter (Amphenol Model ABS104TP), from the splitter this is plugged into the Vector Boostral 610 optical media converters output.
Once the external works was completed, the router and TV box were powered up and an Ethernet cable from the router to TV box was plugged in. The hardware went through three re-boots and software updates and I was good to go.
24 Feb 18, Netflix is suffering lip sync issues when viewed through the VM TV Box, also download speeds vary from 210Mb to 38Mb (wireless tests), it’s early days, so I hopefully this will stabilize soon.
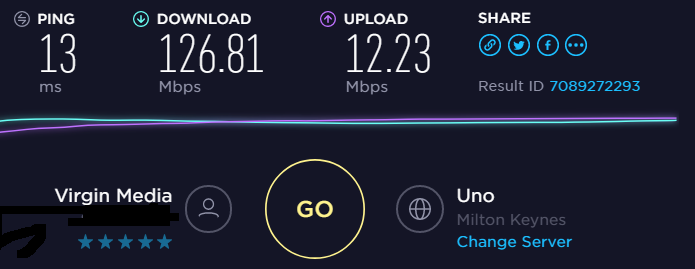
25 Feb 18, Speed test using direct cabled connection to Virgin Media router (200Mb service ordered) :
25 Feb 18 @ 14.11
2 Mar 18, TalkTalk, my existing provider reduced my package ‘Fibre Large’ which is Fibre To The Cabinet’ (FTTC) by £26:25, on knowing I was thinking about leaving for Virgin Media, they did this by moving me to the ‘Faster Fibre Plan’.
I get the same package as before (TV, broadband and phone landline including line rental) for £31.75 per month, the download and upload speeds I’m getting are more than enough for my needs even when all the kids are home battering the broadband, also I keep my landline, Virgin Media have not yet enabled VOIP on the router which was another factor for me.
I called Virgin Media to cancel my arrangement (within the 14 day ‘cooling off’ period), they obviously asked why and I mentioned the main reason was cost and as an aside, that my wireless speeds were faster with TalkTalk rather than Virgin Media.
Perplexed by this, he transferred me to technical in a foreign land and they remotely checked the line and rebooted the router, then asked me to perform a router reset using a paperclip, which I did whilst they were on the phone. They assured me everything was working properly and I did a wireless speedtest and managed 136Mb download.
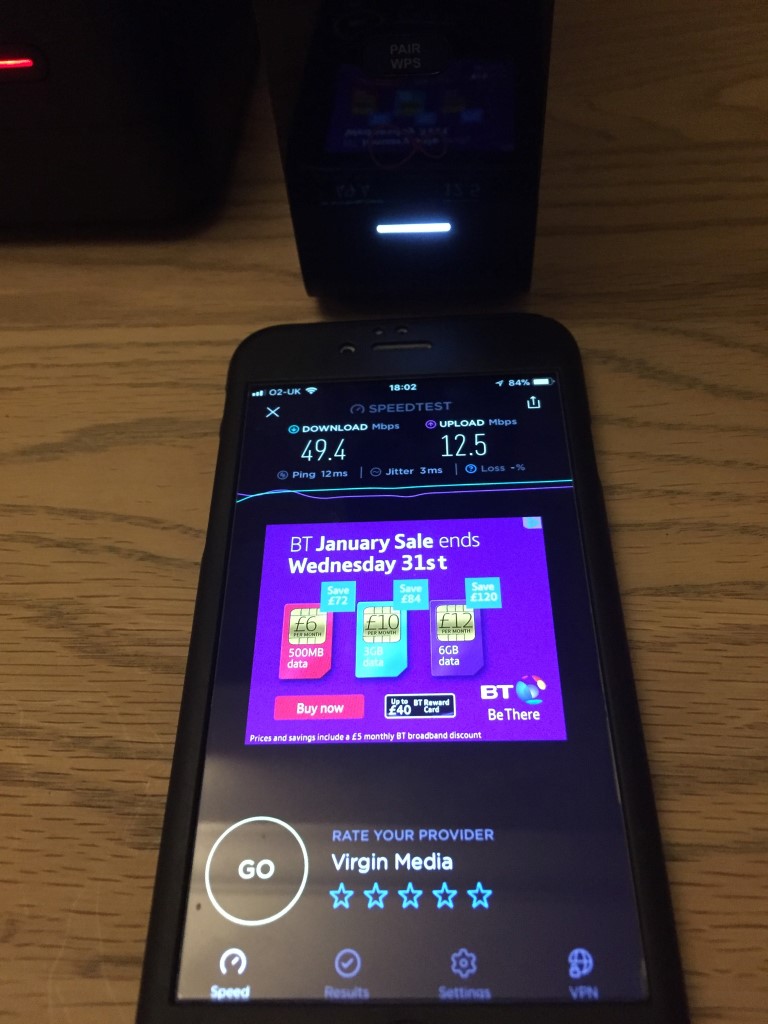
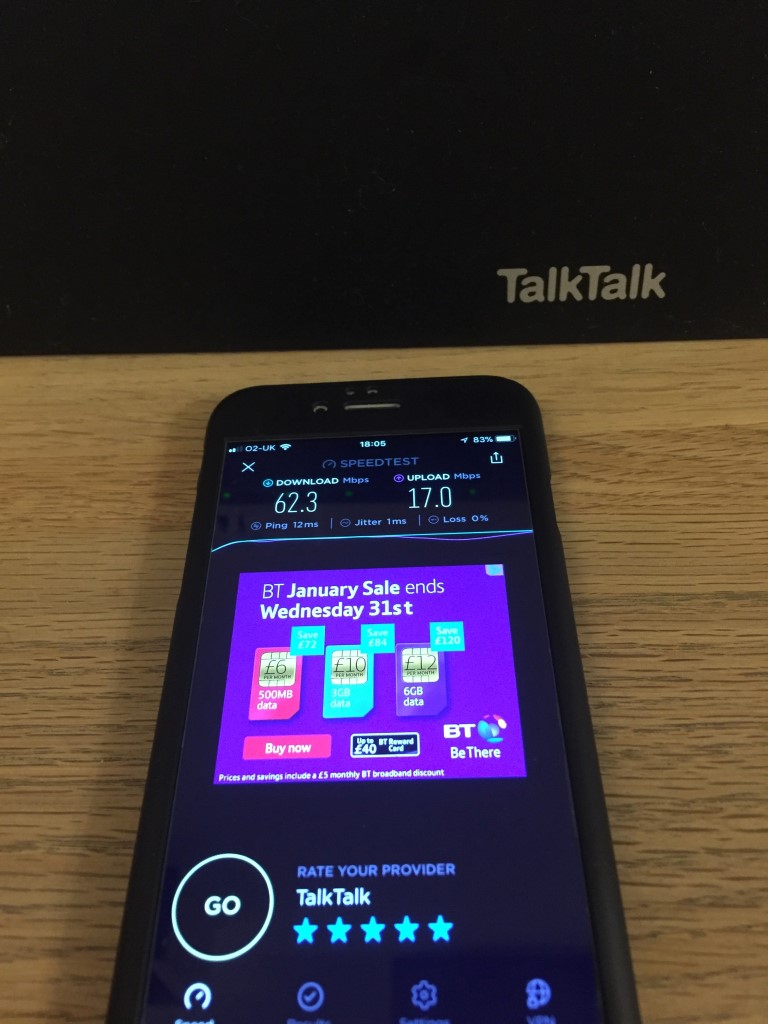
Checking later I took the following images of speed:
Download 49.4Mb, Upload 12.5 Mb from Virgin Media
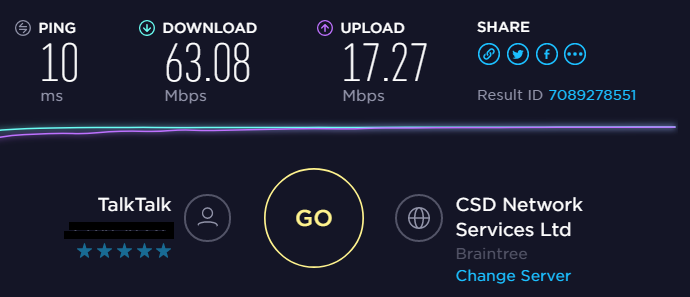
Download 62.3Mb, Upload 17Mb from TalkTalk on 5GHz
The above results used OOKLA Speedtest on an iPhone 6, as the SSID on the Virgin Media router is the same for 2.4GHz and 5GHz I didn’t know which Wi-Fi band I was measuring, I was however, the only device was connected to it.
For balance I ran another TalkTalk test at 2.4GHz, and the readings came out at Download 41.7Mb, Upload 16.8Mb which wasn’t too shabby, especially as 7 wireless devices were connected.
I also ran a directly ethernet connected Virgin Media router test later with a laptop at 20:00hrs 2 March 18, and managed a download speed of 76.17Mb and upload of 10.3Mb, not brilliant for an upto 200Mb service which I was assured was working as it should.
The upshot is that I staying with TalkTalk meaning that I reluctantly terminated my arrangement with Virgin Media effective from 3 March 18.
8 Mar 18, Disconnected my Virgin Media as per the instructions which came in my returns packaging and boxed up the following way as requested:
Router;
TV box;
Remote control;
Two power supplies;
Leads for the above PSU’s;
Splitter and three CATV cables.
This was then taken to my local ‘Click & Collect’ store and it was winging it way back to Virgin Media at nill cost to me.
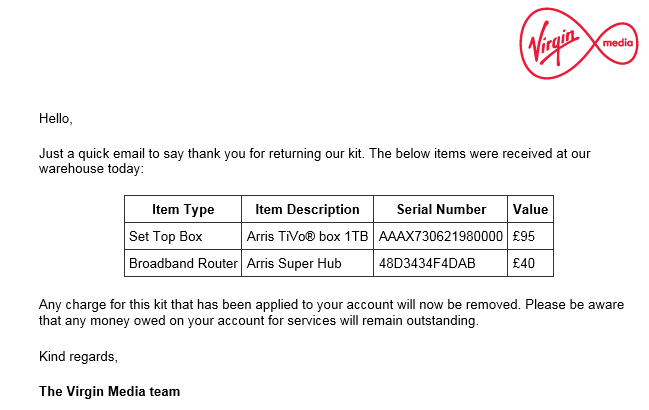
14 Mar 18, Text from VM to say the kit has been received and any charge for kit that might have been applied to my account will be credited, also received an e-mail:
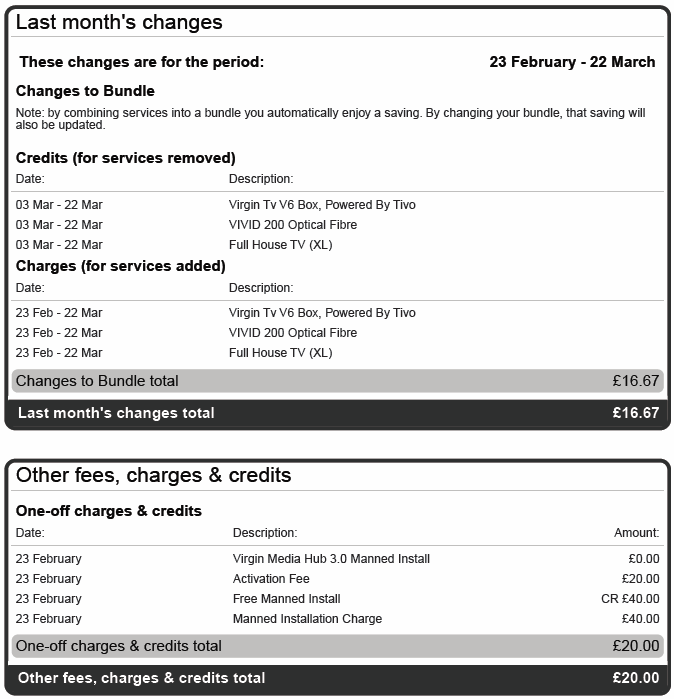
21 Mar 18, Received my first and last Virgin Media bill, this covers the week I had the service and the activation charge, total payable – £36.67.
30 Mar 18, Checking my bank statements and no money has been taken by Virgin Media so I cancelled the Direct Debit to them.
1 Apr 18, Received e-mail from Virgin Media thanking me for joining them and asking me to complete a short survey which I did even though I’m no longer a customer.
4 Apr 18, Virgin Media activity showed on my bank statement ( – £36.76 then +£36.67), contacted VM and they said I do not have to pay anything as I cancelled within 14 days.
11 Apr 18, Text from Virgin Media to call 0800 052 2630 in order to clear my outstanding balance, talked to Kirsten and she saw the error that cancelling within 14 days shouldn’t have triggered a bill, so she added a small credit to my account in order to cancel the debt on the system.
25 May 18, Received letter from Virgin regarding GDPR.
Hybrid Fibre-Coaxial cable and below that a fibre optic connector
Phased civils started in June 2017 and by 4 January 2018 first subscriber activated.
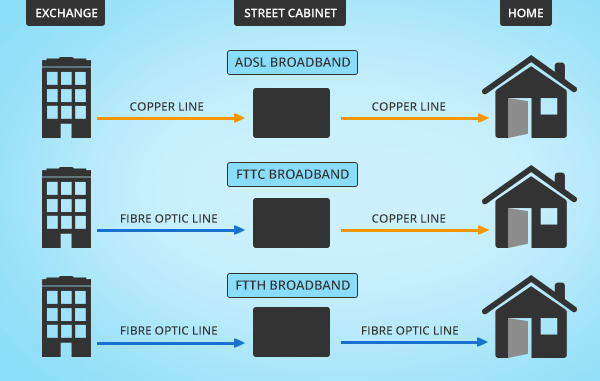
I currently use TalkTalk Fibre to the Cabinet, this the same as BT Infinity, SKY, Plusnet etc, this means a fibre optic cable is brought from the local exchange to a street cabinet, from this the existing telephone copper cable is used for broadband and phone, depending how close you are to the cabinet will determine how fast your broadband is, in may case, I get a maximum speed of 62.79Mbps download, 17.34Mbps Upload and a Ping time of 17.34ms which is probably the best I can get (using Speedtest 15/11/17 @ 18:00).
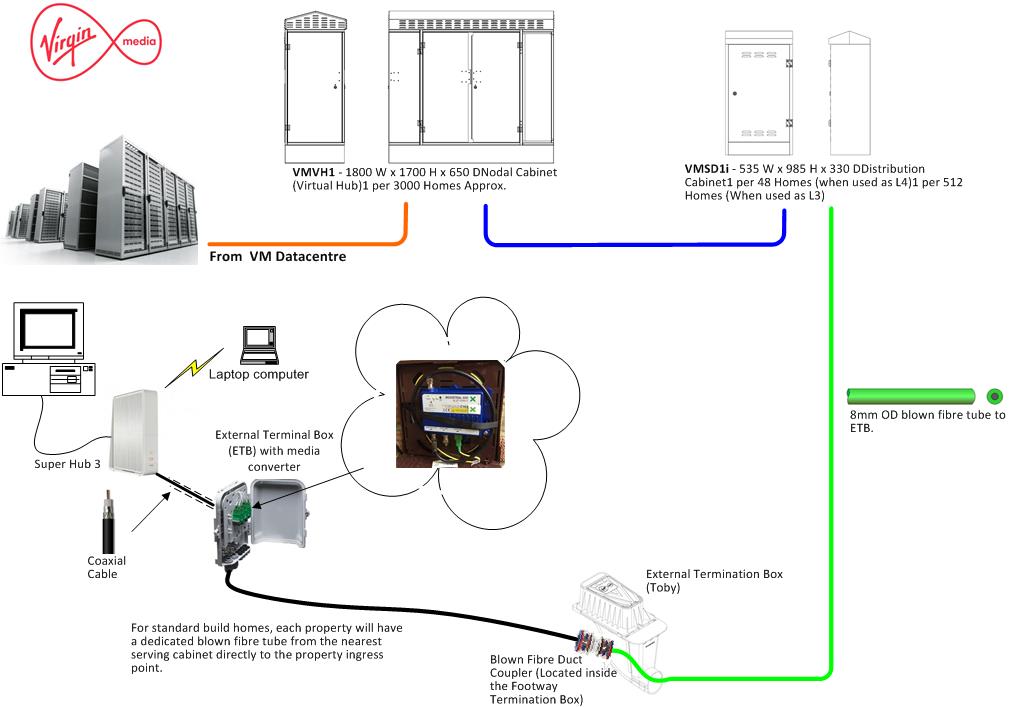
Diagram showing how Fibre To The Home (FTTH) is just that.
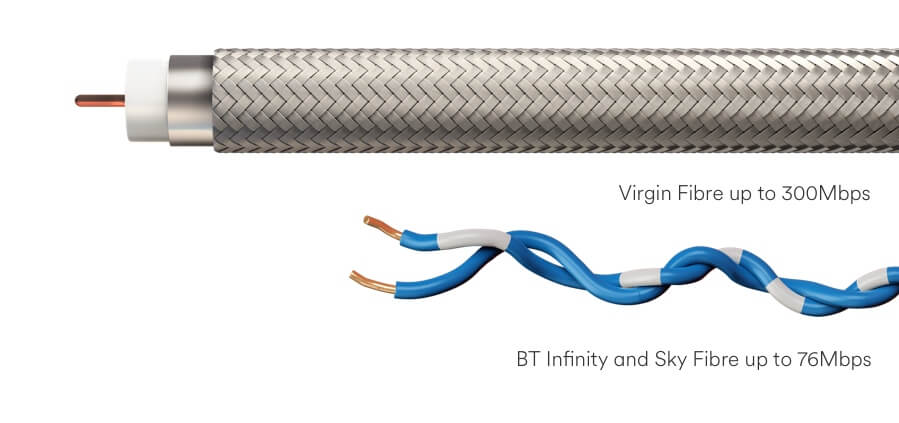
I was delighted when I saw that the Virgin Media cable enabling works was scheduled for installation via Roadworks.org, bringing up to 300Mb speeds to Chatteris, this will give people an option, rather than be tied to telephone line provided services, so I thought I’d start this blog.
This speed test was done on the 25 Feb 18 @ 14.14 by directly connecting a cable to the TalkTalk router to compare FTTC with Virgin Media FTTH:
Not to shabby performance for over copper wires.
Infrastructure Process
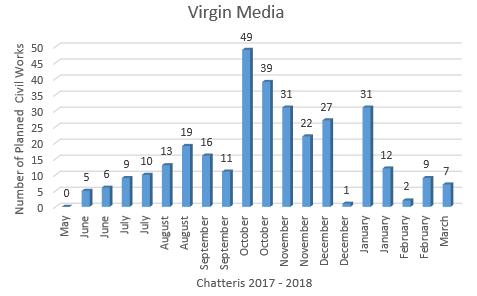
The infrastructure in my area was due to start on 4 August 17, expecting to last until the 14 August and I registered my interest in advance using Cable My Street.
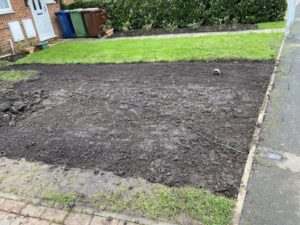
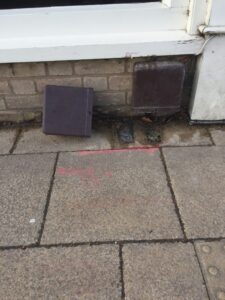
My roads infrastructure work started on the 23 October 18 and was carried out very swiftly and with minimal mess considering the civil work required, the works was undertaken during school holidays to minimise any disruption, the crew were respectful of any request to get on and off the drive, also in my case I wanted the ‘Toby’ to be in a particular position, this wasn’t a problem and on the pictures below you can see the original point marking has been crossed out, and the new position marked as a red box.
VM installing my Toby
Time lapse video of Virgin Media installing FTTH infrastructure.
Details on how the Virgin Media infrastructure is installed (for developers but a great resource) is HERE (large file) and a general guide used for another town scheme is HERE.
The system we are getting from Virgin uses RF over Glass, with the infrastructure being installed by John Henry Group. This comprises of a fibre optic cable laid in a trench which is blown through a microduct tube from the nearest cabinet to the home after your order is placed.
I’ve included a YouTube video by EJC to show hows its done when the cameras are rolling.
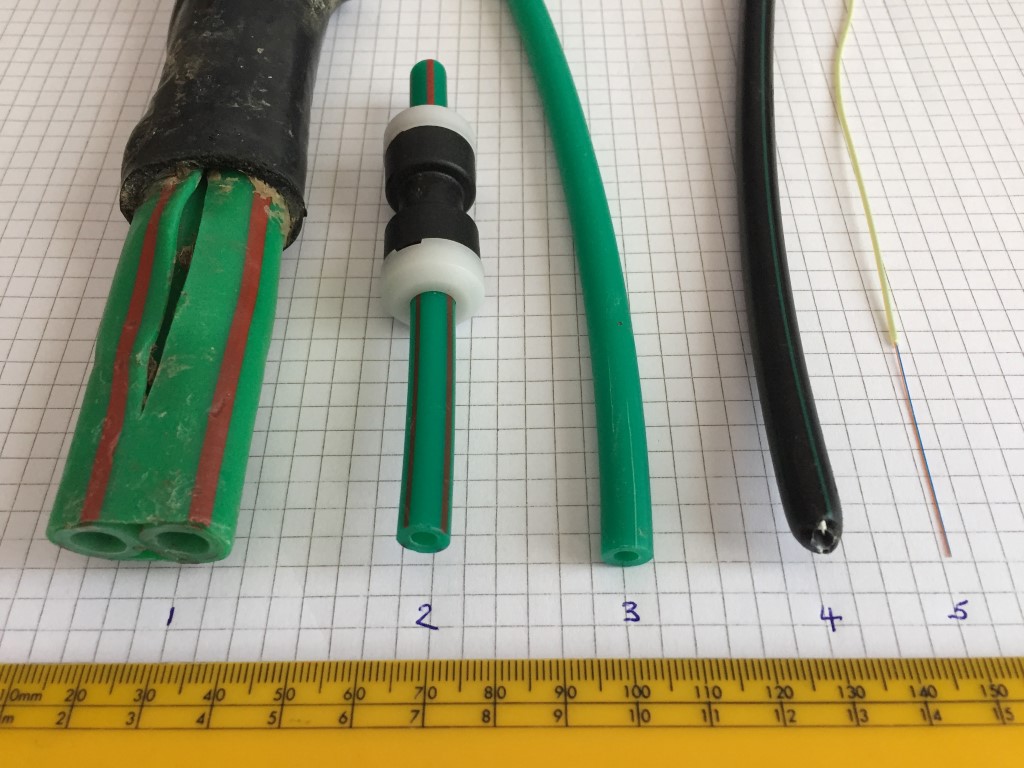
Microbore tube showing fibre optic cable
The wrapped Red and Green double tube is installed from the VMVH1 hub cabinets to the Level 3 (L3) street cabinets via solid ducts. Each tube has an Outside Diameter (OD) is 12mm one tube is used to transport 24 core fibre optic cable, the other bore is spare.
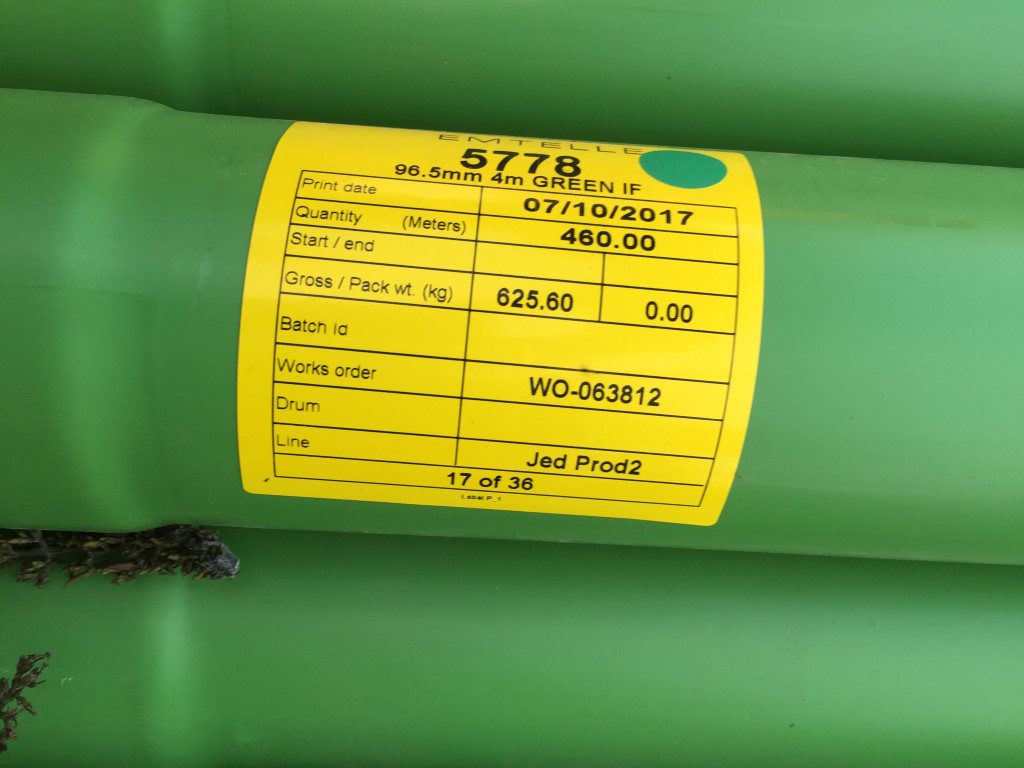
Duct for transporting double Green/Red stripped microduct.
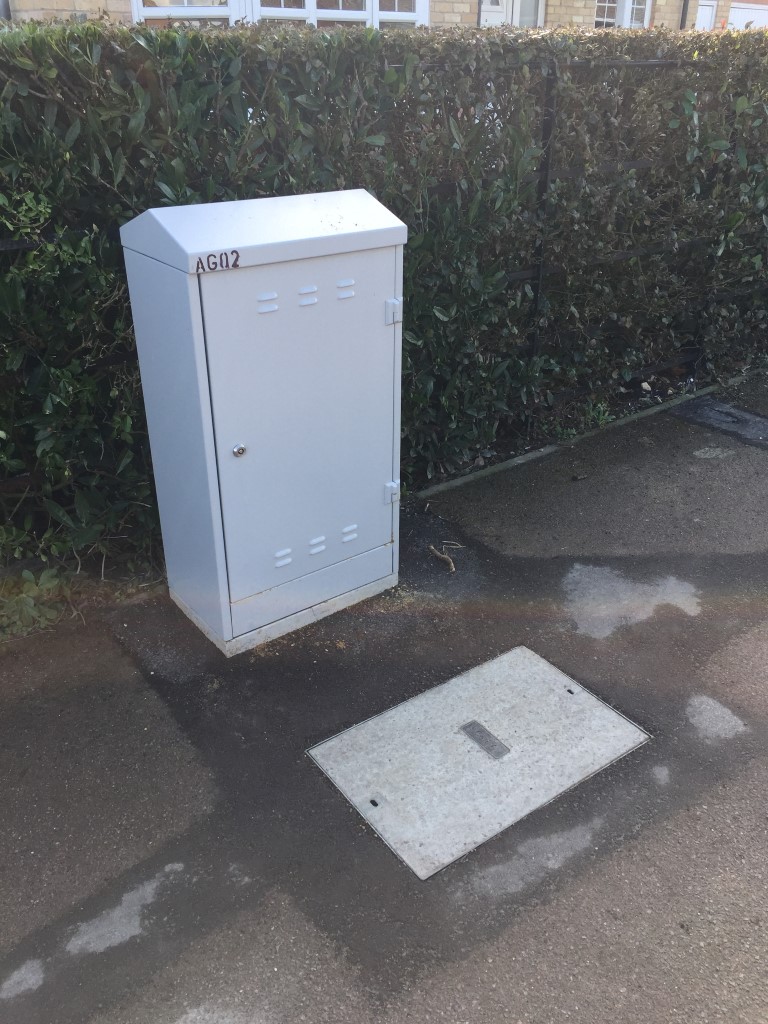
2. The single Red and Green has an OD of 8mm and carries 12 core fibre optic cable from the L3 cabinet to the Level 4 (L4) distribution board. The L3 cabinets are identified by having only two letter and two numbers stenciled on them.
Level 3 cabinet in St Martins Road
3. The Green microbore is 8mm OD and is ran from the L4 cabinet to each ‘Toby’ outside the property.
4. Black microbore is the same dimensions as the Green microbore and is used from the Toby at the pavement to the house Omnibox.
5. 1.1mm diameter single mode fibre optical cable containing two fibres, I stripped the fibre back in the above picture, from the factory the fibre is pre-terminated.
Connection method used in the street cabinet after the fibre has been blown in.
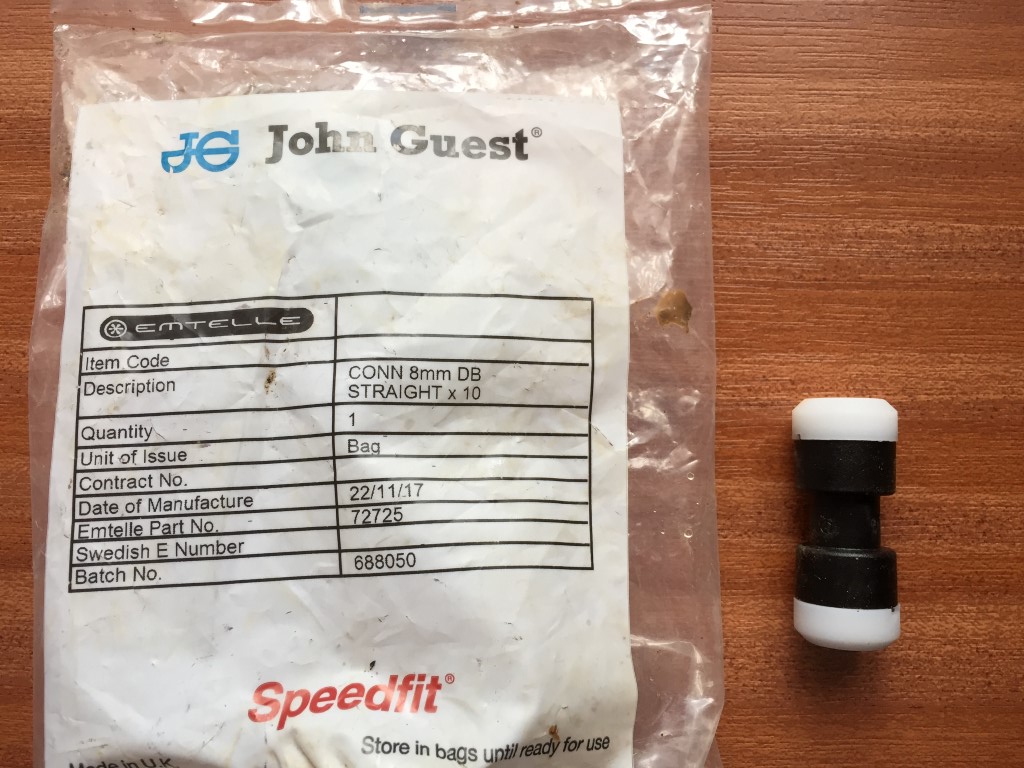
8mm straight couplings used to connect microducts.
The image below shows the microduct couplings in use within a pavement trench. Top picture taken at the junction of Dock Road and Bridges Street, bottom picture taken by the library shows a larger 12mm OD striped microduct.
Larger size microduct and coupling, (possibly for a multicore fibre, rather than a single fibre?).
The marker tape which is put over the buried Virgin Media infrastructure and serves two purposes, the first is to allow detection using a Cable Avoidance Tool (CAT), the marker tape has two metal wires bonded to it, so the route of the tape can be found and traced from the surface without excavation, the second purpose is to warn that you are about to unearth or hit cables should you be digging.
Nice swerve around 🙂
VMSDI Level 4 Open Cabinet Picture – undergoing second-fix.
VMSD1i – 535 W x 985 H x 330 D Distribution Cabinet 1 per 48 Homes (when used as L4)1 per 512 Homes (When used as L3) – Cabinet found locked in the open position 5/11/17
Click Map Pin on the corner of Ash Grove and High Street for more images of cabinet AF0113.
Great guy second fixing AG01 which is a Level 3 cabinet.
One of the towns two VMVH1 Nodal Cabinets
Newly installed VMVH1 – 1800 W x 1700 H x 650 D Nodal Cabinet (Virtual Hub)1 per 3000 Homes Approx. The yellow temporary cover was used to protect the hole before the VMVH1 cabinet was installed.
Inside VMVH1 supply pillar
Permission asked of road workers to take pictures, cabinet unlocked and open 18 Nov 17
Within the distribution board above is a smart RCD from Tii-Tech which is rather clever as it performs regular operational self tests to avoid the need for a person to visit the cabinet to do them.
End of Line Termination Boxes
From the street termination box, a microduct coupling is used to extend the duct from the street cabinet to your outside wall, the fibre once blown through is connected to a media converter within the externally mounted Omnibox
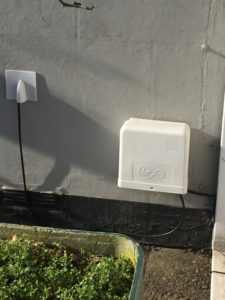
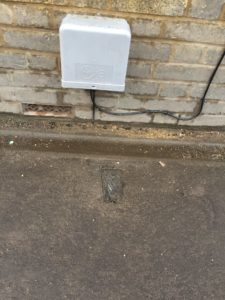
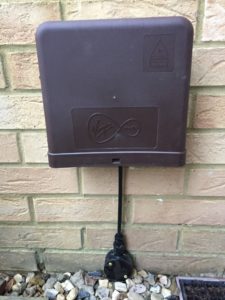
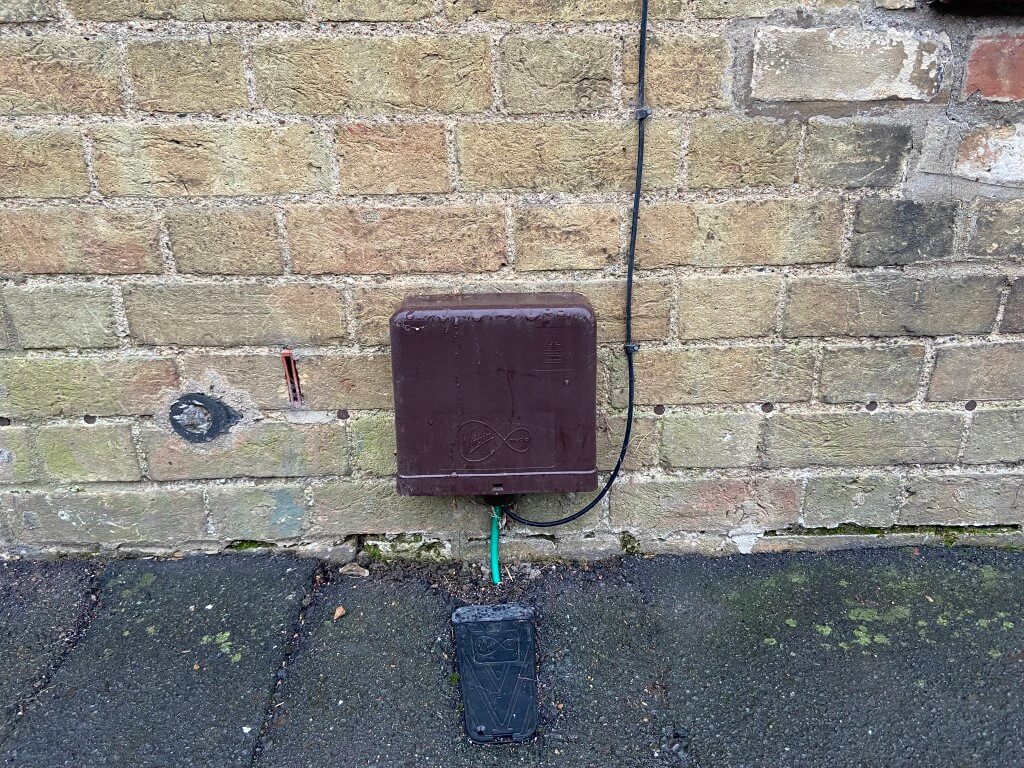
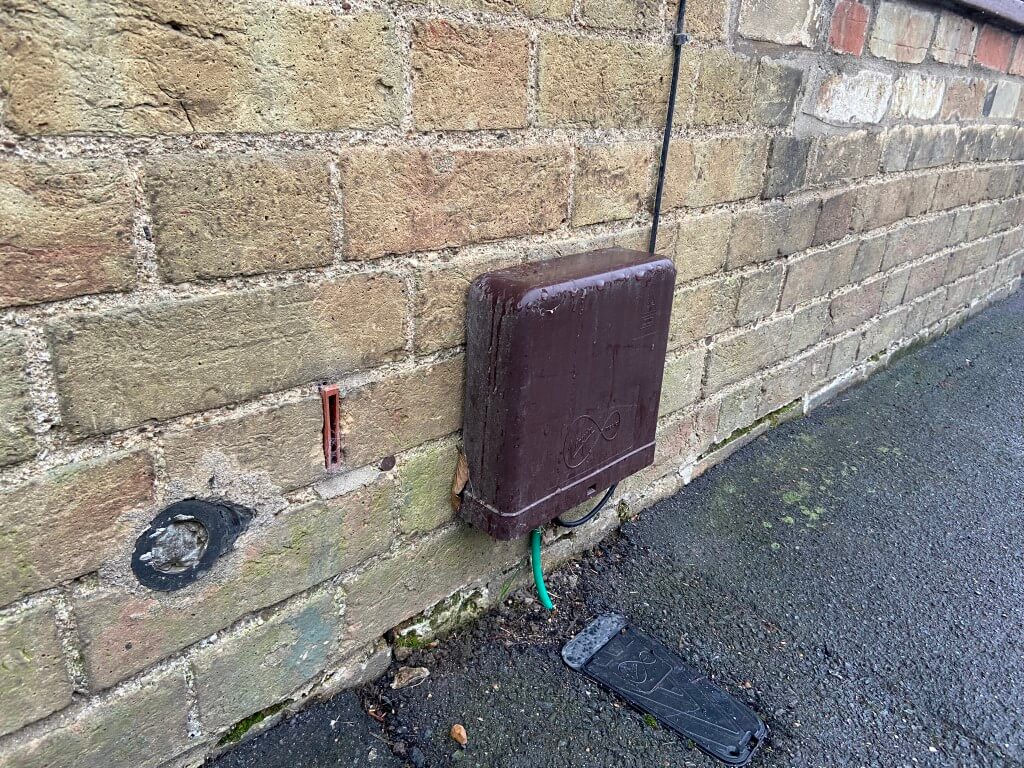
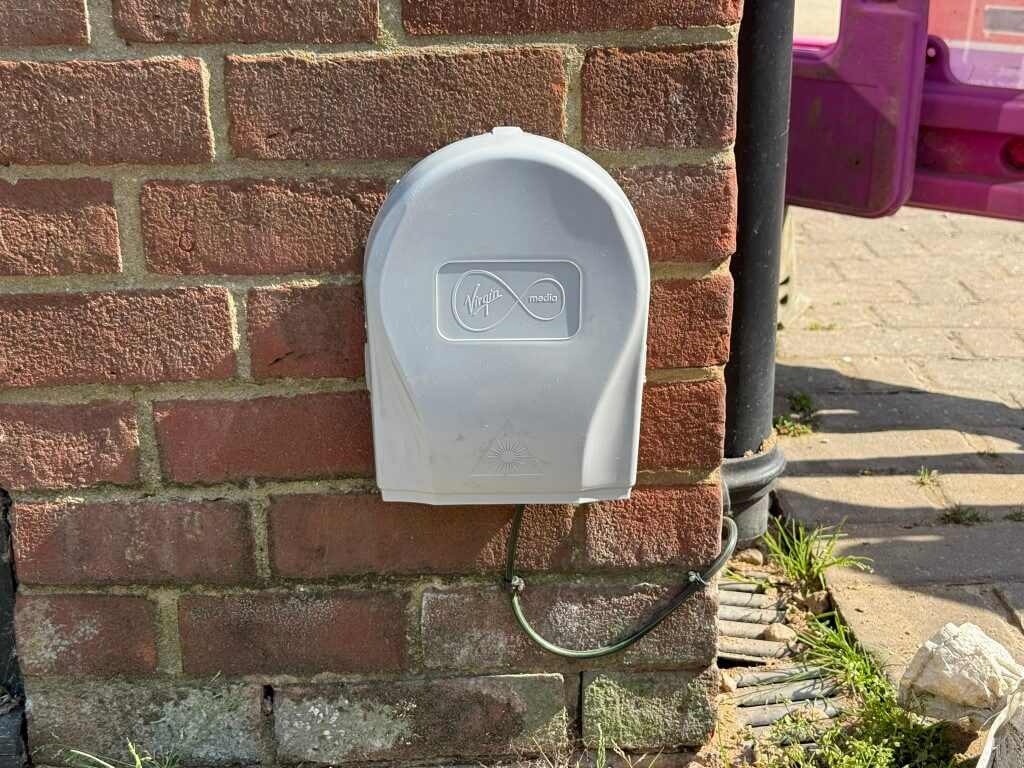
Showing the three different colours of Onmibox used in Chatteris, the last one is mine.
The media converter changes the fibres optical pulses of light into electrical data which a coaxial cable then takes to the Super Hub 3 Router and connectivity to the internet.
Cassette of single mode fibre, pre-terminated, up to 500m in increments of 25m are used dedpending on the distance from home to cabinet (25m, 50m, 75m, 100m, 125m, 150,m 300m & 500m).
This configuration will give data transfer speeds of up to 300Mbps, a basic outline of how it connects together is below, the VM Datacentre is in Wisbech and Chatteris is fed by a direct fiber from their:
Data centre to house
In advance of Virgin installing the infrastructure in the street I have put a conduit through the wall into a dry lining box with a blank please and installed a length of 20mm flexible conduit from the pavement Toby to the house wall, bit premature, but hey ho 🙂
Links to latest and archived Planning Permissions for Chatteris containing Virgin Media infrastructure works (remedial works have been excluded) :
Remedial works undertaken to the ducting infrastructure, pavement trenching made good and raised Toby’s lowered.
Update -11 Jan 2021
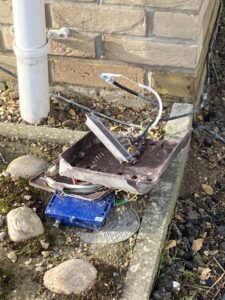
Damage to kit and check out how deep that fiber is as it crosses the lawn, so easy to damage!
The depth of the fiber pipe is about 40mm, so easy to damage if doing lawn maintenance!
Unfortunately the Omnibox is easily damaged/abused.
Update 1 July 2021
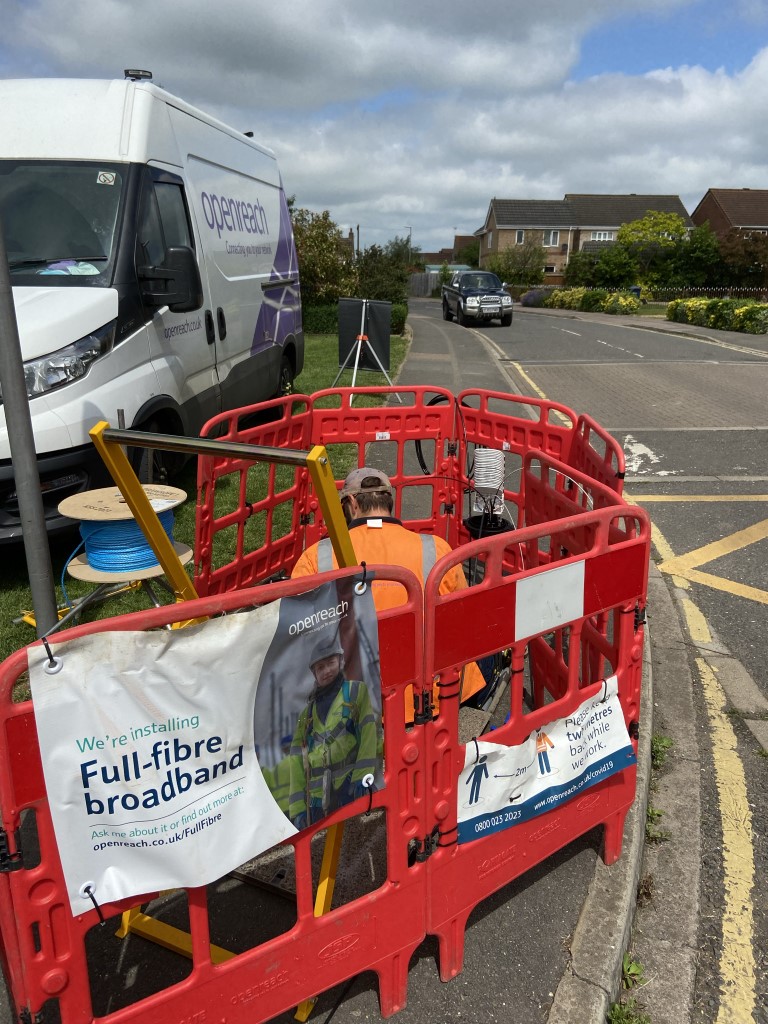
Openreach are installing the infrastructure for Ultra Fast Broadband, Virgin no longer has the monopoly on decent speeds which can only be good for the consumer.
How things change since 2018 when Virgin Media went live in Chatteris, the choice of Fibre to the Premises Ultrafast broadband Internet Service Providers is now a lot larger using Openreach fibre infrstructure.
The new kid on the block, (2023), is Netomnia with there own dedicated infrastructure and competitive pricing is displacing existing Virgin Media customers:
Who knows what’s next?
Update 2024 – Nexfibre
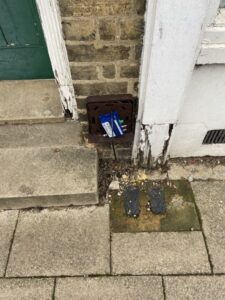
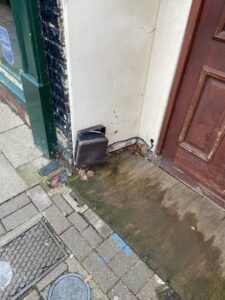
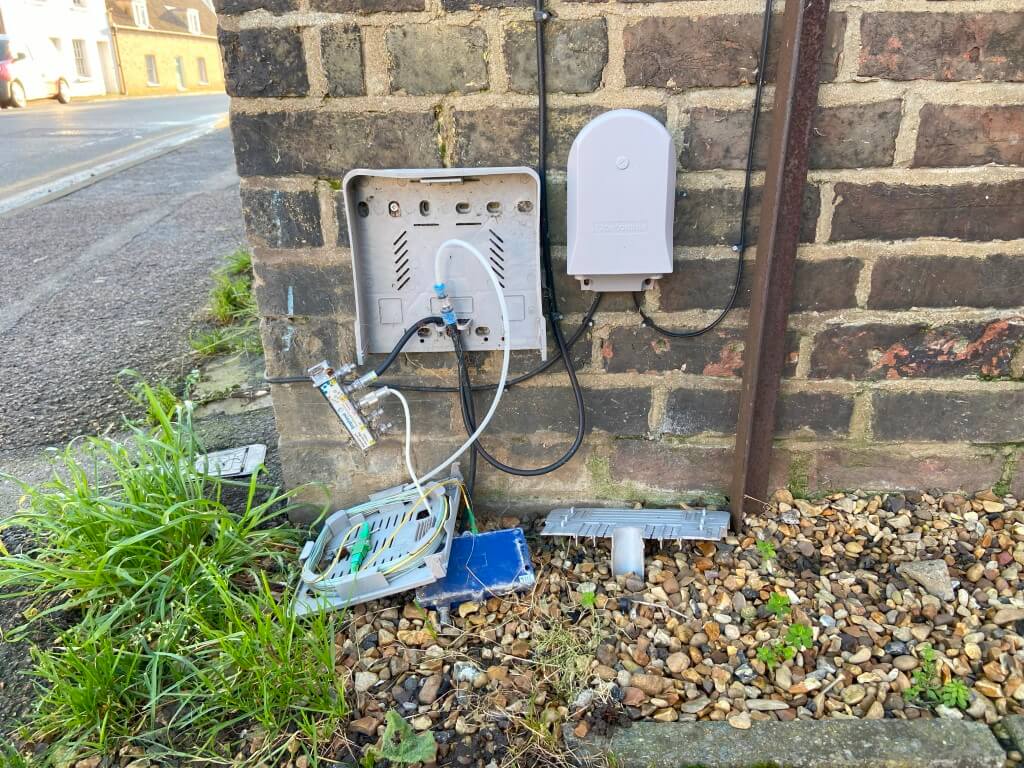
Virgin Media O2 are modifying their home network connection by removing the co-ax cable element and media converter active component, (blue box in the above picture), for fiber directly into the house. Due to the removal of the media converter, the external box can be a lower profile design.
The modification will now enable comparable performance with other internet providers.
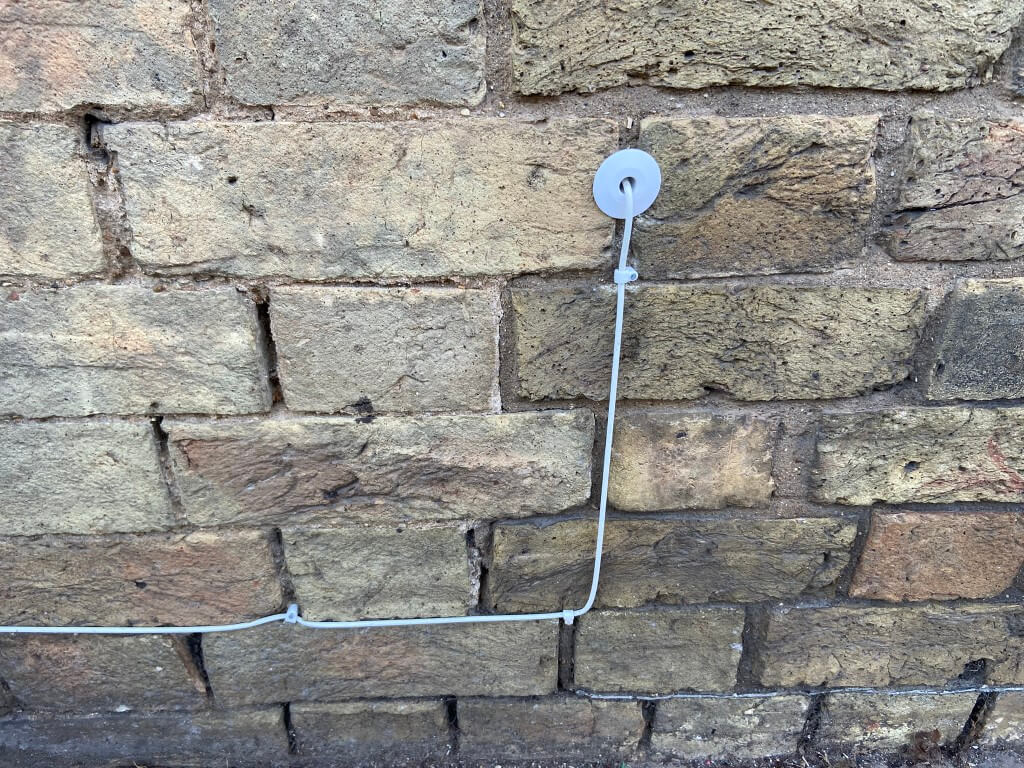
One thing I did notice on my walkabouts is the installer appears to have removed the outer UV protective fibre sheath and the cable clipping looks to have bend the fibre outside its minimum radius on this installation.
Not sure if the white inner is UV stabilized, but I thought it an odd thing to do and generally looks a Friday job.
16 June 2025
Spotted these new style external customer splice points, quite funky.
I have registered the CCTV and weather capture cameras with the Information Commissioners Office, therefore I have made a minor amendment to the Privacy Policy to reflect this.
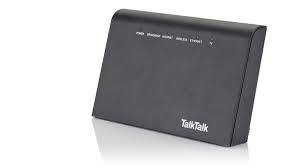
I have recently upgraded my Broadband package and this came with a HG633 router, blog on this is here: Router Upgrade, a day or so after installation Apple updated my daughters iPhone 6 after this update the phone kept dropping in and out of WiFi connectivity.
As the router was new and my Samsung Galaxy worked fine, as did the i tablet mini, so it pointed to her phone.
Cutting a long story short including swapping the phone for a new one, the problem seems to stem from the fact that the HG633 has two WiFi frequencies available (5GHz and 2.4GHz), both being ON by default and sharing the same SSID, this makes the iPhone 6 very unhappy.
The problem of frequent disconnects and reconnects was solved by entering the router setup and renaming the WiFi SSID’s so that each frequency had a unique identification, based on the signal strength is the frequency you ‘pair’ with, this has cured the problem.
Hope this helps bring peace and harmony back into the homestead.
Apple update (Feb 16) causes frequent WiFi connection issues with HG633.
I have had Fibre to the Home for a while at 38Mb download speeds, Talktalk my ISP offered 76Mb download speeds for a small increase in costs, the engineer called today (27 Jan 16) to check my actual speeds which were well below that quoted and installed a new HG633 router.
The problem of reduced speed performance is Openreach’s as its their infrastructure, so I’ll have to wait and see, the current download speed is 56Mb so still not too shabby for here.
Manuals for the Huawei HG 533 can be found here, the actual HG633 manual I haven’t managed to track down yet.
At the same time of the Broadband upgrade, I decided to increase the RAM in my Weather PC from 8Gb to 32Gb as it was regularly running at 7Gb used, the PC is a Dell Precision T490 and uses Server RAM modules which cost a total of £60 from ebay.
General tweaking continues, added new links in the ‘Community Interest’ page accessible from the main home page.
On the main home page I have also added a link to Chatteris Town Trail which is full of facts about the town.
A blog about stuff that interests me or I have done.
We use cookies on our website to give you the most relevant experience by remembering your preferences and repeat visits. By clicking “Accept All”, you consent to the use of ALL the cookies. However, you may visit "Cookie Settings" to provide a controlled consent.
This website uses cookies to improve your experience while you navigate through the website. Out of these, the cookies that are categorized as necessary are stored on your browser as they are essential for the working of basic functionalities of the website. We also use third-party cookies that help us analyze and understand how you use this website. These cookies will be stored in your browser only with your consent. You also have the option to opt-out of these cookies. But opting out of some of these cookies may affect your browsing experience.
Necessary cookies are absolutely essential for the website to function properly. These cookies ensure basic functionalities and security features of the website, anonymously.
Cookie
Duration
Description
_GRECAPTCHA
5 months 27 days
This cookie is set by the Google recaptcha service to identify bots to protect the website against malicious spam attacks.
cookielawinfo-checkbox-advertisement
1 year
Set by the GDPR Cookie Consent plugin, this cookie is used to record the user consent for the cookies in the "Advertisement" category .
cookielawinfo-checkbox-analytics
11 months
This cookie is set by GDPR Cookie Consent plugin. The cookie is used to store the user consent for the cookies in the category "Analytics".
cookielawinfo-checkbox-functional
11 months
The cookie is set by GDPR cookie consent to record the user consent for the cookies in the category "Functional".
cookielawinfo-checkbox-necessary
11 months
This cookie is set by GDPR Cookie Consent plugin. The cookies is used to store the user consent for the cookies in the category "Necessary".
cookielawinfo-checkbox-others
11 months
This cookie is set by GDPR Cookie Consent plugin. The cookie is used to store the user consent for the cookies in the category "Other.
cookielawinfo-checkbox-performance
11 months
This cookie is set by GDPR Cookie Consent plugin. The cookie is used to store the user consent for the cookies in the category "Performance".
CookieLawInfoConsent
1 year
Records the default button state of the corresponding category & the status of CCPA. It works only in coordination with the primary cookie.
PHPSESSID
session
This cookie is native to PHP applications. The cookie is used to store and identify a users' unique session ID for the purpose of managing user session on the website. The cookie is a session cookies and is deleted when all the browser windows are closed.
viewed_cookie_policy
11 months
The cookie is set by the GDPR Cookie Consent plugin and is used to store whether or not user has consented to the use of cookies. It does not store any personal data.
Functional cookies help to perform certain functionalities like sharing the content of the website on social media platforms, collect feedbacks, and other third-party features.
Performance cookies are used to understand and analyze the key performance indexes of the website which helps in delivering a better user experience for the visitors.
Analytical cookies are used to understand how visitors interact with the website. These cookies help provide information on metrics the number of visitors, bounce rate, traffic source, etc.
Cookie
Duration
Description
_ga
2 years
The _ga cookie, installed by Google Analytics, calculates visitor, session and campaign data and also keeps track of site usage for the site's analytics report. The cookie stores information anonymously and assigns a randomly generated number to recognize unique visitors.
_ga_92TJCVGJP2
2 years
This cookie is installed by Google Analytics.
_gat_gtag_UA_48800884_1
1 minute
Set by Google to distinguish users.
_gid
1 day
Installed by Google Analytics, _gid cookie stores information on how visitors use a website, while also creating an analytics report of the website's performance. Some of the data that are collected include the number of visitors, their source, and the pages they visit anonymously.
CONSENT
2 years
YouTube sets this cookie via embedded youtube-videos and registers anonymous statistical data.
is_unique
5 years
StatCounter sets this cookie to determine whether a user is a first-time or a returning visitor and to estimate the accumulated unique visits per site.
is_visitor_unique
2 years
StatCounter sets this cookie to determine whether a user is a first-time or a returning visitor.
sc_is_visitor_unique
2 years
StatCounter sets this cookie to determine whether a user is a first-time or a returning visitor.
Advertisement cookies are used to provide visitors with relevant ads and marketing campaigns. These cookies track visitors across websites and collect information to provide customized ads.
Cookie
Duration
Description
NID
6 months
NID cookie, set by Google, is used for advertising purposes; to limit the number of times the user sees an ad, to mute unwanted ads, and to measure the effectiveness of ads.
VISITOR_INFO1_LIVE
past
A cookie set by YouTube to measure bandwidth that determines whether the user gets the new or old player interface.
YSC
session
YSC cookie is set by Youtube and is used to track the views of embedded videos on Youtube pages.
yt-remote-connected-devices
never
YouTube sets this cookie to store the video preferences of the user using embedded YouTube video.
yt-remote-device-id
never
YouTube sets this cookie to store the video preferences of the user using embedded YouTube video.
yt.innertube::nextId
never
This cookie, set by YouTube, registers a unique ID to store data on what videos from YouTube the user has seen.
yt.innertube::requests
never
This cookie, set by YouTube, registers a unique ID to store data on what videos from YouTube the user has seen.