M0HTA – Chatteris, Cambridgeshire
CQ Zone – 14
ITU Zone – 27
WAB Square -TL38
IOTA -EU-005
QRA Locator – JO 02 AK
Latitude: 52° 27′ 22″ N (deg min sec), 52.4560° (decimal)
Longitude: 00° 03′ 26″ E (deg min sec), 0.05746° (decimal)
Elevation: 5 Metres (17 Feet) Above Mean Sea Level (AMSL)
Informative Links
- Click for – Radio Related Links
- Click for – Radio Blog
- Click for – QRZ
- Click for – VFO Intermediate Project
Latest Update – 1 March 2022
Thought it was about time to do a quick update on my shack setup, since the original blog I have retired from work and finally brushed off the dust and decided to have another play on the radio, specifically data modes.
The hardest part was getting the motivation to take what I had apart in order to give the room a refreshing coat of paint, once the decision was made, all the kit was put in plastic storage containers and moved out of the way so the decorating could begin, this was a bit like ‘Tetris’, moving bits, painting behind them, then moving back to make room elsewhere to do the same.
Finally the painting was completed and it was time to construct a radio station, I decided that a more minimal approach was required, rather than a setup like a church organ, surrounded on multiple levels with kit 🙂
This is how it ended up:
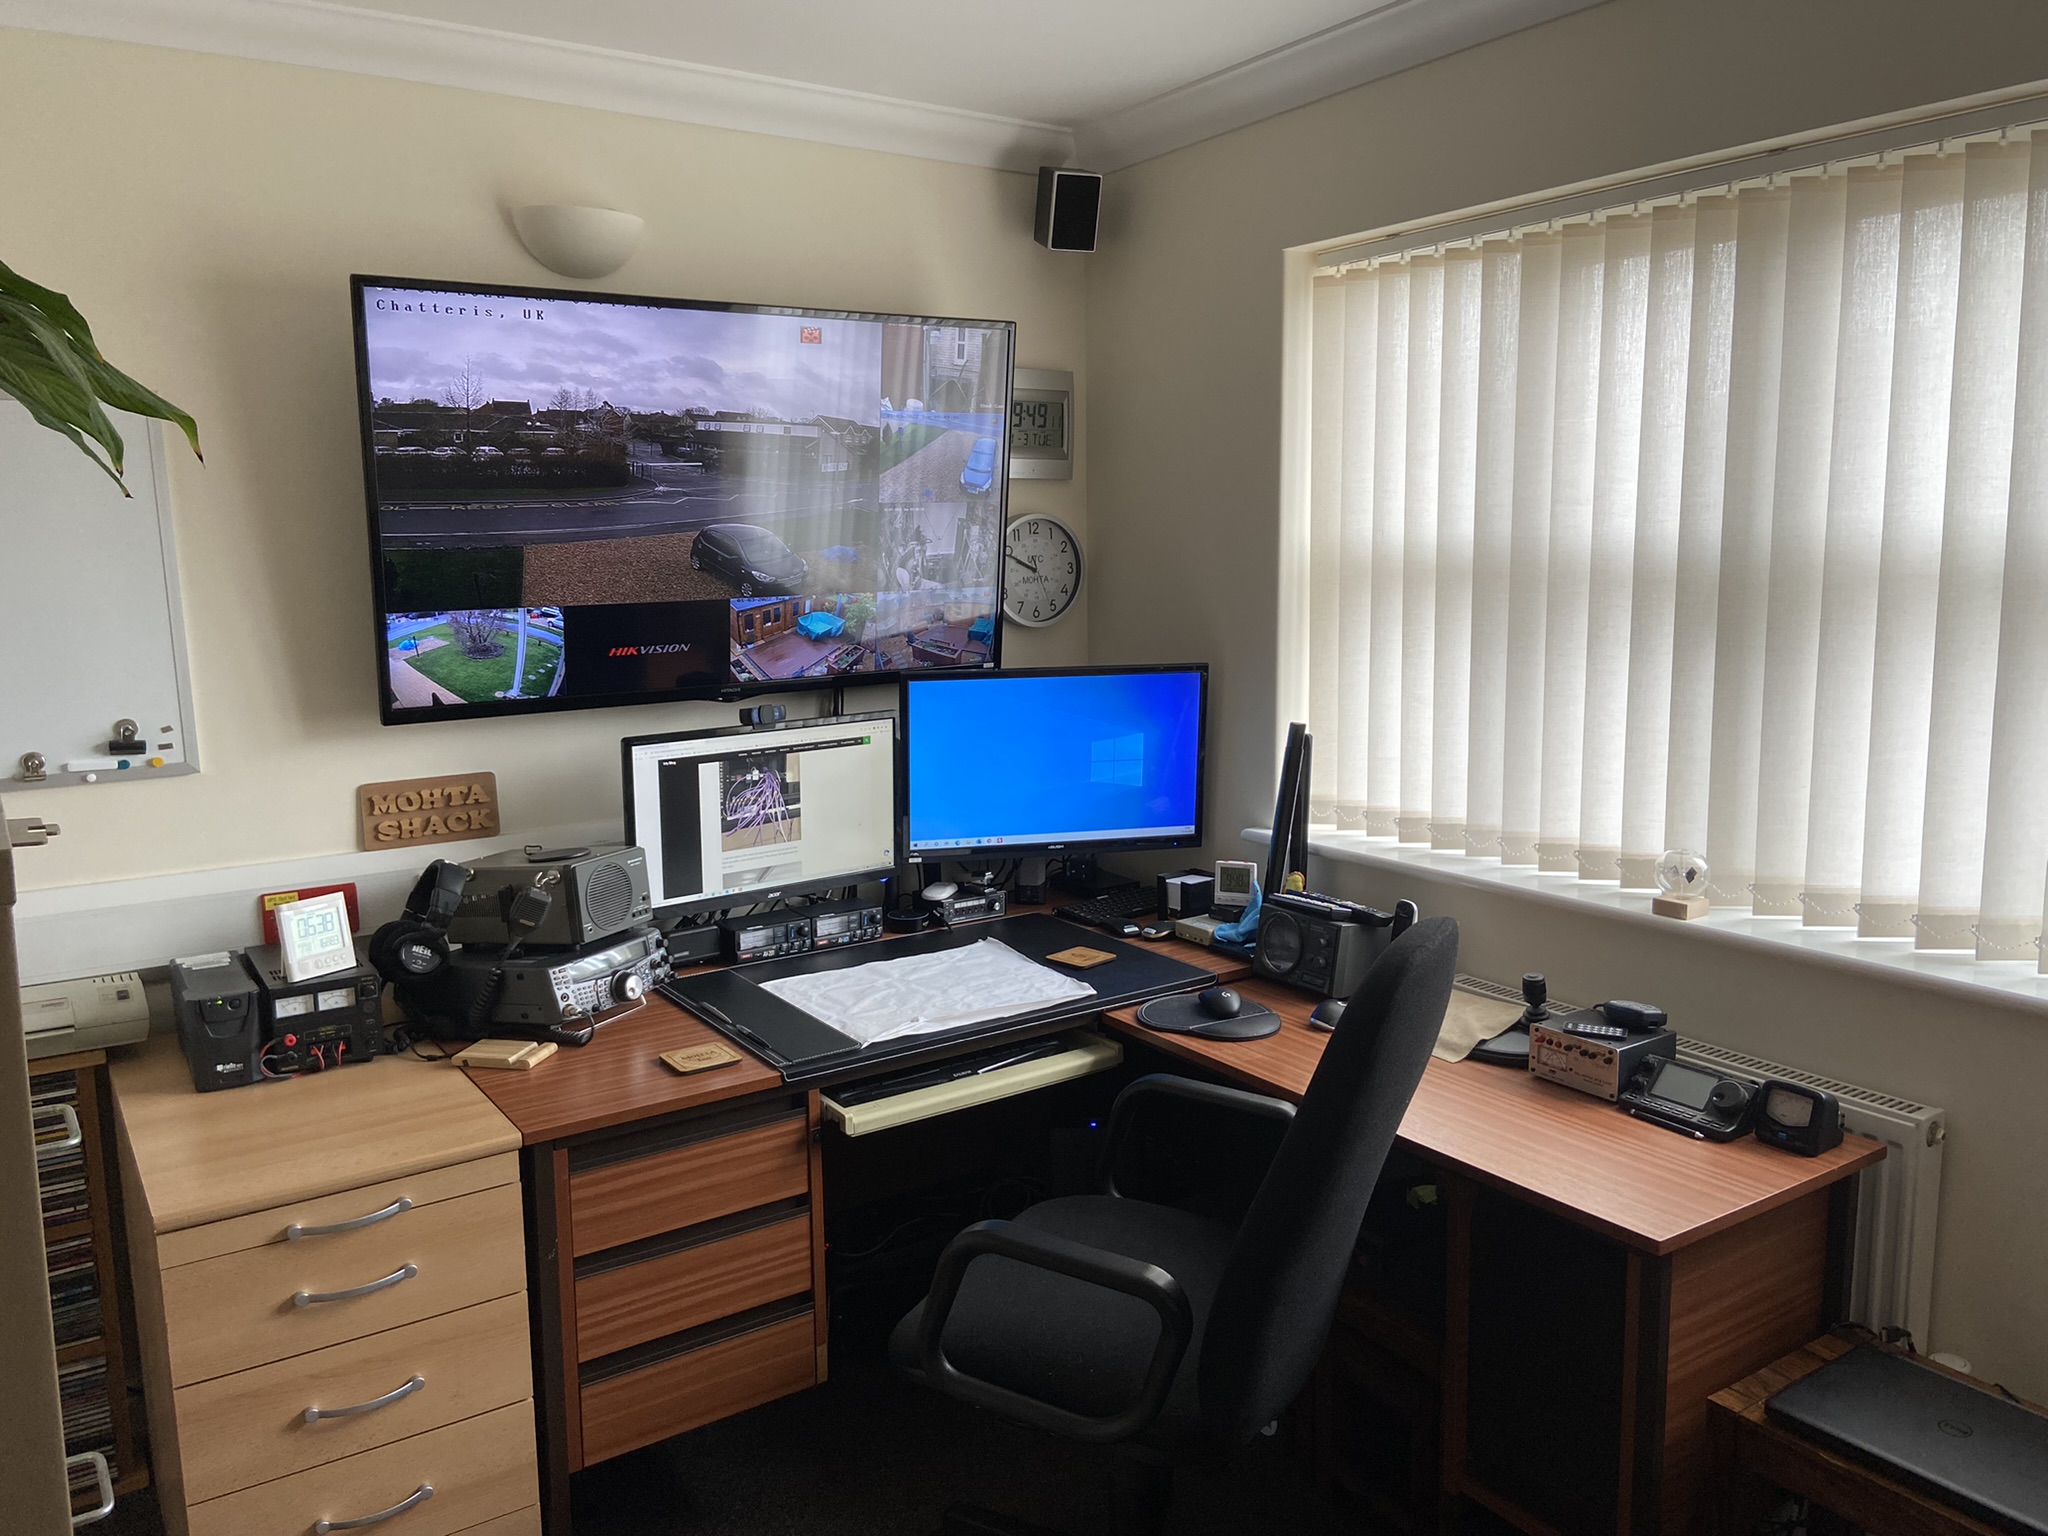
The remodel is a lot less cluttered and cleaner than how my shack eventually ended up after all the different levels of addition and modifications, fingers crossed it will stay this way.
The Kenwood TS2000 and Icom 7100 each have their own power supply unit and dedicated antennas, the Kenwood uses my Longwire and 2m/70cm x2000, whilst the Icom uses the MFJ 1786 Magloop and 4m dipole.
My preferred software is still Ham Radio Deluxe (HRD) and this controls the complete station, when on WSPR, this is configured to use HRD logging.
The mast hasn’t been extended for a long time now, and now Doves have nested, it won’t get a test until they have flown off.
Blog on Mast Automation – HERE
Keep checking back for updates.
Original Blog
Background – 17 December 2017
Hi All and thanks for dropping in,
Just like a number of others on the air, my early exposure to radio was during the UK CB boom in the early eighties using AM rigs, once it went to FM I lost interest, and now some 30 odd years later I’m back looking to develop a sustainable leisure pastime.
I have a weather station web site and noticed that a number of other station owners were radio hams, and that was the catalyst, I met Andy (G6OHM) through my weather site, Andy is a truly established radio amateur and with Andy’s wife we both undertook the weekend training with Peterborough & District Amateur Radio Club culminating in successfully passing the Foundation test on the 13th April 14 – A few days later after logging on to the OFCOM site I registered my first call sign of M6EID.
I’m fortunate that there are a number of very active radio clubs within a radius of 30 miles of Chatteris, I took a drive out to a Friday evening meeting of the Cambridge & District Amateur Radio Club (CDARC) and found it so friendly I joined straight away and have been going as regularly as I can ever since, for me it has the right mix of experienced and helpful hams and of course a very enjoyable social aspect.
I home studied for the Intermediate License Test with the practical assessment at Foxton being signed off by Peter (M0DCV) CDARC Lead Trainer, I took and indicatively passed the exam on the 21st June 14 at Cauis College, Cambridge facilitated by Martin (G3ZAY) of the Cambridge University Wireless Society, registering the call sign 2E0DDI a few days later, I kept with the same formula of home study supplemented by the excellent program QADV and online resource Hamtests in preparation for the advanced license exam which I took on the 8th December 14, again at Cambridge but in a different campus venue. Cambridge has brought me luck as just over a week later I had found out that I had passed, pressing the OFCOM wheel of fortune button, I have the call sign of M0HTA. (Easy for me to remember as the last three letters stand for Help The Aged!)
Setup
Well that’s how it started and where I’ve ended up (greater detail can be found in my blog pages) – so onto my humble setup ———>
![]() Equipment:
Equipment:
I see this hobby as very much ‘work in progress’ and enjoy reading ham forums about others experiences and tips that they are willing to share, for a first station I wanted the flexibility to see what is out there on the bands without investing in an array of different transceivers and antenna switches etc, this influenced by decision to get a Kenwood TS-2000, in mid September 15 I bought an Icom 7100 to cover off the bands that the TS-2000 didn’t and also to use the DStar feature, (I have added a small blog regarding the hotspot I have).
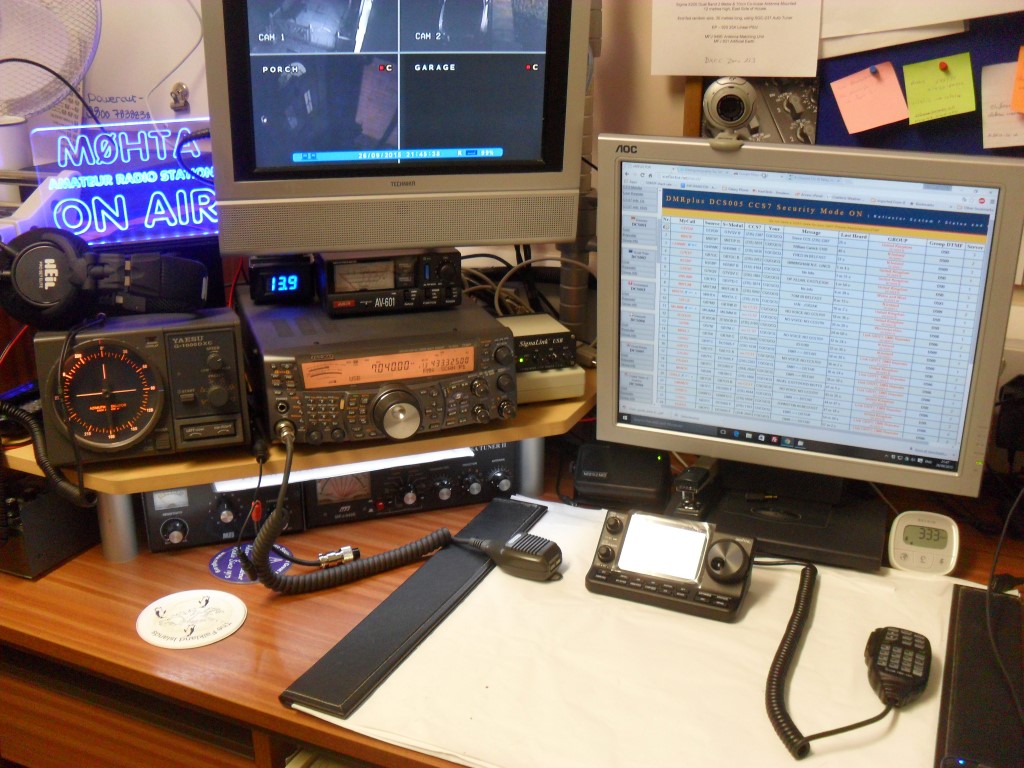
As you can see it is a relatively basic setup, out of picture is a 25A linear Power Supply this is plugged into a Hive socket, this allows remote switch on/off via the internet.
The Hive socket also has a convenient switch on top of the unit which makes operation very easy.
SignaLink is a great addition as the opened up datamodes to me which I enjoy, the noise reducing extension speaker was also a solid investment.
I use PSK31 via Ham Radio Deluxe recently played with WSPR program to see how effective my propagation is. Another element to data mode has been tracking High Altitude balloons using DL-Fldigi and trying to decode Space Station images.
(June 15) Added a couple of new item, the G-1000DXC rotator and interface as well as the manual tuner and RF earth artificial ground, some new test equipment in the form of a AV-601 VSWR and power meter also a MFJ 269C analyser.
Mast & Antennas
In late July 15 my electric winch up mast was delivered by MM0CUG and I installed it in early August, this currently has a x200 2m/70cm co-linear and two, three element co-linear Yagis fitted, these are mounted to cover off both Vertical and Horizontal polarisation. The total height of the antenna above sea level when the mast is elevated is 16.7m (55′) the – (did I forget to mention Chatteris is in the Flat Fenlands and my QTH is only 5m (16′) above sea level). My HF antenna is an end fed long wire.
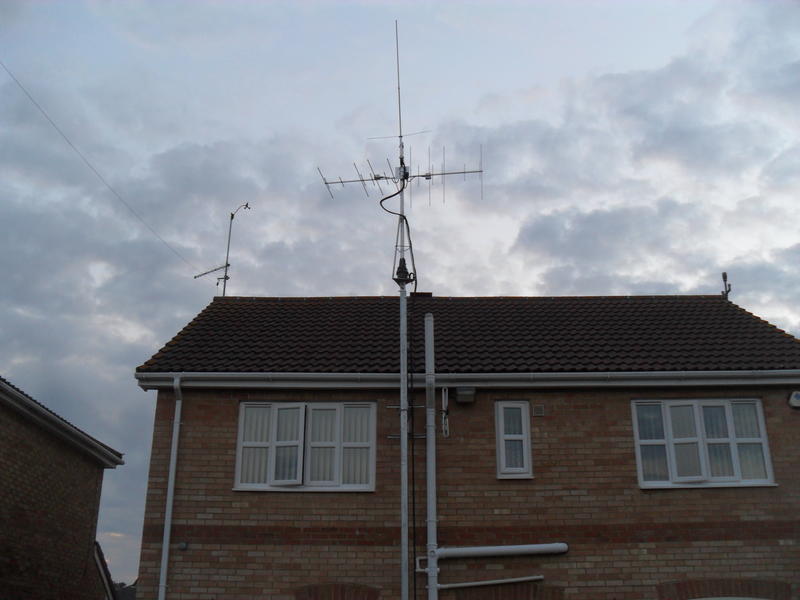
On the left you can just make out my wind speed and direction sensor, lower down the mast is my TV antenna and just below that is the insulator supporting the highest point of the longwire. The main antenna mast is in the lowered position.
Mast Automation
June 2016 – the mast control system was fully automated, sensors for mast or lowered were installed at the time when the mast was first fitted, I added sensors to detect if the top bracket or bottom securing mast pins were inserted, these sensors were then connected into a Programmable Logic Controller which allows full motor control of the mast, a full write up is HERE– and latest update HERE.
To get the longwire as high as possible, I opted to use a 6m (21′) scaffold pole at the bottom of the garden, in order to stay on the right side of the Planning Laws I applied for planning consent which was granted on the 10 September 2014.
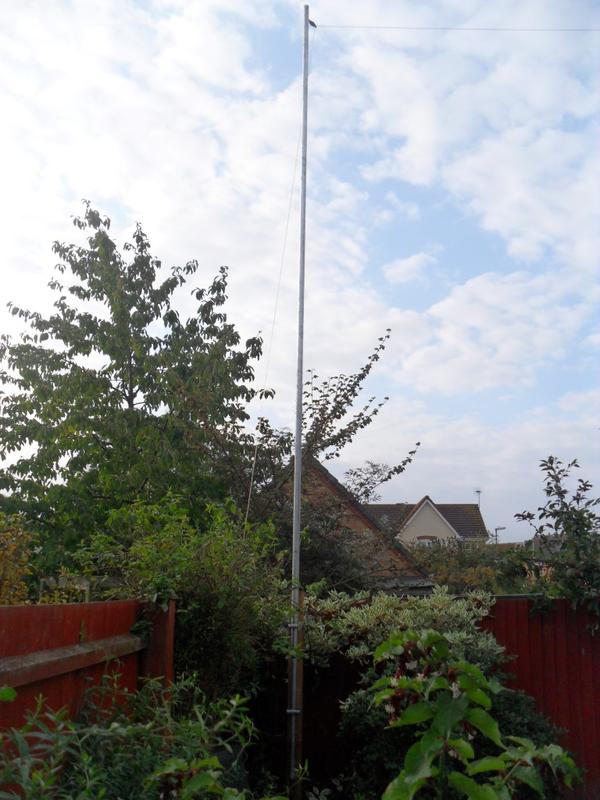
The mast is affixed to a 100mm x 100mm (4″ x 4″) wooden pressure treated post which is concreted into the ground, the rigging to allow the insulator to be raised or lowered is routed within the pole itself to make for a neater installation.
The longwire drops down to a auto-tuner which is hidden from view in the picture above, making the antenna an inverted ‘L’ design with an overall length of 30m (98′ 5″), the auto-tuner enables me to tune across all the bands.
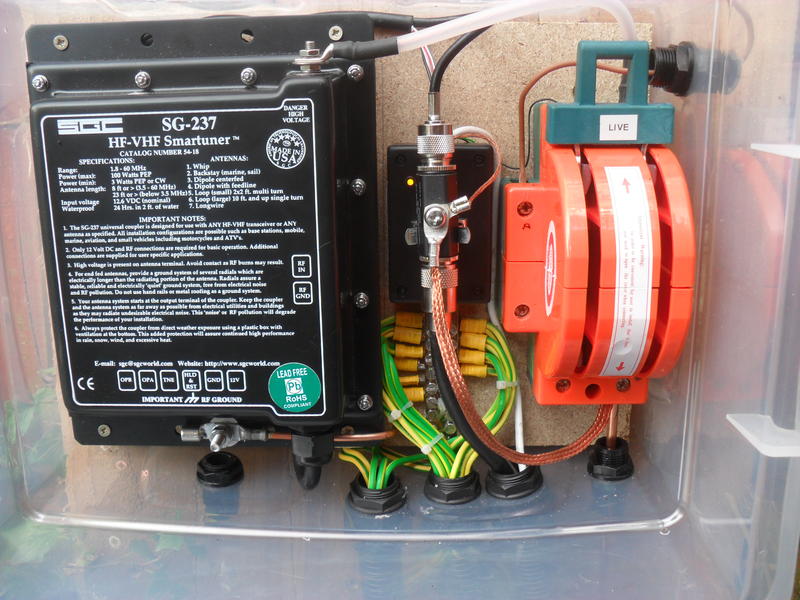
The large Knife Switch is used to disconnect the antenna from the tuner and put it to ground should a storm be on its way, the other side of the Knife Switch is used to indicate in the shack if the switch is in the correct position to operate the rig.
Surge suppression is included as is a small Amber LED showing power is available to the tuner.
Green/Yellow wires are from the buried radials (20 off).
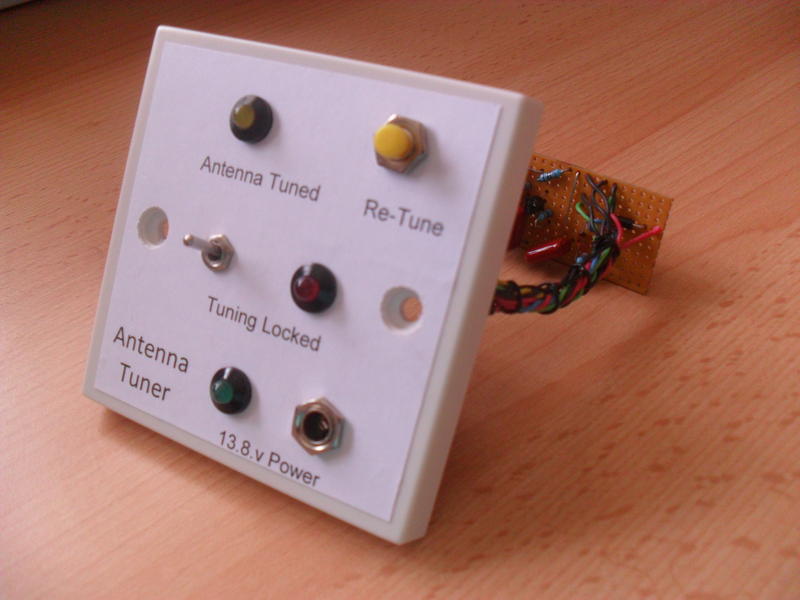
This home built SG-237 control unit is mounted next to the antenna faceplate in the shack, the two main indicators are the Amber ‘Antenna Tuned’ and the Green LED indicating that the Knife Switch is connected to the SG-237.
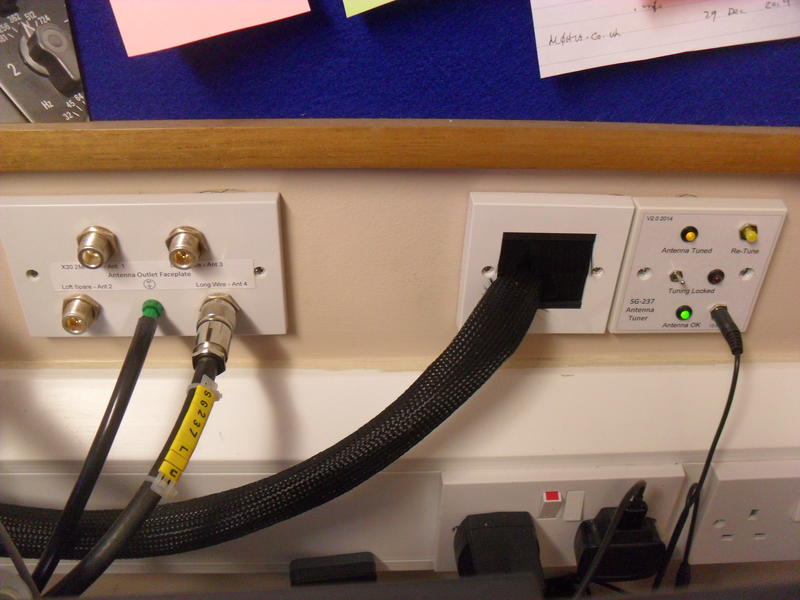
In an attempt to keep the radio installation neat (I know this will change in time, but bear with me), I dropped antenna, rotator , low voltage and tuner cables in the cavity and connected to a flushed in faceplate or brought out through a brushed faceplate, the SG-237 tuner control is to the side of the brushed outlet – more pictures are on my blog page of this.
Once cables are connected, my swing-arm mounted PC monitor covers everything over.
I have recently bought a G-1000DXC rotator which I have linked to Ham Radio Deluxe, the interface was from http://www.easy-rotor-control.com in kit form,
The mast is a recent addition ( August 15 ) and more information is posted in my blog.
17 December 2017 Update
Today is the three year anniversary of passing my Advanced Amateur Radio Licence, so I thought I’d post the latest picture of my shack just before I tuck into my lunch 🙂

I hope you have enjoyed reading about my modest setup, I have so much to learn from others and I’d like to thank you in advance for freely sharing your wealth of knowledge, it’s very much appreciated.
Watch this space as my journey into this strange world of Radio continues 🙂
73
Ian
Echolink – Node 983672
EPC #23668
CCS7 – (235) 2515