
What is Sonoff –
Home automation is “The Internet of Things”. It simply means the way all devices or appliances are networked together to provide customers with a seamless control over their home equipment.
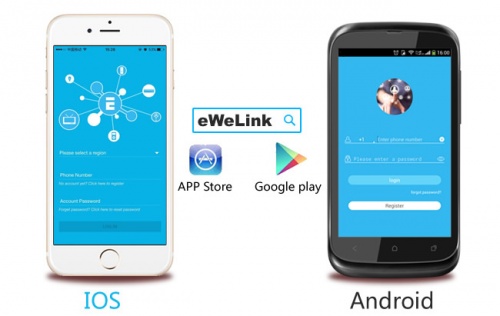
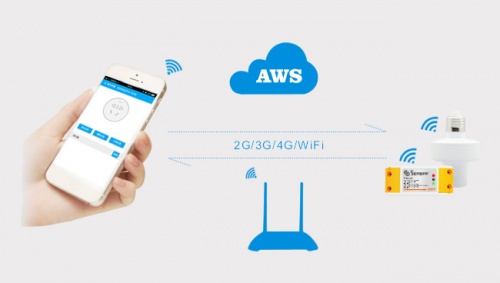
Sonoff is an affordable device that provides users with smart home control. It is a WiFi based wireless switch that can connect to a wide range of appliances. Sonoff transmits data to a cloud platform through the WiFi router, which enables users to remotely control all the connected appliances, via the mobile application eWeLink. The cloud server of Sonoff is Amazon AWS global server.
Sonoff makes all home appliances smart. As long as the mobile has network, users can remotely control the appliances from anywhere at any time. Another feature available is to set timing schedules for the appliances, which can include countdown, scheduled on/off, and can thus, help users maintain an easy life.

The unit I needed to modify was the Sonoff Basic, this is a simple WiFi enabled unit which will switch 230v on or off, however, the application I needed was for it to switch a set of voltage free contacts, as these cost less that £6.00 each, its worth a go with the soldering iron.
The unit is very compact and before starting, I paired it with my mobile phone and checked that it worked correctly.

The top simply clips off the base and the PCB comes apart without any fixings after cutting the paper security seal.


The relay has the Sonoff sticker on it and the mains is switched through the relay, the board uses double sided tracks for this.

The relay was desoldered and removed from the PCB, this then allowed access to the tracks which were cut with a Dremel.

The picture shows the bottom of the PCB with the tracks cut from the 230v input and a shorting link to complete the relay switching circuit.

This shows the relay back in place and the top tracks cut, the modification now allows a voltage free changeover which will be used to bring on my low voltage triggered external lighting.
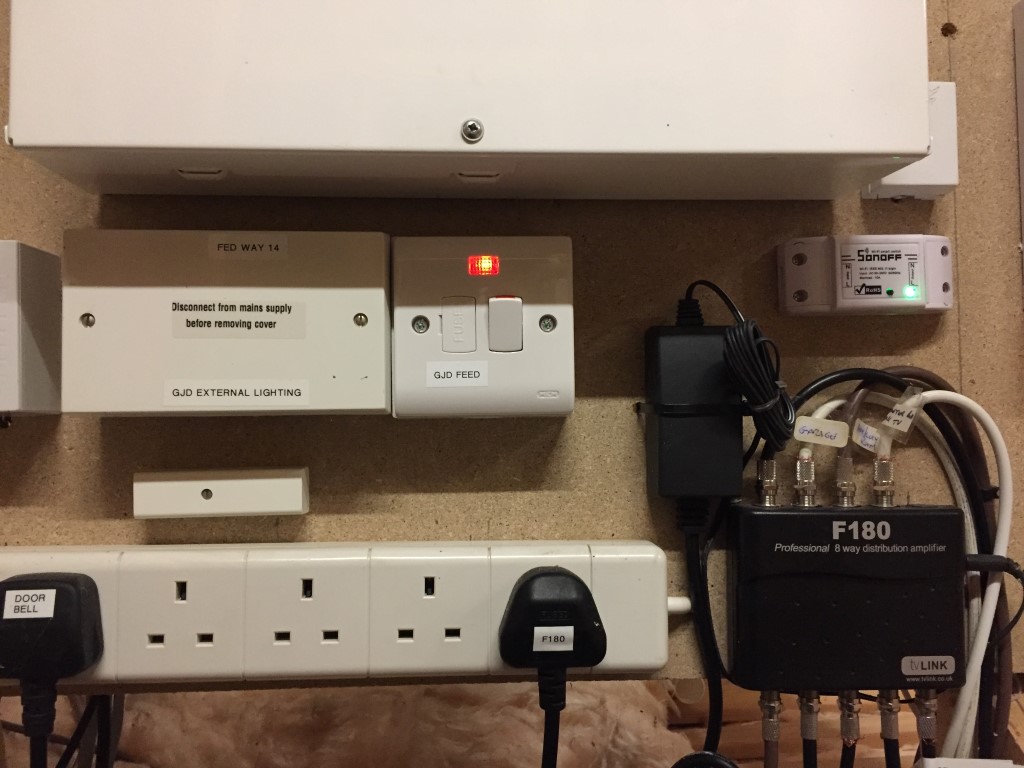
Sonoff installed and connected to controller.
Does this provide a low voltage DC trigger on the output?
Hi and thanks for checking in, the modification makes the relay a simple switch, although the doesn’t provide a DC output, it could be used to switch one.
Thanks for the reply. I was able to replicate your switch. I’m not real sure I have a use for it. I just wanted to try. These Sonoff switches are just so hackable. I wish I could provide 3.3v or 5v to activate a solid stage relay.
I did the exact same modification before I saw this article. I used a 12in hacksaw with the rounded end snapped off to allow cutting into a tight space (24 tpi), to cut the track which can be done without removing the relay.
Initially I was going to use the basic SV model which is supplied without case but identical in dimension. The draw back is the manual switch has a low button which doesn’t reach the hole, though it fits the basic case perfectly otherwise.
Current drain of the basic is 8.8mA and 12mA with a 130v supply from an isolating transformer.
The SV model with an input of 5v running in isolated mode is 40mA and 80mA with the relay operated.
Thanks for this! Exactly what I was looking for. Perfect.
Glad it helped, thanks for checking in.
Hi friend, can you tell me if this is possible with a TH16 too? And how?
I’ve not done the modification to a TH16 as the one I have needed to switch a voltage rather than give a volt free contact, I can’t see any reason why it can’t be done following the same steps as I did with the Basic.
I’m not very good with electronics or PCBs … Could you tell me exactly where should I cut and/or make a soldering?
https://www.cnx-software.com/wp-content/uploads/2016/11/Sonoff-TH16-Board-ESP8266-Large.jpg
https://www.cnx-software.com/wp-content/uploads/2016/11/Sonoff-TH16-Board-Large.jpg
thanks in advance!
Hi,
The safest thing to do is to unsolder the relay and extend the leads to the relay coil, then solder wires onto the relay contacts, I thought I could give you a drawing based on the link images, but without me trying it first could end in disaster
HI,
So I’m not sure if I’m understanding this correctly, after I make the dry contact mod, can I power the sonoff by connecting it to the input terminal as before? Or do I need a separate 5v PSU for power?
Hi,
You can power it as before, the only difference is you can now switch a range of voltages via the relay as it is only acting as a simple on/off switch.
Great thanks!
Sonoff have now changed the design of the basic switch (to R2) ,
Instead of soldered tracks it has 2 wires coming from the mains input and relay. Not much information online regarding the change. Would be good to update the guide based on this new design.
Hi friend. I want to replace the switch that brings the sonoof by a wall switch to be able to use it with Google home and physically without problems there since I want the device not to be in view. Do you think it works?
Hi Gavin,
I’ll look into getting the R2 version and having a play.
Hi,
If you want to remove the light switch and have the sonoff to control the light with the sonoff hidden out of view, then this will work.
Remove the wall switch and connect the wires together (all with the power OFF!!), the wires to the lamp will now be the feed to the sonof, which in turn will switch the lights.
Hola muy buenas, primero gracias por los consejos. Estoy empezado en este mundilllo de sonoff y me gustaria usar Sonoff TH16 Wifi inteligente interruptor de temperatura como termostato, osea como rele, como la modificación del sonoff basic sin tener que comprar un rele solido, otra opción es crear una escena en ewelink dejando el basic como rele y el de temperarura se colocaria donde quisieras, pero el sonoff de temperatura solo permite la escena acondicionado a la temperatura muchas gracias un saludo
Google Translate:
Hello very good, first thanks for the tips. I am starting in this sonoff world and I would like to use Sonoff TH16 Wifi smart temperature switch as a thermostat, I mean as a relay, as the modification of the sonoff basic without having to buy a solid relay, another option is to create a scene in ewelink leaving the basic as relay and the temperature would be placed where you want, but the sonoff of temperature only allows the scene conditioned to the temperature thank you very much.
Hi and thanks for contacting me. I use the TH16 to control cooling of an IT cabinet, the relay is internally wired to switch the supply voltage (https://www.itead.cc/sonoff-th.html), if you need a volt free changeover contact the internal modification of cutting the tracks to the relay from the supply would probably work well as their would be no other components needed.
Hola y gracias por contactarme. Utilizo el TH16 para controlar el enfriamiento de un gabinete de TI, el relé está cableado internamente para cambiar el voltaje de alimentación (https://www.itead.cc/sonoff-th.html), si necesita un cambio de voltaje, comuníquese con el interno la modificación de cortar las pistas al relé desde el suministro probablemente funcionará bien ya que no serían necesarios otros componentes.
Thank you for this guide. Sadly from the comments it looks like we need to check if we receive v1 or v2 of the basic sonoff unit.
I plan on using the 8xTH16 units to control radiator actuators and I just need a wifi on/off switch not a power pass through to activate the boiler. Think im going to use openhab.org to control it all.
Hi,
The Sonoff basic R2 V1 wasn’t available when I did the modification, however, looking online it appears that physical wires are used instead of the PCB tracks, this should make the modification to a volt free changeover contact a lot simpler.
I don’t have the latest version to play with but it look like cutting the two internal black wires with come from the power in terminal area and connecting these together, should make the output volt free Note- I’ve not tested this!.
Your project sounds interesting using the TH16, one option is to desolder the relay extending only the relay coil wires and take the clean contacts from the relay to your actuators, another way would be to let the TH16 switch external relays.
Good luck.
Hi!
I have just got new sonoff rf r2 power v1.0 and it is not just to cut black wires. I thought so too and cut them – but didn’t get dry contacts:) As far as I can see, I need to desolder the relay and cut the plate or made some modification with relay outputs to take them away from the board and to connect them directly to sonoffs output.
Thanks for letting me know, I’ll order a R2 version and do the mod, adding the pics to the original blog.
Hi again dear members.
Look like this conversation is the most up to date in the internets:)
In general – R2 seems to be more reliabe when using high powered devices with it because of good 2.5 mm2 wires (approx.).
But this version is harder to modificate for non-professional enthusiasts as I am.
As I alreay mentioned above – cutting the wires does not provide dry contacts.
In previous version “the dry contacts mod” could be easily done without desoldering the relay (as I just did on my old sonoff for 10 minutes) I just cut the plate board through with my dremel.
With R2 version you can’t do this mod with hacksaw on this board.
It is still possible to make two separate cuts with a dremel on the board’s downside without desoldering the relay, but it need more skills in comparasion with an old version.
So it is safer to desolder the relay.
In fact, I have burned one relay’s solder pad when tried to desolder it from the board using bad iron.
Be careful and use good soldering irons:)
P.S. I see that people have some troubles with flashing R2 with tasmota because of tiny small gpio soldering pad.
Again, with this revision ITEAD made it harder to modificate it’s hard and software parts.
Great post! I would like to achieve the same with a standard TH16 but the wiring is rather different. Would you like to see a high-res photo? I would welcome your advice on it.
Hi Daniel,
Are you looking to make the TH have volt free connections.
Yes, and it has rather different wiring to the basic model.
Hi guys,
Thanks Chatteris for the tutorial in the first place.
I successfully did this on a pair of sonoff devices but just recently got a new one which is the R2 version.
Can anyone give any direction on how to do this on this new version?
Thanks!
If someone sends me an R2 version I can attempt the mod and document the process and then send it back to them if it helps the cause 🙂
Sonoff POW
I’ve got a POW and I’m hoping to get a set of dry contacts out of it – any ideas if the mod would be possible on a POW?
Thanks!
Hi Dan and thanks for checking in,
My immediate thought was to solder wires to the relay coil connections in order to operate another relay giving you the volt free contacts.
Ian
Dan, why u want to do dry contacts out of POW? i thought POW is intended to be wet contact, as it needs to monitor the power consumption. Wont this defeat the purpose of using POW at all?
Hello, has anyone attempted this on a sonoff basic r3? If so would you please be able to show me how you did this. Thank you.
Hi David,
I’ve not got hold of an r3, hopefully someone will read the thread and answer the question with how they did it and any learning they can pass on.
Ian
Hello,
Thank you for this mod.
It was exactly what I needed to make my garage door opener work.
I have soldered 2 wires to my remote control and connected them to the output of my sonoff, flashed with esphome with 1000ms delay and it works flawlessly.
No hiccups so far and it’s been running for a month.
The TH16 is fairly easy to convert to “volt free” operation I now have one controlling my Ravenbheat boiler.
Desolder/Lift the relay up/off on the 240v
out side take the clean contacts from the relay to the boiler and bingo.
Disclaimer information provided for edutainment only, Mains voltage will kill you.
if you don’t know what you’re doing leave well alone!
Paul
This is not exactly a “changeover” in normal technical parlance. This is still an on/off relay. The difference being it acts as a simple switch and not feeding the incoming mains to the out put terminals.
AFAIK & IMHO a “changeover” means and requires 3 terminals . A common (input), a NO (normally open) and a NC (normally closed) terminal.
Hi and thanks for checking out my blog.
Yes, you are quite correct, my terminology was to changeover from a voltage switched output to voltage free contacts, I should have used the word ‘modify’ instead.
Thanks for pointing this out.
Hi Guys,
I have the Basic R3 non RF version. Its a brilliant device. It is unfortunate that i have to report the R3 has voltage at the out output of around 1 to 6 volts when turned off. It seems to be a design issue. Im not sure if firmware can fix this.
In terms of a dry contact relay it is very difficult as they have now rotated the relay to make it very difficult to modify. The live and relay terminal are extremely close together.
I will have a go at it as soon as i have time. Unless there is a firmware to overcome this issue.
Has anyone successfully done this with the R2?
Hi,
Can you tell what is the output voltage?
If i power this modified relay with 120vac. What is the output voltage I get? And can that be variable voltage based on anything or any other input?
Thanks,
Saurabh
Hi,
The modification cuts the supply voltage PCB tracks to the relay contacts, this then allows the relay contacts to be voltage free enabling connection to other equipment of differing voltage to the supply.
The modification will work on 120v versions of so off and will give voltage free changeover contacts from the relay, as the contacts from the relay are either on or off, vairiable outputs will not be possible.
Ian
I’m struggling with left to right and top and bottom. At first It looked like the live and neutral will be directly connected to each other through the relay.
As no one commented they had blown up the board I had to look closer and then it all made sense, it was the way the photos were arranged, changing orientation during the process.
All said and done, thanks for the info.
Hi Brad,
Glad you got there in the end, I did have another look at the images to see if I could mark them up or change the orientation to make things easier, I decided to leave things as they are as the PCB has couple of slots in the board which are probably the best way of determining the orientation when your working on the mod.
Good feedback for me though.
Hi everyone,
Thought if anyone is interested I have been running the WiFi version explained here for years with no problem but decided ZigBee was the way for me. I bought the equivalent counterpart BASICZBR3 and am happy to say the conversion also works perfectly
Hi Rob,
Good to know, so thanks for sharing.
I’ve not explored the ZigBee option, so might look into this.
Regards
Ian
I’m looking to change the SPST relay on board to SPDT.
Probably the easiest way to go is an external SPDT relay on the existing relay output.
Any thoughts on this?
Hi Phil,
I agree an external 230v SPDT relay would be best as trying to modify an existing Sonoff with a relay with a different footprint is making it a lot more work than it needs to be 🙂
Thank you very much for this tutorial,
Just made an old R1 tasmota into a dry relay for use in a combi boiler to control the heating. Boiler ignition/thermostat switch is 24v so needed a solution.
I didn’t bother desoldering the relay, I was able to cut the track using the Dremel, using a drill bit to get in tight.
Hi Lee,
Nice job, always a good feeling of satisfaction when things work out.