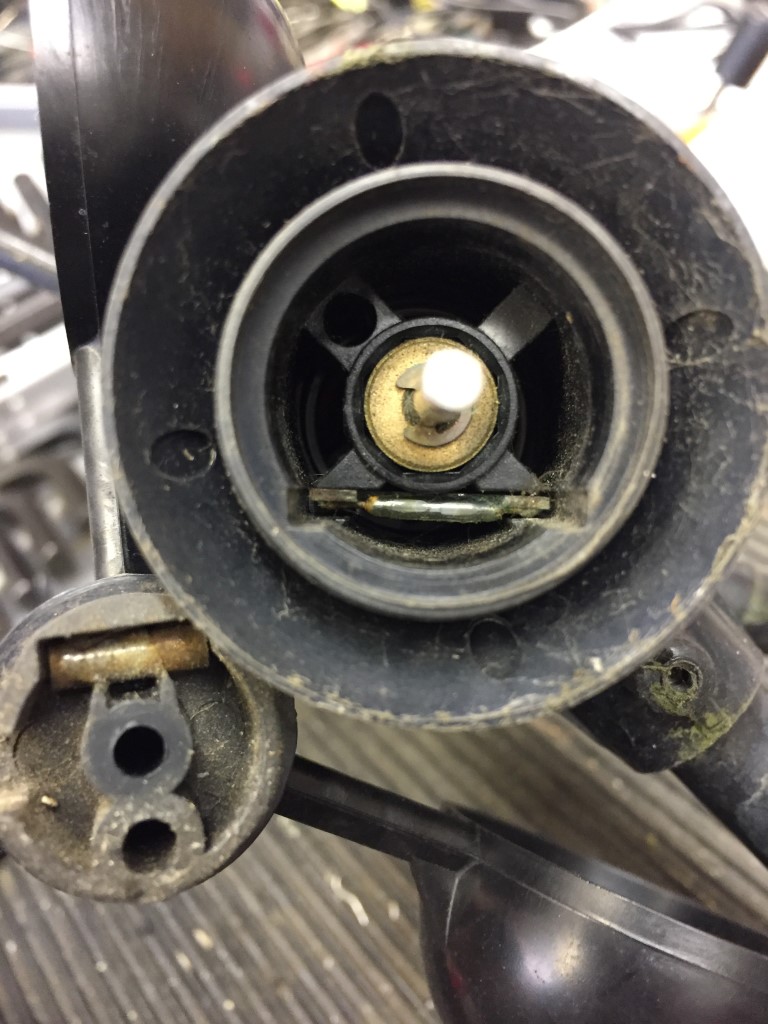
25 October 17 @ 01:24 – Wind speed stopped recording, when I noticed I checked all the accessible connections, but still no reading, can’t complain, after 9 years its not done to bad!
Reed Switch failed after 9 years, not too bad!
Ordered a new one from Scaled Instruments, Gainesville, Florida, also I added a couple of other nice to have goodies:
Product
Quantity
Price
Davis 6462 – AeroCone w/Bird Spikes and Debris Screen With Davis logo
1
$24.50
Davis 7120.031 – Reed Switch for Tipping Bucket
1
$2.70
Davis 6410 – Anemometer for Vantage Pro2 & Vantage Pro
1
$105.00
Subtotal:
$132.20
Sub Total – £158.69
Customs & VAT – £35.90
Total – £194.59
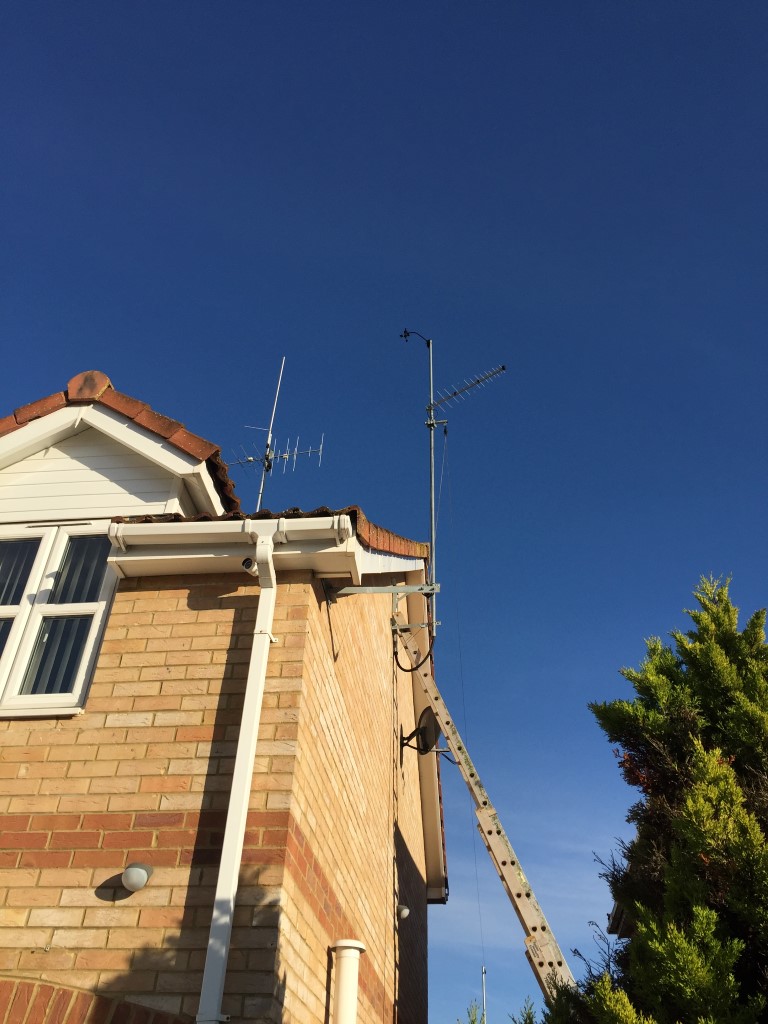
New Davis 6401 installed 19 Nov 17
Delivery & Installation Progress
November 19, 2017 – Installed all tested and working.
November 16, 2017 – Tested new anemometer and wind. direction vane for operation before installation.
November 14, 2017, 2:00pm – Received and unpacked.
November 11, 2017, 10:33am – Paid Customs Charges and Handing fees of £35.90 to release for delivery.
November 9, 2017, 11:37 pm
Arrival at Post Office
UNITED KINGDOM
Your item has arrived at the delivering post office in UNITED KINGDOM at 11:37 pm on November 9, 2017.
November 9, 2017, 3:16 pm
Customs clearance processing complete
UNITED KINGDOM
November 8, 2017, 11:07 pm
Held in Customs
COVENTRY PARCELFORCE, UNITED KINGDOM
November 3, 2017, 10:24 am
Departed
LONDON, UNITED KINGDOM
November 1, 2017, 2:41 pm
Arrived at USPS Regional Facility
MIAMI FL INTERNATIONAL DISTRIBUTION CENTER
October 31, 2017, 12:28 am
Arrived at USPS Regional Facility
JACKSONVILLE FL NETWORK DISTRIBUTION CENTER
October 30, 2017, 4:05 pm
Departed Post Office
ARCHER, FL 32618
October 29, 2017
Pre-Shipment Info Sent to USPS, USPS Awaiting Item
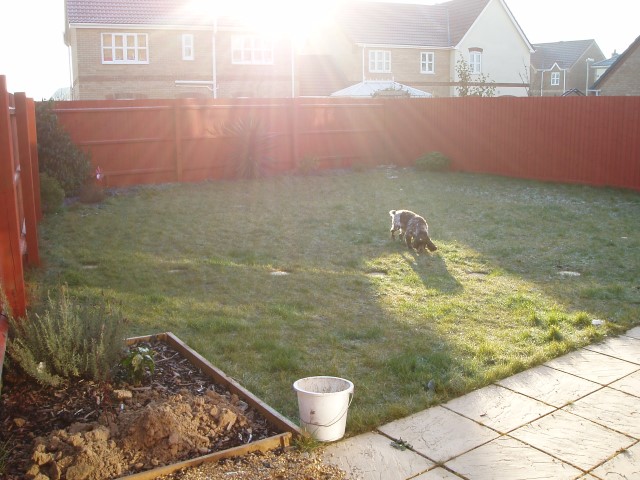
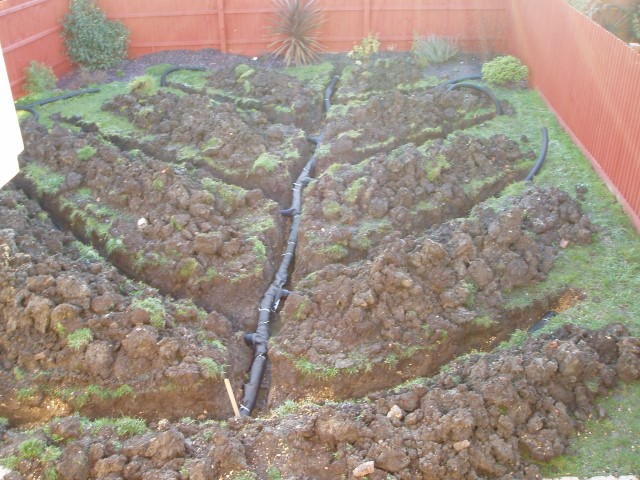
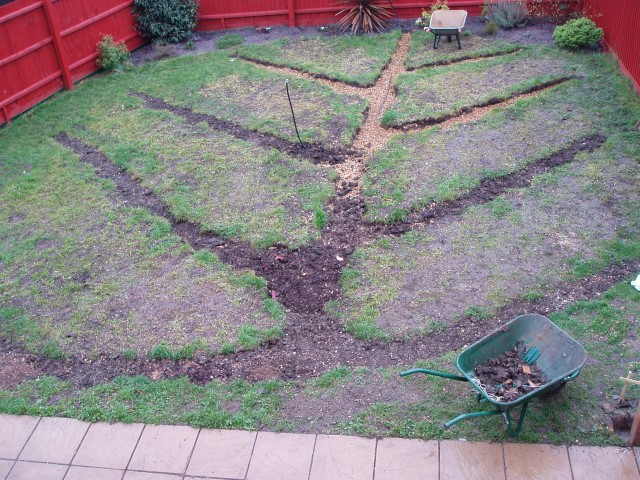
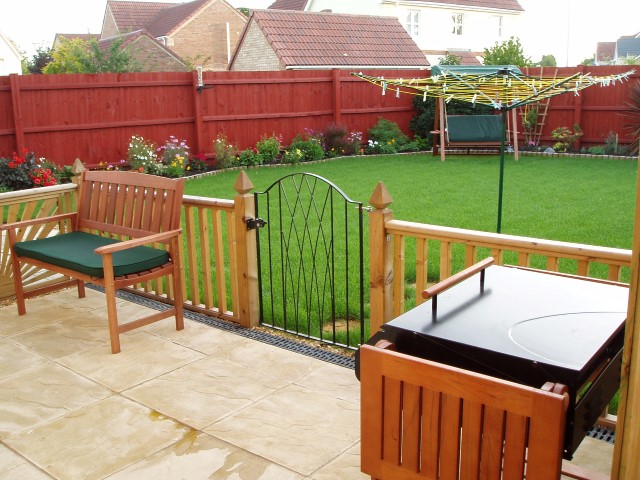
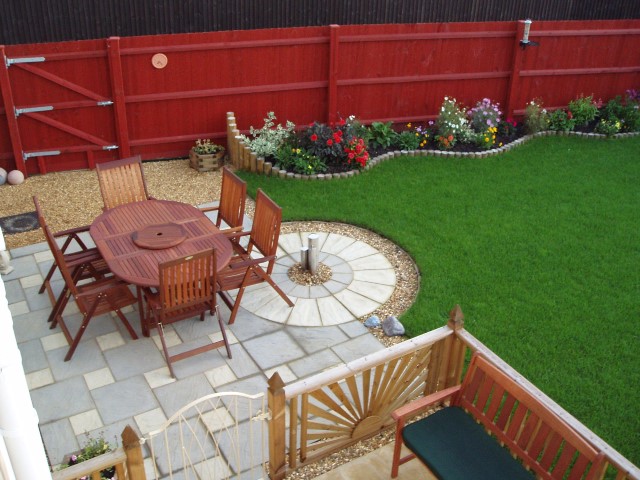
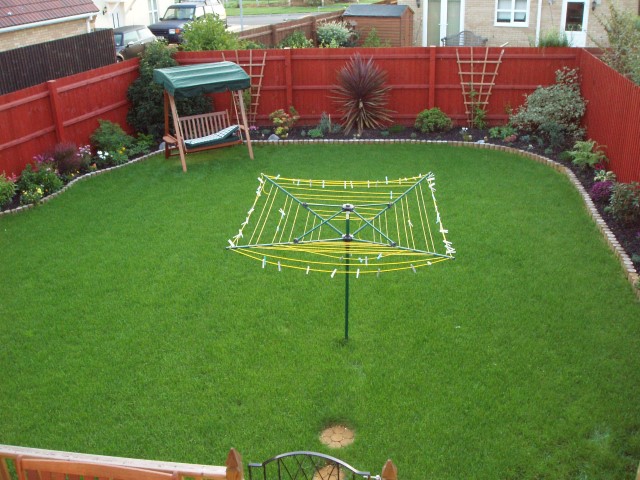
Tenuous link to weather with this one, when we first moved into our house in January 2006, every time the dog came back in from being in the garden, she would have wet paws even if it had not rained for days as the land just did not drain as it is made up of very heavy clay with a thin topping of soil to allow the grass to grow, the only course of action was to improve the drainage.
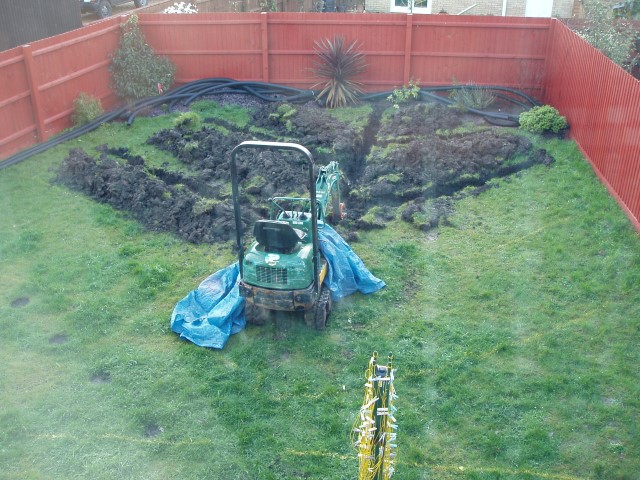
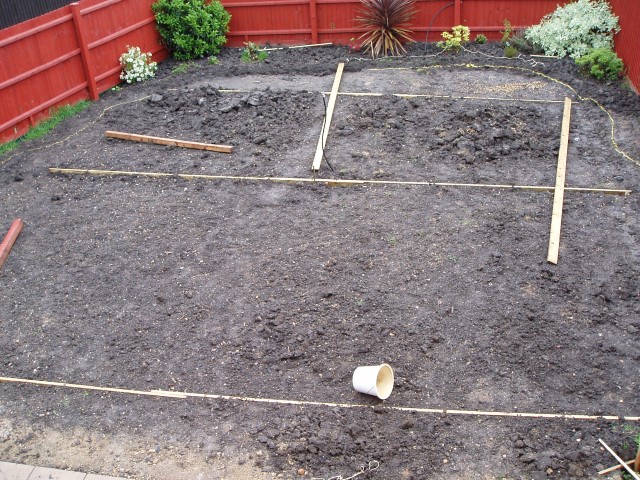
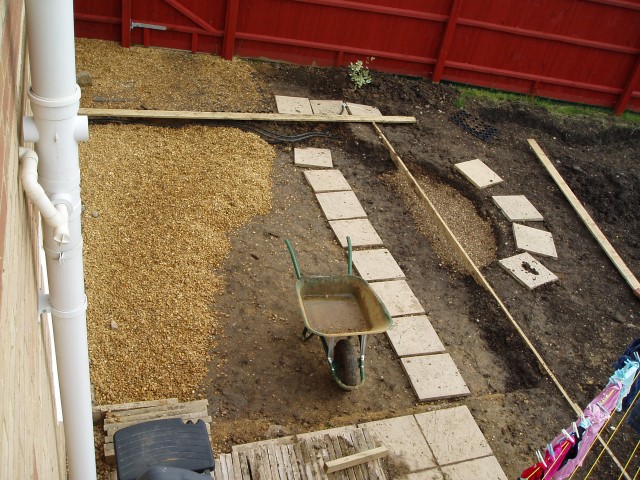
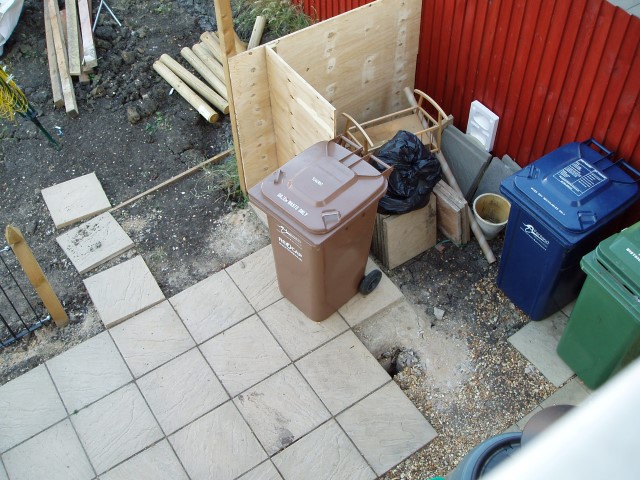
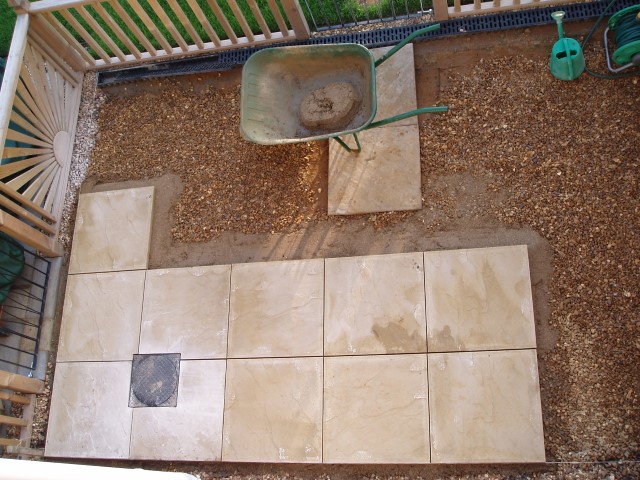
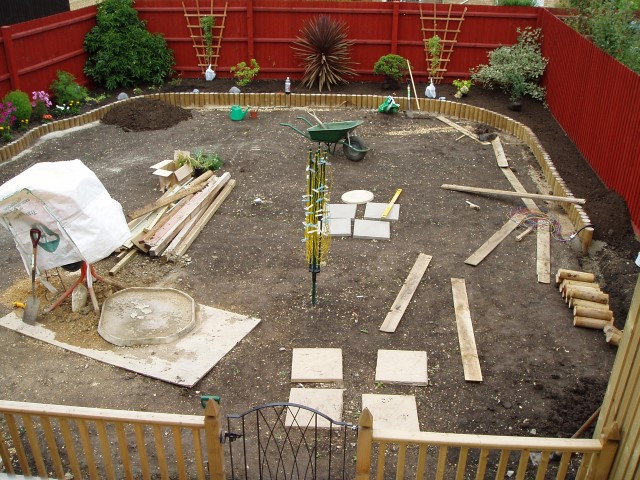
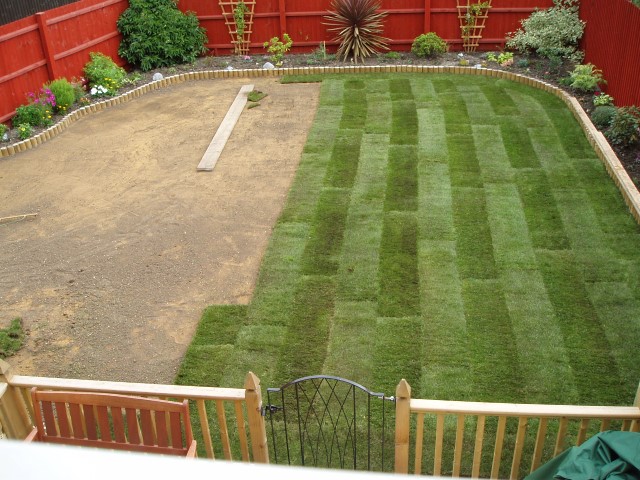
Garden as it was when we moved in, first job was to put a gate into the fence so the mini digger can get in.Work starts on installing the land drains.All trenching done.Drains installed and back-filling.Top soil added and ground rotovated.Patio base going in.Beginnings of the bin store.Patio going down.Edgings and raised border going in.Turf going dawn.Completed patio.Patio area, note the gate in the fence used for the digger access.Lawn growing well.
This blog is from 2014 updated in Feb 2018 and refreshed in July 2022.
A few years ago just before Christmas we had an extended power outage, not only didn’t the telly work :-(, but all the food in the fridge/freezer was nearly spoiled which would have been a disaster, it was at that point I decided to install an external power inlet point for a petrol generator and some form of switching.
I decided early on that I only needed the essentials to be on the generator backup, this included the heating, lighting, kitchen power circuit and cooking, it was important that I confirmed which circuit breaker control which circuit, this is important as I need to isolate high current consuming circuits so as not to overload the generator when online.
The generator I bought was a Honda 3kVA manual pull start unit off eBay (it later transpired that it wasn’t a genuine Honda, you’ve got to love shysters), which should be plenty big enough, if we need to heat water for hot drinks we’ll use the gas hob kettle rather than the electric one so as not to overload the genny, I can keep an eye on actual consumption due to a digital power monitor which is incorporated into the transfer switch enclosure.
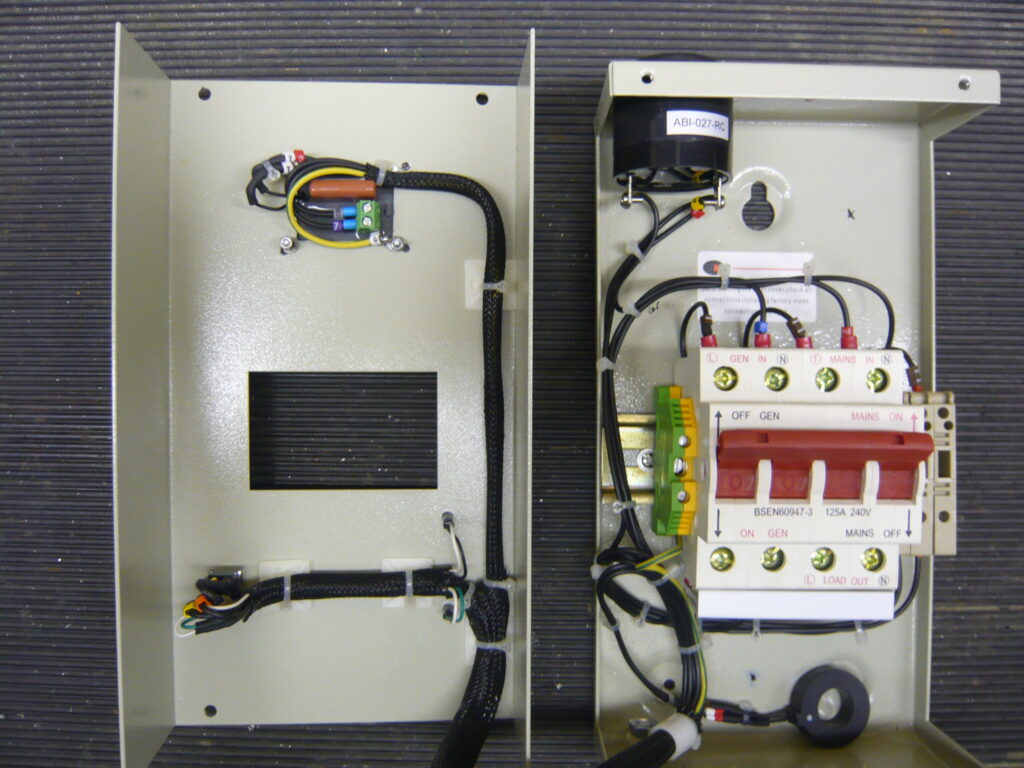
As the generator is a manual pull start their was no point having an automatic power transfer switch, so I built a manual one.
So, outside in the meter cupboard is a 16A switched male socket inlet, this has been modified with a power indicator which illuminates when the generator is running, the generator plugs into this external outlet via small lead, two things to note, first that the petrol generator is outside so that fumes can’t get into the house and secondly that the power lead from the generator to the house uses a female socket to ensure that no exposed pins can be touched with the generator running, removing any shock risk.
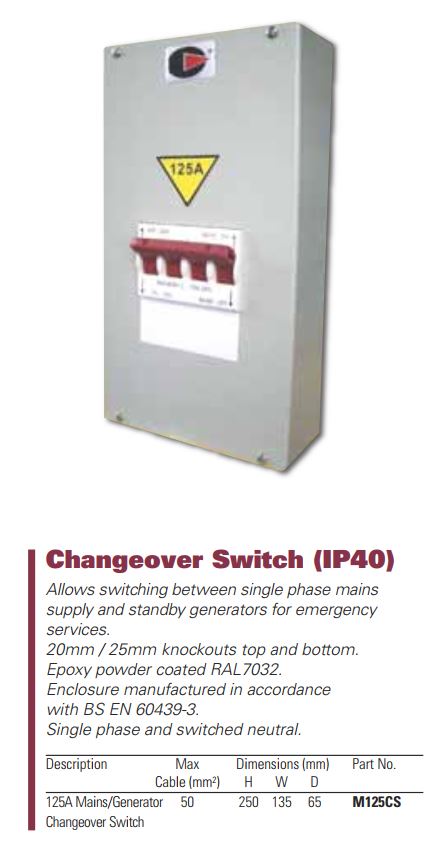
From the external socket a 4mm cable feeds into one side of a power transfer switch, this switch has a capacity of 125 amps and is a break before make type, this will ensure that it is not possible to back feed power to the generator from the utility supply during the manual switching operation.
The supply from the utility company also go to this transfer switch, the output of the switch goes to the consumer unit and from here to each of the circuits in the house.
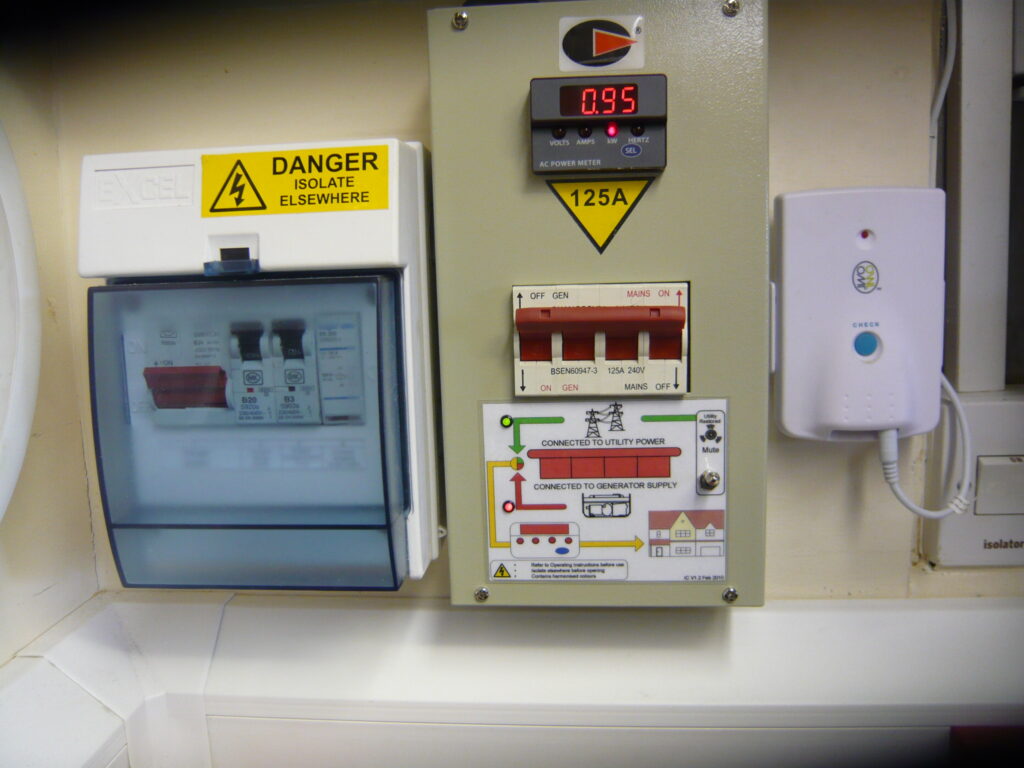
Operation – under normal conditions, the transfer switch is set to Utility supply, this is confirmed by a green 230vAC LED wired directly across the supply via a1A fuse.
On a sustained power outage, the generator is hooked up and started, the switch on the external socket inlet is turned to ON and the Red generator power available LED is lit, (the 230vAC LED is wired directly across the generator supply at the switch via 1A fuse).
Non essential circuit breakers in the consumer unit are turned to the OFF position, once done, the transfer switch generator power available LED is checked, and if still available, the transfer switch is operated to import power to the consumer unit from the generator.
As the transfer switch is in the garage, I would not know if the Utility power had been restored, I therefore fitted a 230vAC buzzer across the Utility supply via a switch, restoration of utility supply is indicated by an audible tone which obviously is switched OFF in normal Utility power operation.
To check that the generator is not being electrically overloaded, an ACM20 panel meter was fitted, this displays, amongst other things is power (Watts) being drawn, which is very useful for this monitoring function.
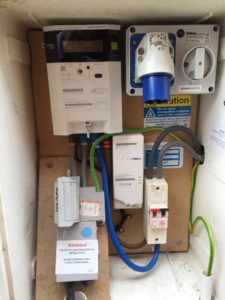
Original electricity cupboard
Supply company lowered the isolator to make room for the generator intake switch.
Transfer switch mounted next to garage dado power consumer unit.
Transfer switch fully installed with both Utility and Generator power available.
Consumer modified to RCBO and remote power off to garage supply
Smart meter installed August 2017
Generator plugged in on test.
System on test, instruction by the consumer unit, give the start-up and shutdown process including which breakers to turn off before changing over, the transfer switch panel meter is used for monitoring load to make sure the generator is not overloaded.
Update
17th December 2022 – I’ve noticed over a few months that the ACM20 display has been acting weird, and today it finally gave up giving me believable readings, so a new one is on order from Mouser.co.uk for the sum of £80.47.
31 January 2023 – Taken a while but finally got round to replacing the original meter, the details of the new one are:
www.murata-ps.com
ACM20-4-AC1-R-F-C
Part Number – 4900204
The only issue I had was getting the Current Transformer wires the right way round as I had to extend them, you know if its wrong when the Wattage stays at zero!
If you have a weather site using Saratoga and Leuven scripts and are considering moving server from North America to European servers….DON’T DO IT!!!!
The story started on 15 Oct 17, looking through cPanel on my GoDaddy site, it suggested that speed might be increased by moving to a server nearer to my location, this meant moving data from North America to Europe, as the transfer was free, what did I have to lose.
The data migration took 3 hours on 16 Oct 17, filled with high expectations that my site would load super fast, I clicked on chatteris.biz and waited, and waited and waited, the site took nearly a minute to load.
I rang GoDaddy service desk and spoke to an assistant who suggested it was due to the SSL certificate needing to be rekeyed on the new server and he sent me the details on how to do it, being nervous of breaking the site even more, I called back and they said they can rekey the certificate for £100 in 10 days time, I declined.
A great friend came round and together we rekeyed the SSL certificate, guess what,…..nothing changed!
I posted on WXForum and started this WXForum Topic , it turns out that their is a known issue with European servers and the only way to resolve it is to go back to North American server.
So, on the 23 Oct 17 after paying £19.20, my data was once again whistling over the big pond, and this time it worked 🙂
The moral of the story is that if it isn’t broken, don’t try and fix it, the second moral is don’t move GoDaddy servers to other GoDaddy servers unless you want a world of pain.
Update 23rd February 2022
Due to increasing costs and charging for an SSL certificate, I decided to jump ship and join Hostgator, the blog of the transfer is HERE.
This was one of those jobs that you thought it was a good idea at the time, once construction started and things didn’t go as planned, I wished I’d never started it and the only way out was to spend your way out!
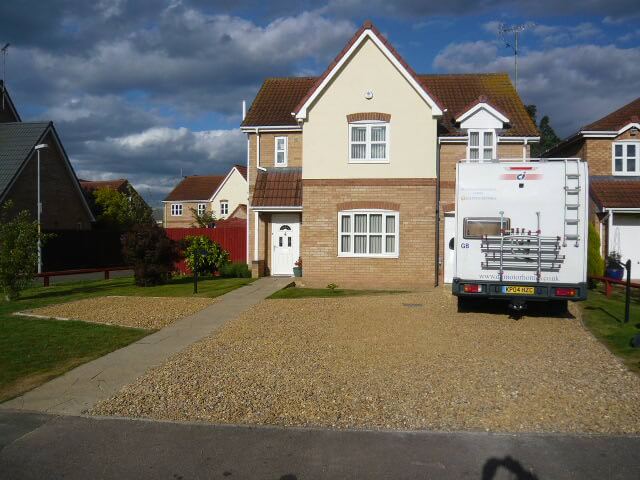
April 2011 was day one, the plan was to sink a vehicle inspection pit into the drive so that when it’s not in use, it would be completely covered and therefore unnoticeable, the pit had to be narrow enough to take the small car we had (Fiat Punto) but robust enough so that when our 3.5t motorhome was over it the walls didn’t collapse with me in it, also it had to be the correct height that I could work under the car or van comfortably and the right length that I can get to at least half of the underside of the van without it sticking out across the pavement (sidewalk for US visitors).
Planning
First stage was to confirm that planning permission didn’t apply, which it didn’t and secondly that there were no buried services that could stop the project, I did lift manlids to check the direction of pipes and wrote to the gas, electricity, telephone and water utility companies and all came back ok, the only thing I had to move out of the way was the armoured conduit which goes to the outside lights which was easy as I’d fitted it.
If the pit was nearer to the house or impacted on the house footings, Building Regulations may have come into play, as it was the pit was over 4m away from any external wall, so no issues.
Design
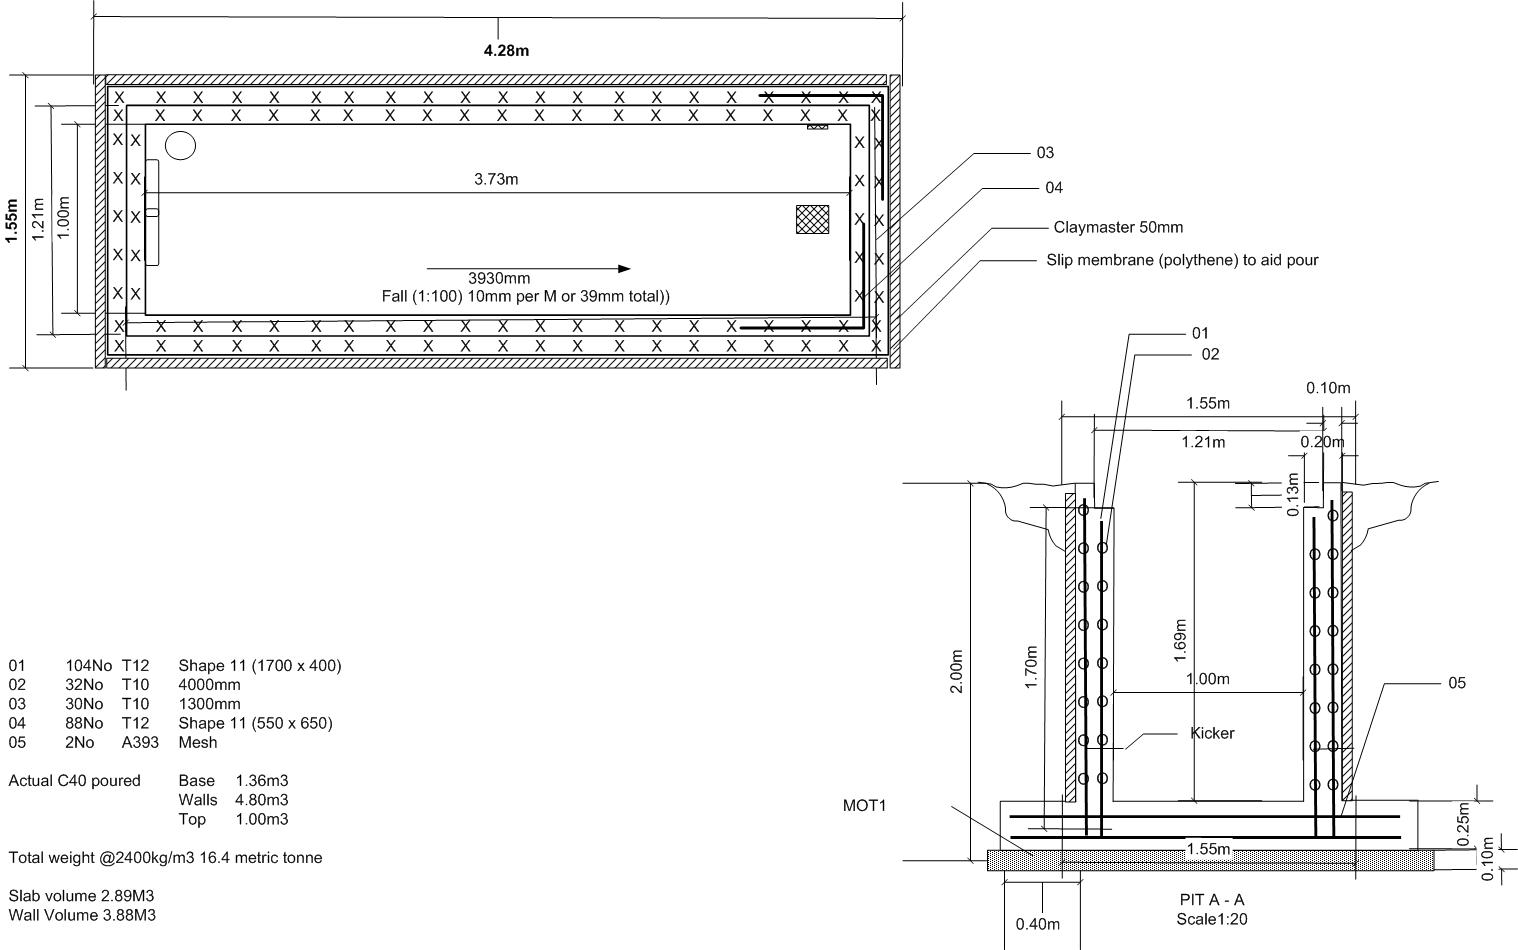
One the dimensions were decided on, I started researching the reinforcing steel bars and type of concrete required, from this I drew a rebar plan which gave me the quantities of steel and concrete needed.
I did explore using a ‘tanked’ construction and simply digging a hole and sinking it in, what bothered me was the high water table we have here and if you google ‘hydrostatic pressure’ their are examples where swimming pools have simply been pushed out of the ground, not a good look!
I opted to use 18mm plywood to make a ‘shuttered’ form even though the wood would be wasted, on balance it was still cheaper than hiring in bespoke steel panels from a local supplier.
Build
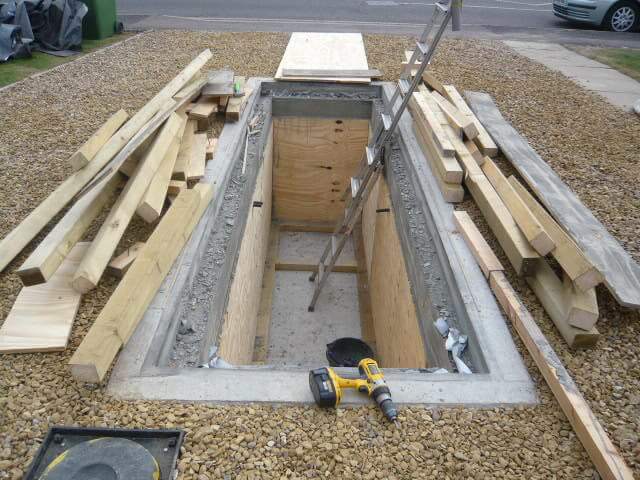
The following series of pictures show the construction from the marking out of the hole to the finished pit, I mentioned at the start about things not turning out as expected, I made a flawed assumption that after the hole was dug, I could get away without propping the sides (I know it was stupid!), anyway fortunately I wasn’t in the hole at the time, but the sides caved in, now the problem this presented was that the cost to fix this.
The cost escalated as I would need a JCB rather than a mini digger to scoop out the spill due to the now extended boom reach required, also I would need two more 12m2 skips at £110.00 each, not to mention the additional backfill to make good the sides where the clay had slid from, all in all a blinking nightmare, so, do I fill the lot in and cut may losses, ore spend out of it, well the rest is history and a year later the credit card was finally paid off :-).
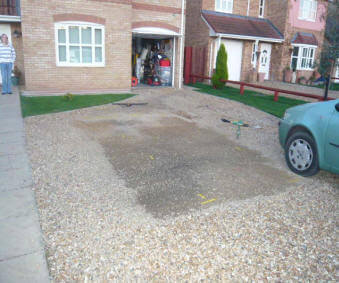
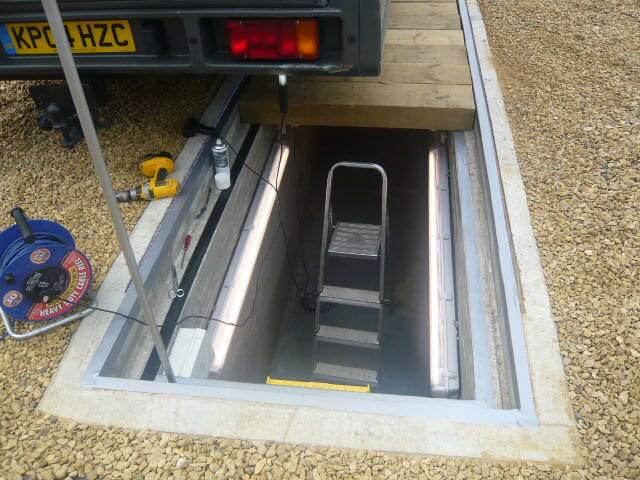
The finished internal pit dimensions are W 970mm x H 1230mm x L 3680mm (W 38.1″ x H 48.4″ x L 144.8″)
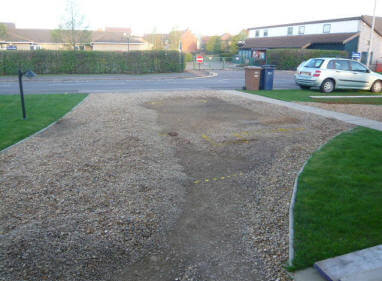
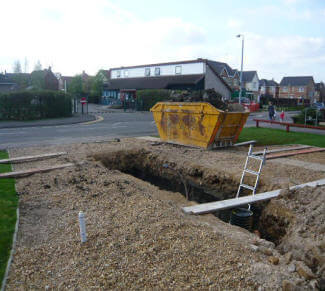
Outline marked out
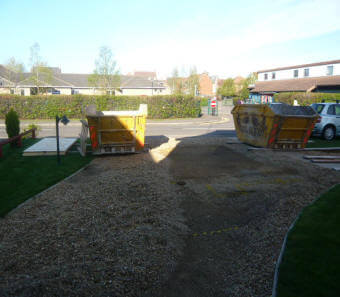
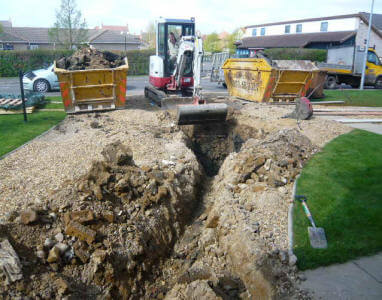
Two skips ready for the spoil.
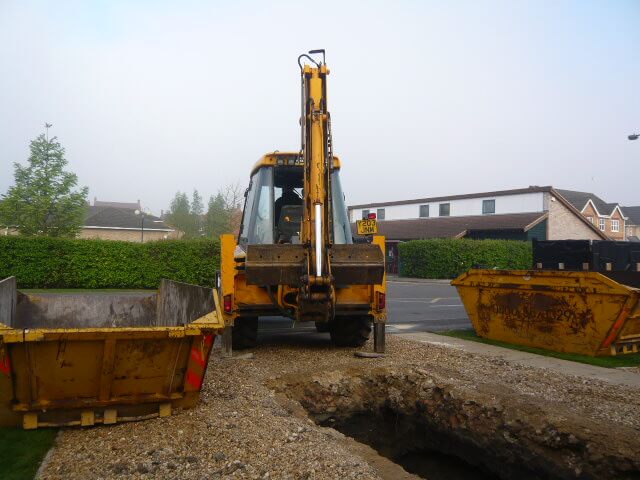
Mini digger and driver ready to start.
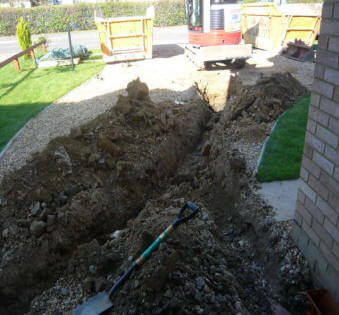
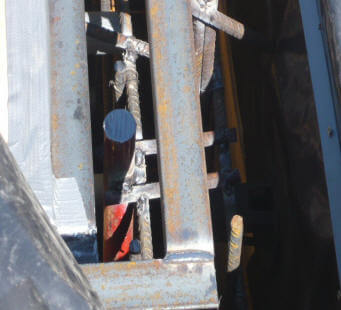
First trenches dug, one to pick up the power, compressed air lines and sump pump delivery pipework to a drain, the other trench was for the 6″ vent pipe to the base of the pit.
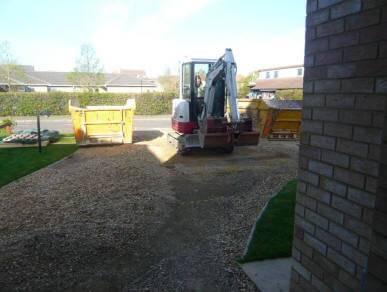
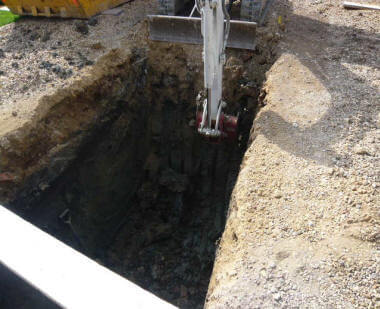
Main pit dig started
The driver did a very neat job.
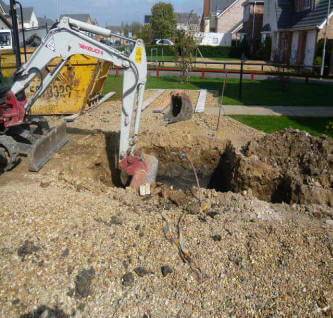
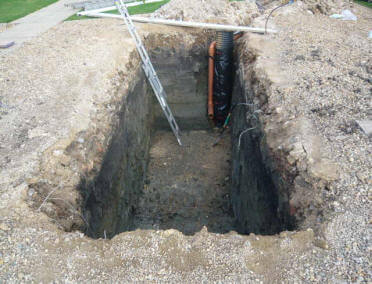
All dug out and ladder down for inspection.
Completed Holes, the brown pipe is from the fresh air vent stack.
All done – spot on digging job, brown pipe is for the air vent and the Black tube is for the submersible pump to pump the pit out as their was no intention to make it waterproof.
Big Problem!
Everything was going so well until the sides collapsed due to the clay drying out.
Pit sides caved in the day after it was dug as I didn’t support them, the ground is heavy clay which slipped leaving a overhang, this overhang was soil and hay as the land on which the house was built used to be a farmers field.
Workaround
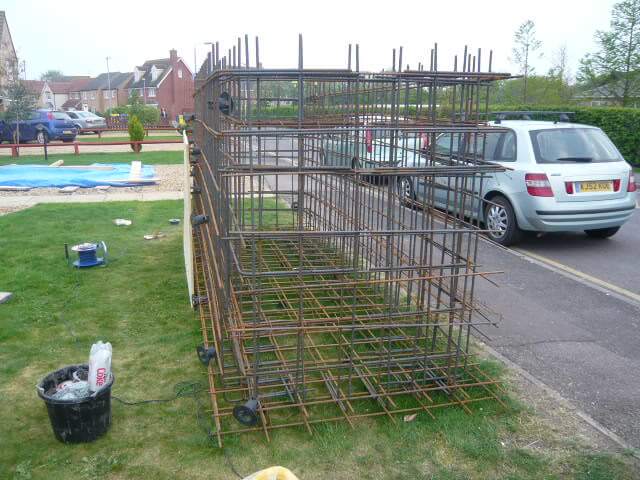
So, change of plan, I decided to build the steel work outside of the hole and surround it in shuttering ply, and have the digger lift it into the hole……
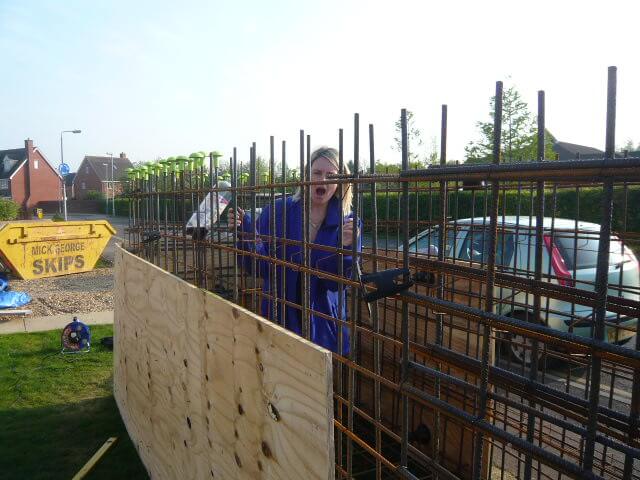
Start of cage construction
Lin looking happy to help
JCB with longer reach than a minidigger to clear the collapsed hole
Side shuttering ongoing
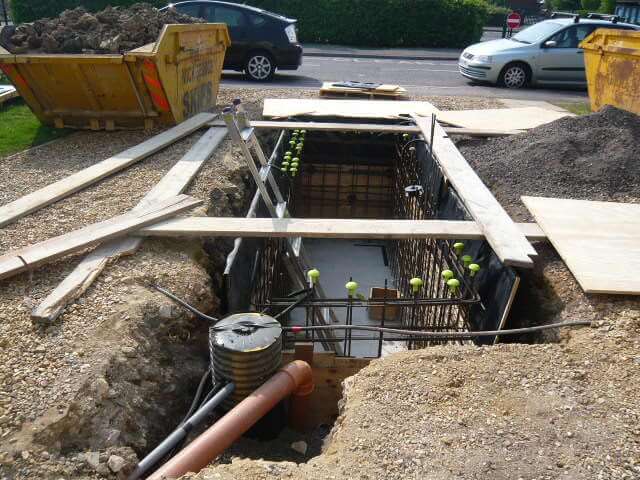
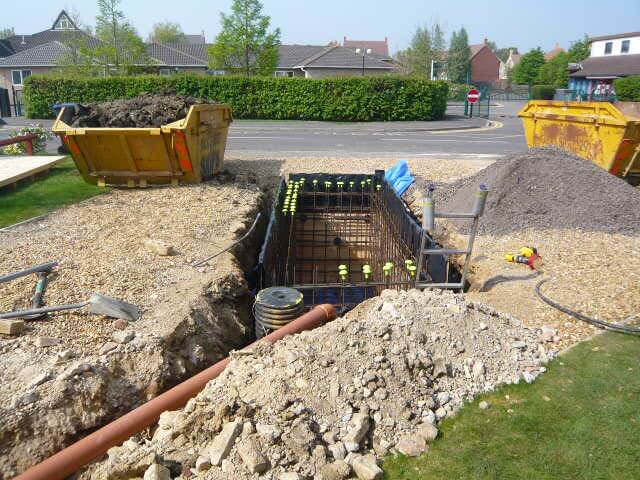
With the cage lowered in, the base was concreted in with a raised ‘kicker’ lip created by formwork, this enabled the wall plywood to be pushed against this, supporting the base of the wall section.
As I didn’t know the cubic meterage of concrete required, I opted for a company that mix on site and you pay for what you use – Cardinalis.
Wall shuttering in place
Rebar welded to angle iron edge protectors
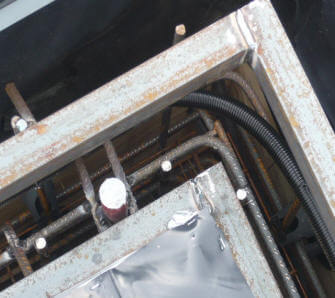
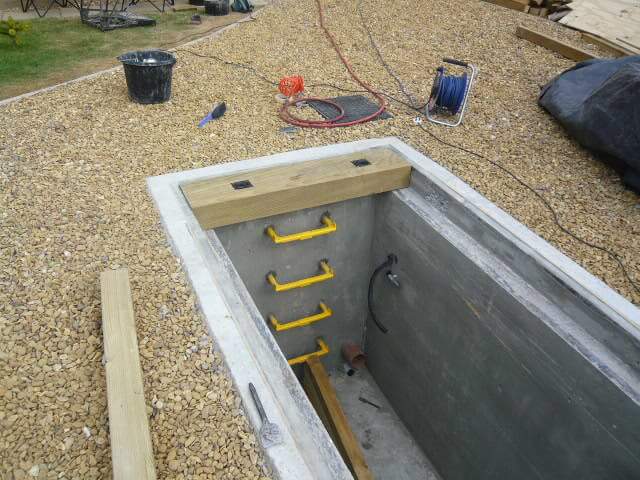
During the wall shuttering, flexible conduit was installed for pit lighting, power socket and compressed air line.
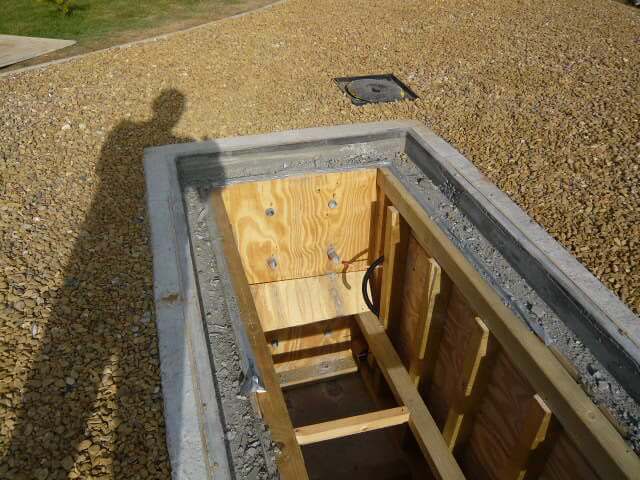
During the shuttering of the access end wall, I drilled holes in the plywood and pushed in waste pipe, the holes left when the form is stripper will be for the Step Irons, also you can see flexible conduit sticking out from the garage which will bring power and compressed air to the pit,
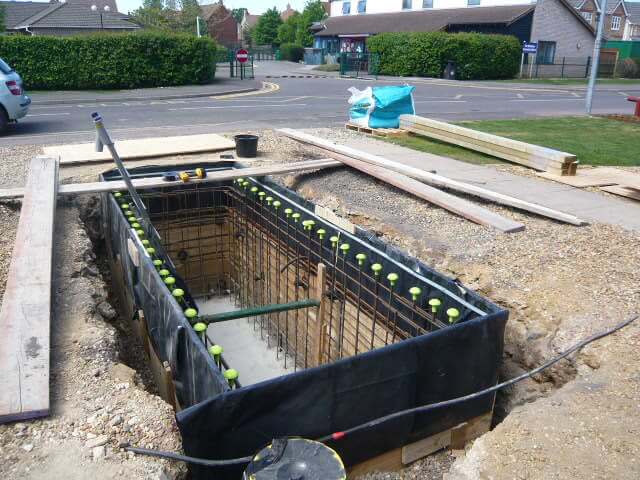
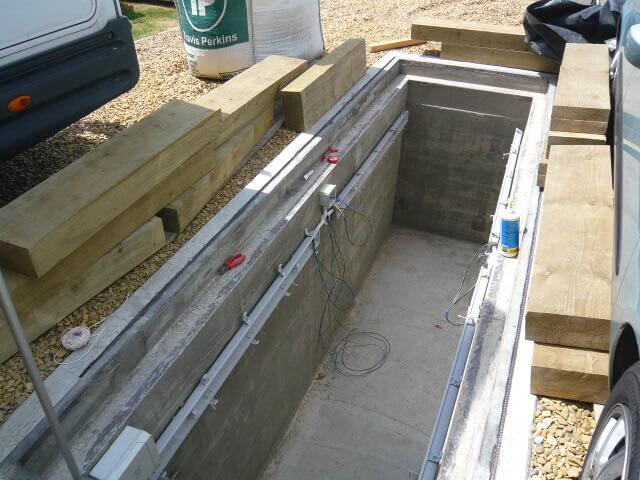
Stripping of the forms, very exciting part of the project, three separate pours were used, the first was the base including ‘kicker’, the walls were then shuttered and the second pour was for the walls, the final pour was to build up to the finished level and form the lip for the wooden sleeper pit cover.
The picture shows the fitment of the removeable sleepers and the ‘Step Irons’ down into the pit, the Step Irons were cemented in the holes with a high strength/ rapid set mixture.
Fluorescent lights being fitted to the walls of the pit, however, due to the damp atmosphere, these were removed at a later date.
First job was to repair a broken molding.
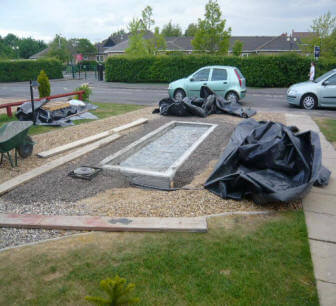
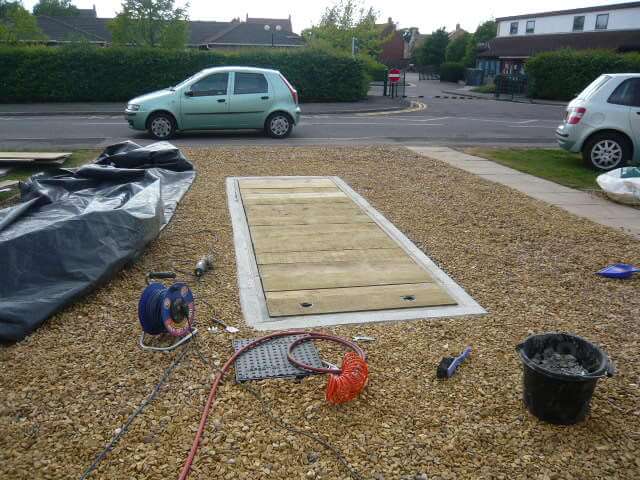
All finished, with the pit boards on and lightly covered with gravel. everything blends in.
Update
Move the clock forward to 2022, some 11 Years after I initially built the pit, the motorhome had well gone and I’ve changed my car so their is no need for the pit now, however, it has come in very handy in an unexpected way.
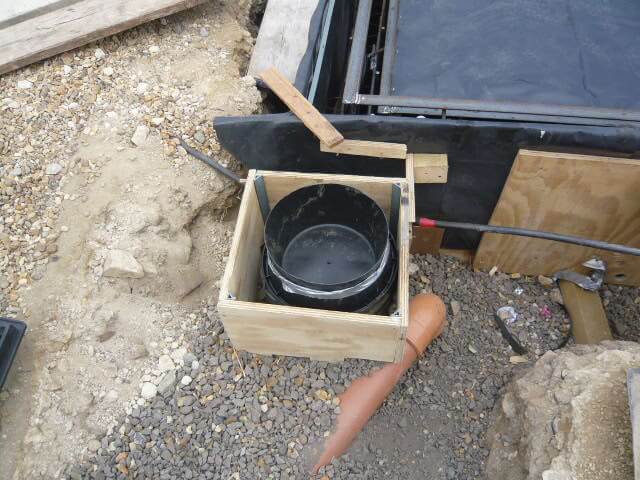
I have re-seeded my front lawn and these needs copious amounts of water to keep it healthy, as we are on a water meter, I turned my attention to the volume of water in the pit, this is made up of ground water and surface water getting into the pit.
It turns out that I have approximately 4390.6 litres or 965.7 gallons (1159.8 US gallons) of water storage on my drive, so I bought a pump and reduced the metered water on the lawn :-), plus I have now linked it to my my lawn irrigation system.
An added bonus is that the pit will refill due to the local high water table also I have bought a stopple for the rainwater drain, this means that rainwater from the roof will, instead of going into the surface water drain, it will use a redundant ‘pump out’ line from the pit to drain, as a ‘fill’ line’ instead.
The other thing to mention is that the original wooden pit cover swelled and rotted so needed replacement, I used 125mm sleepers and had the sawmill cut these to 1160mm which is slightly shorter than the original sleepers, hopefully this will leave enough room for expansion should they swell in the future.
The cost of the sleepers from Brigstock Sawmill was just under £300.
A blog about stuff that interests me or I have done.
We use cookies on our website to give you the most relevant experience by remembering your preferences and repeat visits. By clicking “Accept All”, you consent to the use of ALL the cookies. However, you may visit "Cookie Settings" to provide a controlled consent.
This website uses cookies to improve your experience while you navigate through the website. Out of these, the cookies that are categorized as necessary are stored on your browser as they are essential for the working of basic functionalities of the website. We also use third-party cookies that help us analyze and understand how you use this website. These cookies will be stored in your browser only with your consent. You also have the option to opt-out of these cookies. But opting out of some of these cookies may affect your browsing experience.
Necessary cookies are absolutely essential for the website to function properly. These cookies ensure basic functionalities and security features of the website, anonymously.
Cookie
Duration
Description
_GRECAPTCHA
5 months 27 days
This cookie is set by the Google recaptcha service to identify bots to protect the website against malicious spam attacks.
cookielawinfo-checkbox-advertisement
1 year
Set by the GDPR Cookie Consent plugin, this cookie is used to record the user consent for the cookies in the "Advertisement" category .
cookielawinfo-checkbox-analytics
11 months
This cookie is set by GDPR Cookie Consent plugin. The cookie is used to store the user consent for the cookies in the category "Analytics".
cookielawinfo-checkbox-functional
11 months
The cookie is set by GDPR cookie consent to record the user consent for the cookies in the category "Functional".
cookielawinfo-checkbox-necessary
11 months
This cookie is set by GDPR Cookie Consent plugin. The cookies is used to store the user consent for the cookies in the category "Necessary".
cookielawinfo-checkbox-others
11 months
This cookie is set by GDPR Cookie Consent plugin. The cookie is used to store the user consent for the cookies in the category "Other.
cookielawinfo-checkbox-performance
11 months
This cookie is set by GDPR Cookie Consent plugin. The cookie is used to store the user consent for the cookies in the category "Performance".
CookieLawInfoConsent
1 year
Records the default button state of the corresponding category & the status of CCPA. It works only in coordination with the primary cookie.
PHPSESSID
session
This cookie is native to PHP applications. The cookie is used to store and identify a users' unique session ID for the purpose of managing user session on the website. The cookie is a session cookies and is deleted when all the browser windows are closed.
viewed_cookie_policy
11 months
The cookie is set by the GDPR Cookie Consent plugin and is used to store whether or not user has consented to the use of cookies. It does not store any personal data.
Functional cookies help to perform certain functionalities like sharing the content of the website on social media platforms, collect feedbacks, and other third-party features.
Performance cookies are used to understand and analyze the key performance indexes of the website which helps in delivering a better user experience for the visitors.
Analytical cookies are used to understand how visitors interact with the website. These cookies help provide information on metrics the number of visitors, bounce rate, traffic source, etc.
Cookie
Duration
Description
_ga
2 years
The _ga cookie, installed by Google Analytics, calculates visitor, session and campaign data and also keeps track of site usage for the site's analytics report. The cookie stores information anonymously and assigns a randomly generated number to recognize unique visitors.
_ga_92TJCVGJP2
2 years
This cookie is installed by Google Analytics.
_gat_gtag_UA_48800884_1
1 minute
Set by Google to distinguish users.
_gid
1 day
Installed by Google Analytics, _gid cookie stores information on how visitors use a website, while also creating an analytics report of the website's performance. Some of the data that are collected include the number of visitors, their source, and the pages they visit anonymously.
CONSENT
2 years
YouTube sets this cookie via embedded youtube-videos and registers anonymous statistical data.
is_unique
5 years
StatCounter sets this cookie to determine whether a user is a first-time or a returning visitor and to estimate the accumulated unique visits per site.
is_visitor_unique
2 years
StatCounter sets this cookie to determine whether a user is a first-time or a returning visitor.
sc_is_visitor_unique
2 years
StatCounter sets this cookie to determine whether a user is a first-time or a returning visitor.
Advertisement cookies are used to provide visitors with relevant ads and marketing campaigns. These cookies track visitors across websites and collect information to provide customized ads.
Cookie
Duration
Description
NID
6 months
NID cookie, set by Google, is used for advertising purposes; to limit the number of times the user sees an ad, to mute unwanted ads, and to measure the effectiveness of ads.
VISITOR_INFO1_LIVE
past
A cookie set by YouTube to measure bandwidth that determines whether the user gets the new or old player interface.
YSC
session
YSC cookie is set by Youtube and is used to track the views of embedded videos on Youtube pages.
yt-remote-connected-devices
never
YouTube sets this cookie to store the video preferences of the user using embedded YouTube video.
yt-remote-device-id
never
YouTube sets this cookie to store the video preferences of the user using embedded YouTube video.
yt.innertube::nextId
never
This cookie, set by YouTube, registers a unique ID to store data on what videos from YouTube the user has seen.
yt.innertube::requests
never
This cookie, set by YouTube, registers a unique ID to store data on what videos from YouTube the user has seen.