
Updated 9 December 2022
This was one of those jobs that you thought it was a good idea at the time, once construction started and things didn’t go as planned, I wished I’d never started it and the only way out was to spend your way out!
April 2011 was day one, the plan was to sink a vehicle inspection pit into the drive so that when it’s not in use, it would be completely covered and therefore unnoticeable, the pit had to be narrow enough to take the small car we had (Fiat Punto) but robust enough so that when our 3.5t motorhome was over it the walls didn’t collapse with me in it, also it had to be the correct height that I could work under the car or van comfortably and the right length that I can get to at least half of the underside of the van without it sticking out across the pavement (sidewalk for US visitors).
Planning
First stage was to confirm that planning permission didn’t apply, which it didn’t and secondly that there were no buried services that could stop the project, I did lift manlids to check the direction of pipes and wrote to the gas, electricity, telephone and water utility companies and all came back ok, the only thing I had to move out of the way was the armoured conduit which goes to the outside lights which was easy as I’d fitted it.
If the pit was nearer to the house or impacted on the house footings, Building Regulations may have come into play, as it was the pit was over 4m away from any external wall, so no issues.
Design
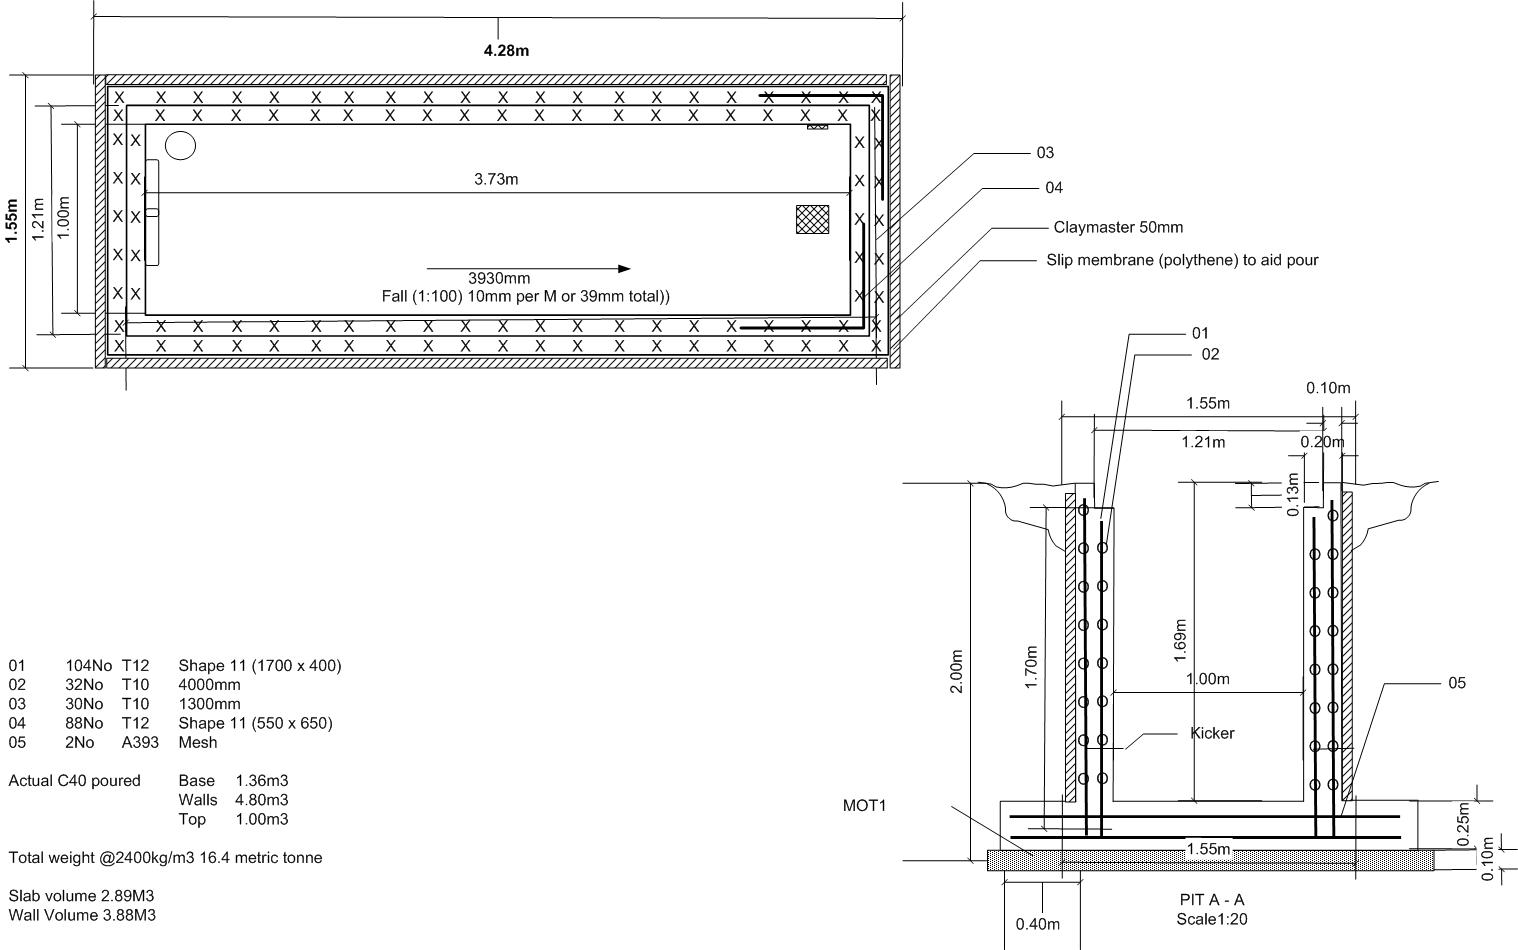
One the dimensions were decided on, I started researching the reinforcing steel bars and type of concrete required, from this I drew a rebar plan which gave me the quantities of steel and concrete needed.
I did explore using a ‘tanked’ construction and simply digging a hole and sinking it in, what bothered me was the high water table we have here and if you google ‘hydrostatic pressure’ their are examples where swimming pools have simply been pushed out of the ground, not a good look!
I opted to use 18mm plywood to make a ‘shuttered’ form even though the wood would be wasted, on balance it was still cheaper than hiring in bespoke steel panels from a local supplier.
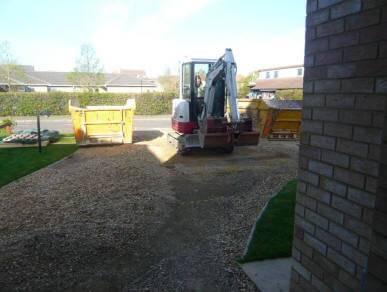
Build
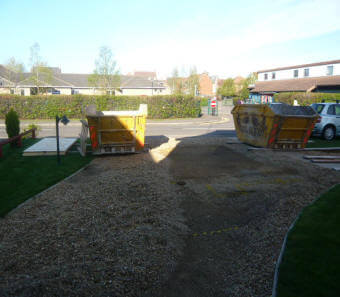
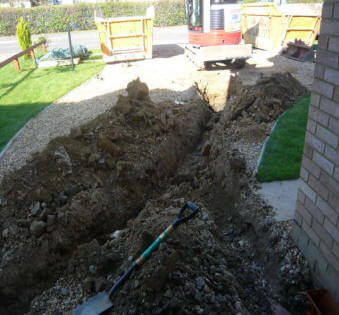
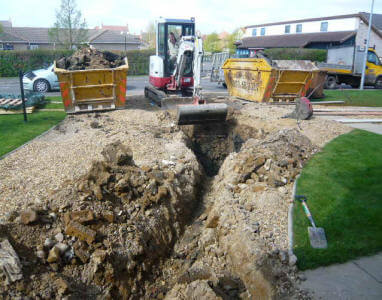
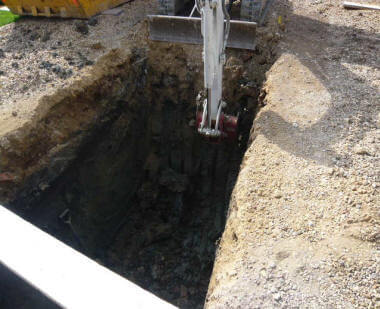
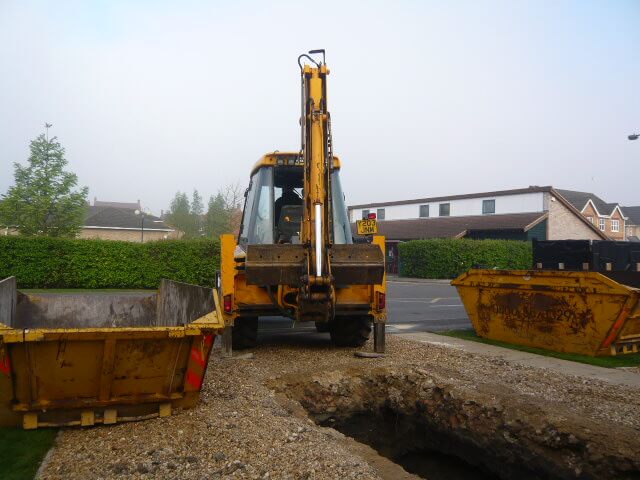
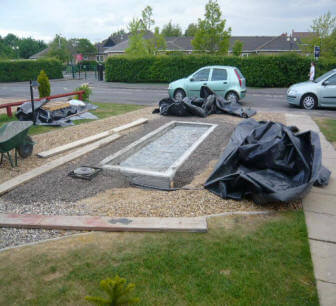
The following series of pictures show the construction from the marking out of the hole to the finished pit, I mentioned at the start about things not turning out as expected, I made a flawed assumption that after the hole was dug, I could get away without propping the sides (I know it was stupid!), anyway fortunately I wasn’t in the hole at the time, but the sides caved in, now the problem this presented was that the cost to fix this.
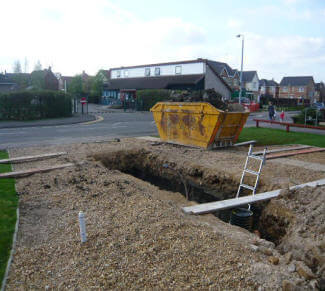
The cost escalated as I would need a JCB rather than a mini digger to scoop out the spill due to the now extended boom reach required, also I would need two more 12m2 skips at £110.00 each, not to mention the additional backfill to make good the sides where the clay had slid from, all in all a blinking nightmare, so, do I fill the lot in and cut may losses, ore spend out of it, well the rest is history and a year later the credit card was finally paid off :-).
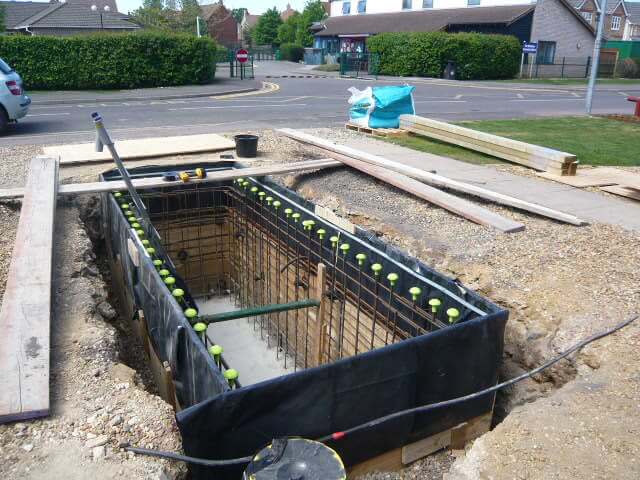
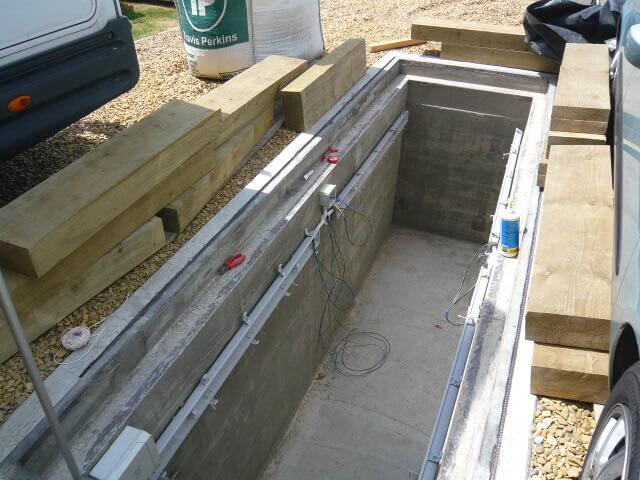
The finished internal pit dimensions are W 970mm x H 1230mm x L 3680mm (W 38.1″ x H 48.4″ x L 144.8″)
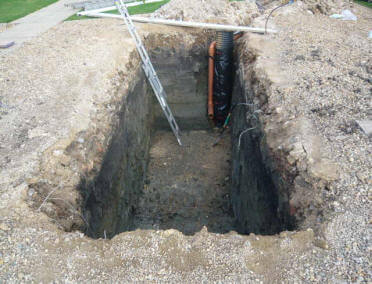
| All done – spot on digging job, brown pipe is for the air vent and the Black tube is for the submersible pump to pump the pit out as their was no intention to make it waterproof. |
Big Problem!


Pit sides caved in the day after it was dug as I didn’t support them, the ground is heavy clay which slipped leaving a overhang, this overhang was soil and hay as the land on which the house was built used to be a farmers field.
Workaround
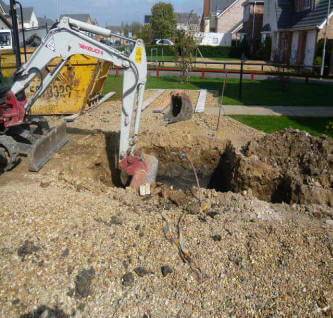
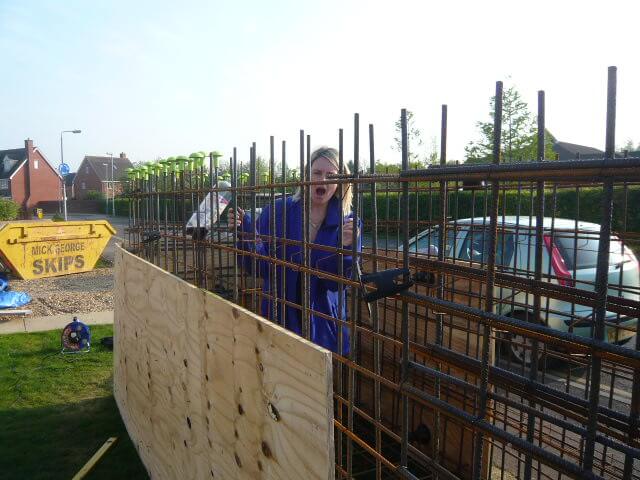
So, change of plan, I decided to build the steel work outside of the hole and surround it in shuttering ply, and have the digger lift it into the hole……
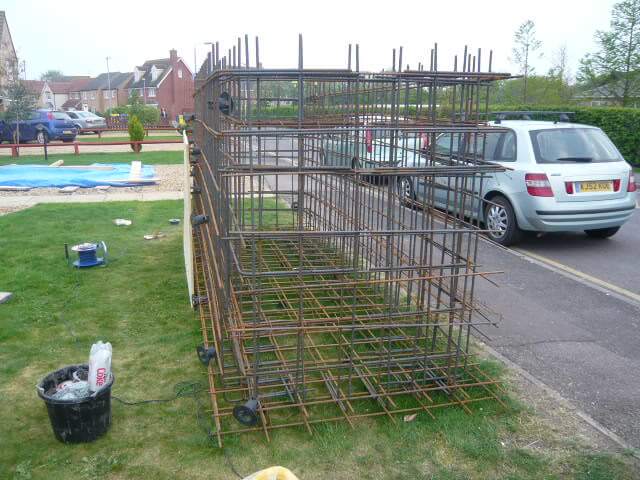
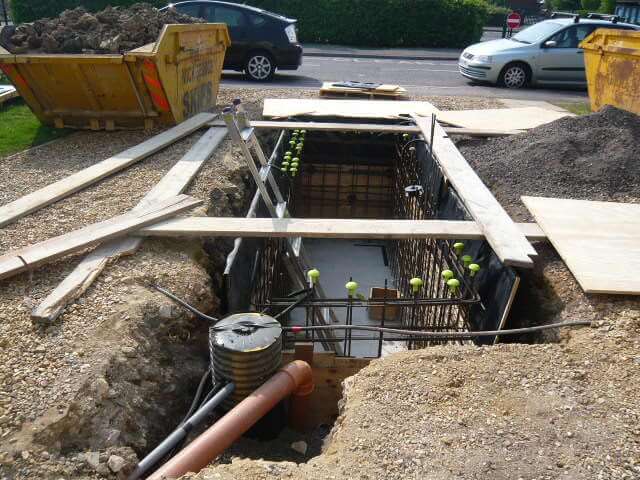
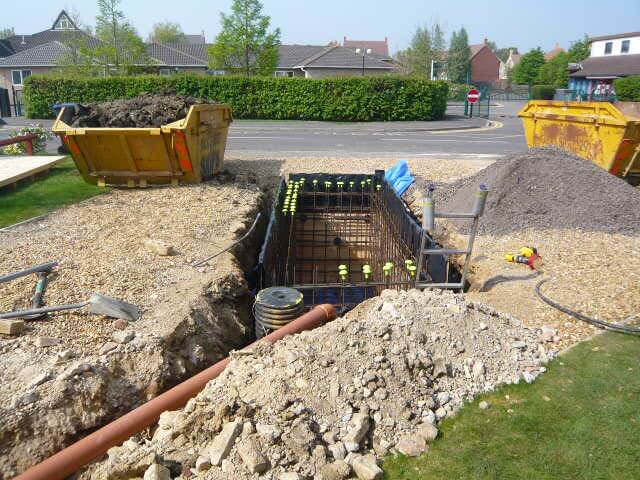
With the cage lowered in, the base was concreted in with a raised ‘kicker’ lip created by formwork, this enabled the wall plywood to be pushed against this, supporting the base of the wall section.
As I didn’t know the cubic meterage of concrete required, I opted for a company that mix on site and you pay for what you use – Cardinalis.
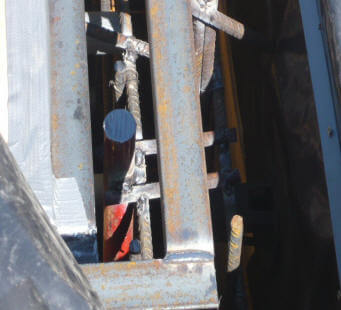
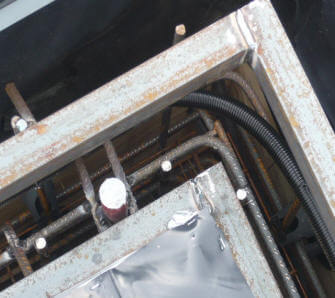
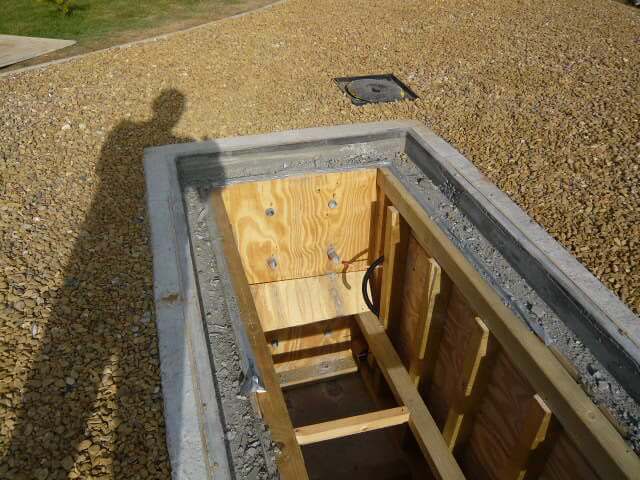
During the shuttering of the access end wall, I drilled holes in the plywood and pushed in waste pipe, the holes left when the form is stripper will be for the Step Irons, also you can see flexible conduit sticking out from the garage which will bring power and compressed air to the pit,
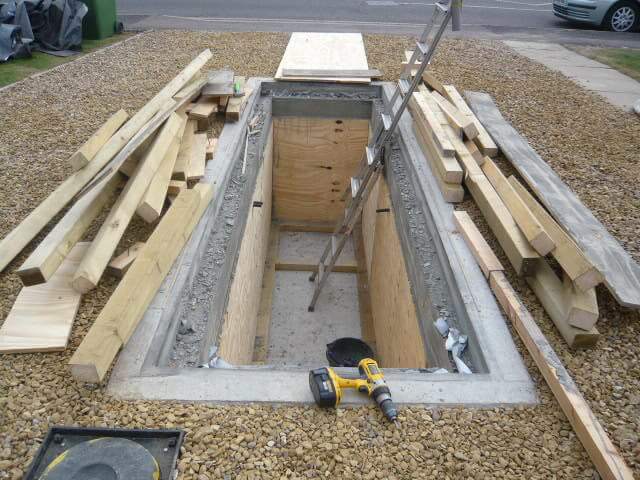
Stripping of the forms, very exciting part of the project, three separate pours were used, the first was the base including ‘kicker’, the walls were then shuttered and the second pour was for the walls, the final pour was to build up to the finished level and form the lip for the wooden sleeper pit cover.
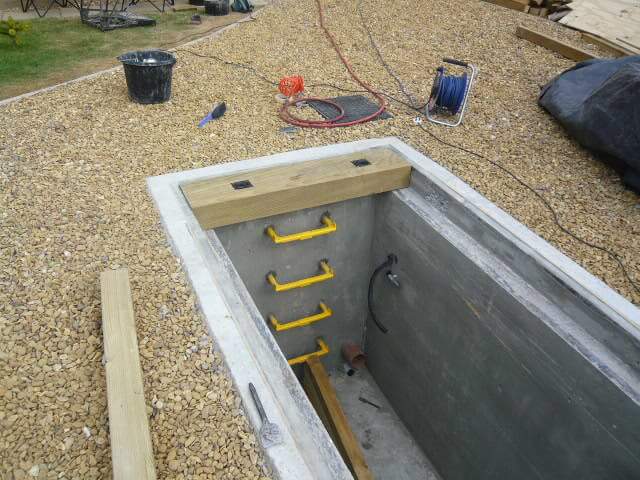
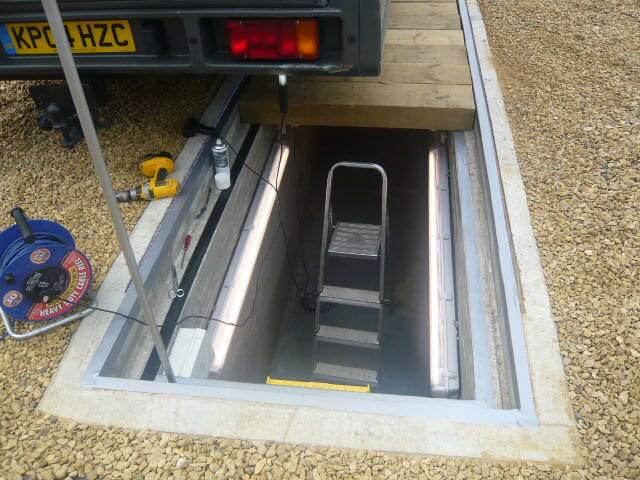
The picture shows the fitment of the removeable sleepers and the ‘Step Irons’ down into the pit, the Step Irons were cemented in the holes with a high strength/ rapid set mixture.
Fluorescent lights being fitted to the walls of the pit, however, due to the damp atmosphere, these were removed at a later date.
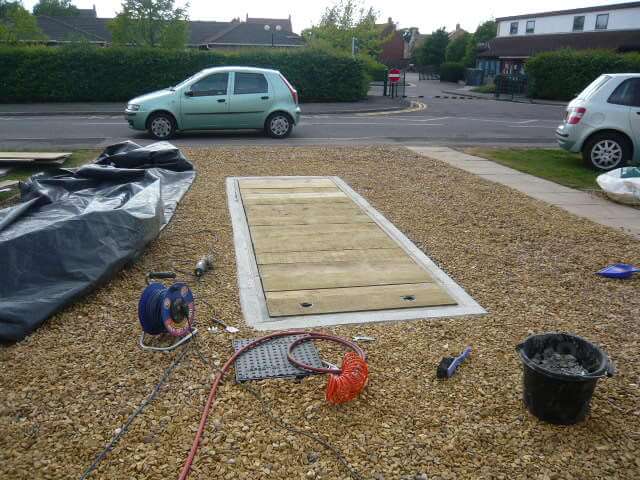
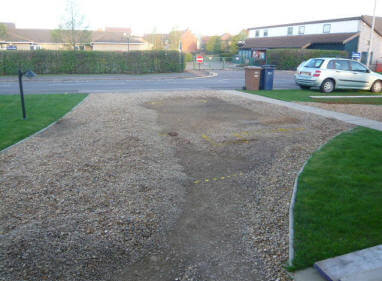
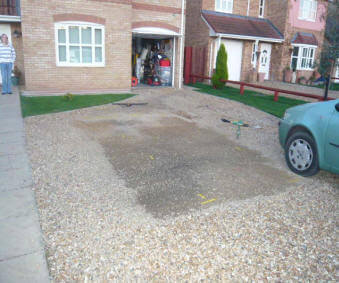
All finished, with the pit boards on and lightly covered with gravel. everything blends in.
Update
Move the clock forward to 2022, some 11 Years after I initially built the pit, the motorhome had well gone and I’ve changed my car so their is no need for the pit now, however, it has come in very handy in an unexpected way.
I have re-seeded my front lawn and these needs copious amounts of water to keep it healthy, as we are on a water meter, I turned my attention to the volume of water in the pit, this is made up of ground water and surface water getting into the pit.
It turns out that I have approximately 4390.6 litres or 965.7 gallons (1159.8 US gallons) of water storage on my drive, so I bought a pump and reduced the metered water on the lawn :-), plus I have now linked it to my my lawn irrigation system.
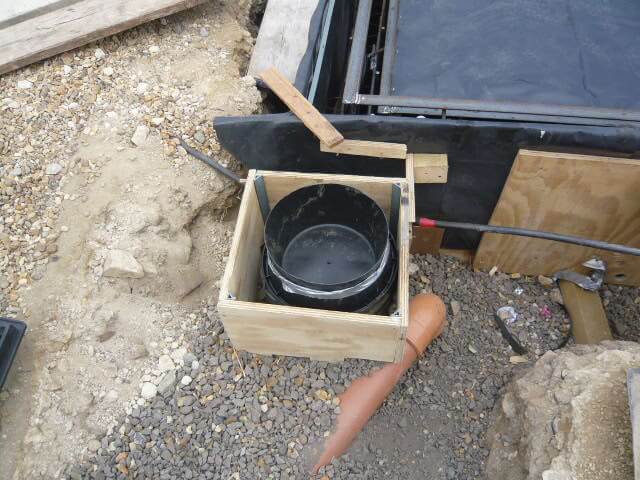
An added bonus is that the pit will refill due to the local high water table also I have bought a stopple for the rainwater drain, this means that rainwater from the roof will, instead of going into the surface water drain, it will use a redundant ‘pump out’ line from the pit to drain, as a ‘fill’ line’ instead.
The other thing to mention is that the original wooden pit cover swelled and rotted so needed replacement, I used 125mm sleepers and had the sawmill cut these to 1160mm which is slightly shorter than the original sleepers, hopefully this will leave enough room for expansion should they swell in the future.
The cost of the sleepers from Brigstock Sawmill was just under £300.