Updated 19 April 2023
Note – Boiler replaced, however Magnaclean has been retained, Blog HERE.
Today (21 April 18), I decided to install a Magnaclean Pro 2 in my heating system which has a system boiler with hot water and central heating controlled using the ‘S’ plan design.
Magnaclean removes suspended solids (ferrous (Magnatite) and non ferrous) from the circulating water and traps them within the canister, this is then cleaned out at regular intervals.
The removal of these particulates will improve the longevity of the boiler and its parts, although my system water has been previously treated with inhibitor and ran clear during the drain down to fit this, these devices are installed when boilers are replaced in compliance with Building Regulations Part L , so I thought I’d bring it up to code.
The instructions specify that the Magnaclean is installed on the return to the boiler after the last radiator and before any system filling/pressurisation point, next to the boiler was a good location for me.
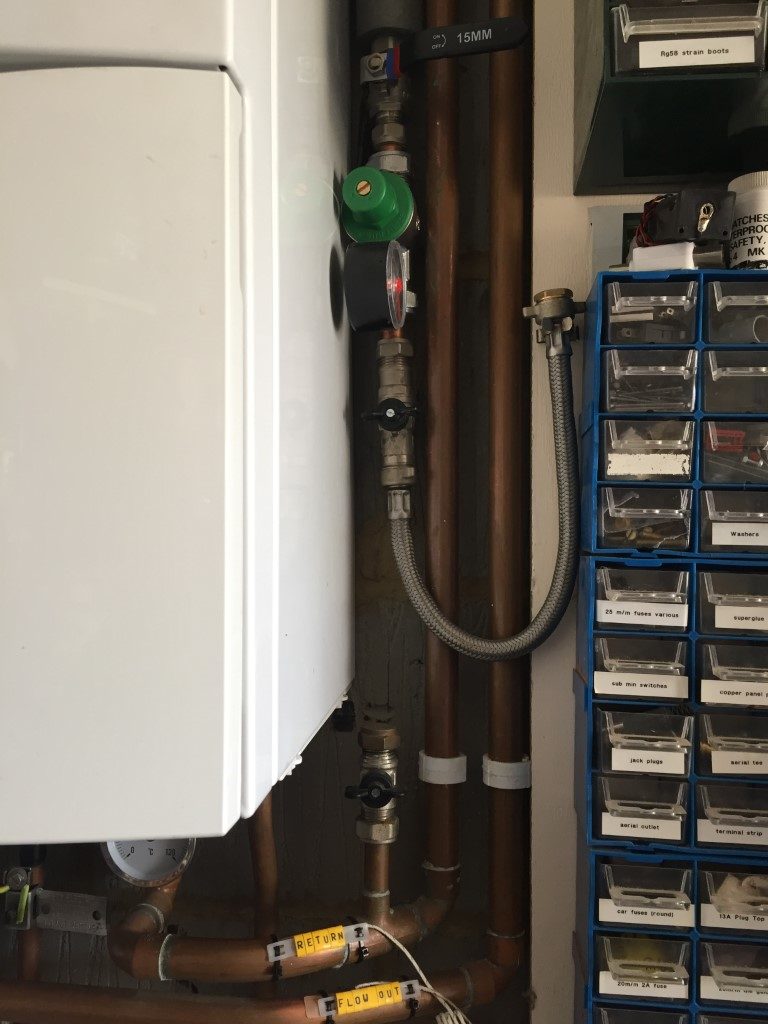
In order to make room for the Magnaclean to fit, the cold water filling loop needed to be raised.
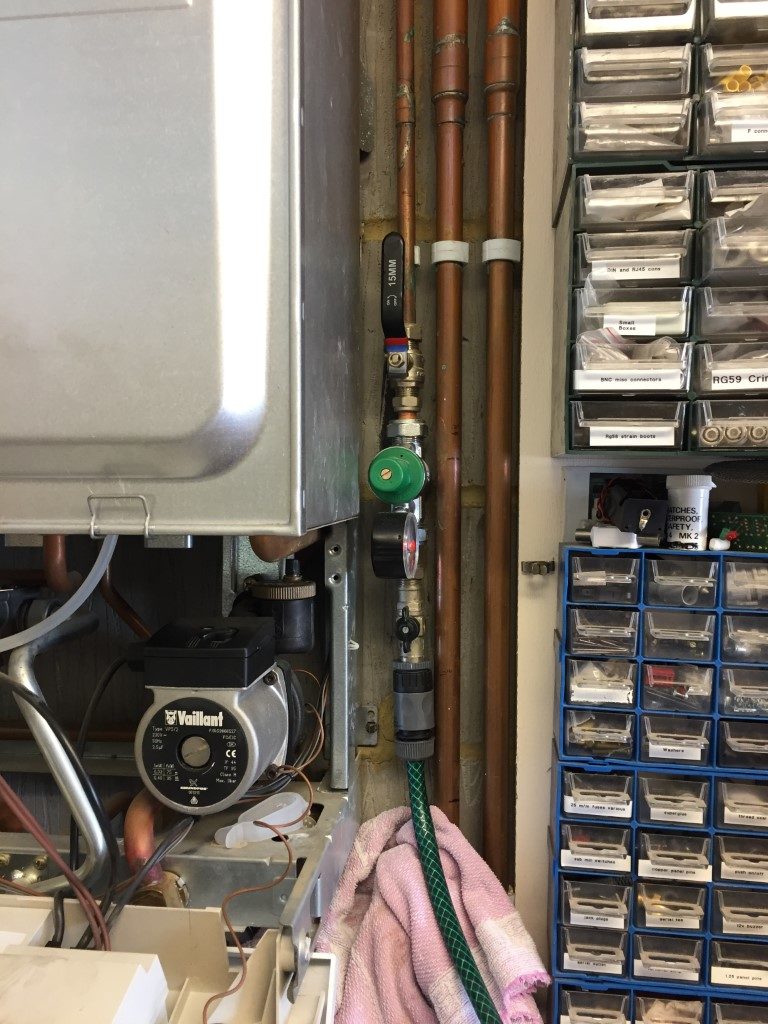
With the boiler power isolated, the case was removed to give more working room, a hoselok fitting was screwed onto the cold fill line and a hose ran to drain, I then isolated at the stopcock and drain the line ready for cutting the 15mm copper pipe and raising the whole assembly.
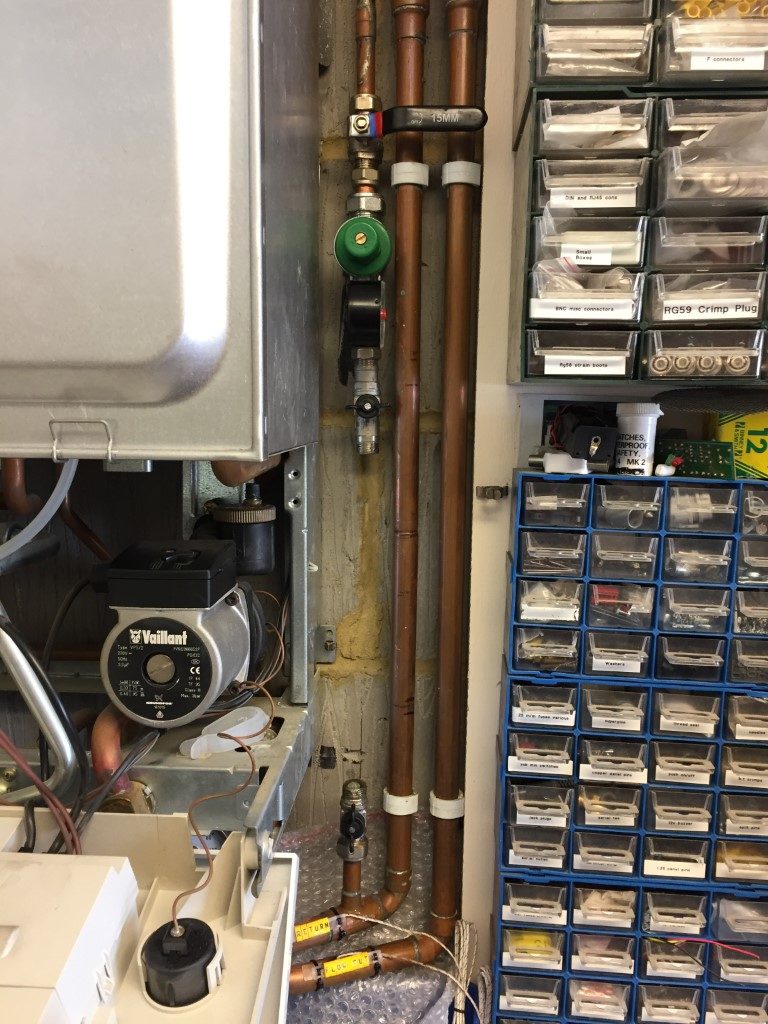
Cold fill raised and leak tested, the maximum height was governed by the length of the braided filling loop, the 22mm copper pipe nearest the boiler is the return and this has two marks 150mm apart indicating where the cuts need to be made.
I used the hoselok fitting on the return filling valve, and drained the heating system water opening a couple of upstairs radiators to break any vacuum.
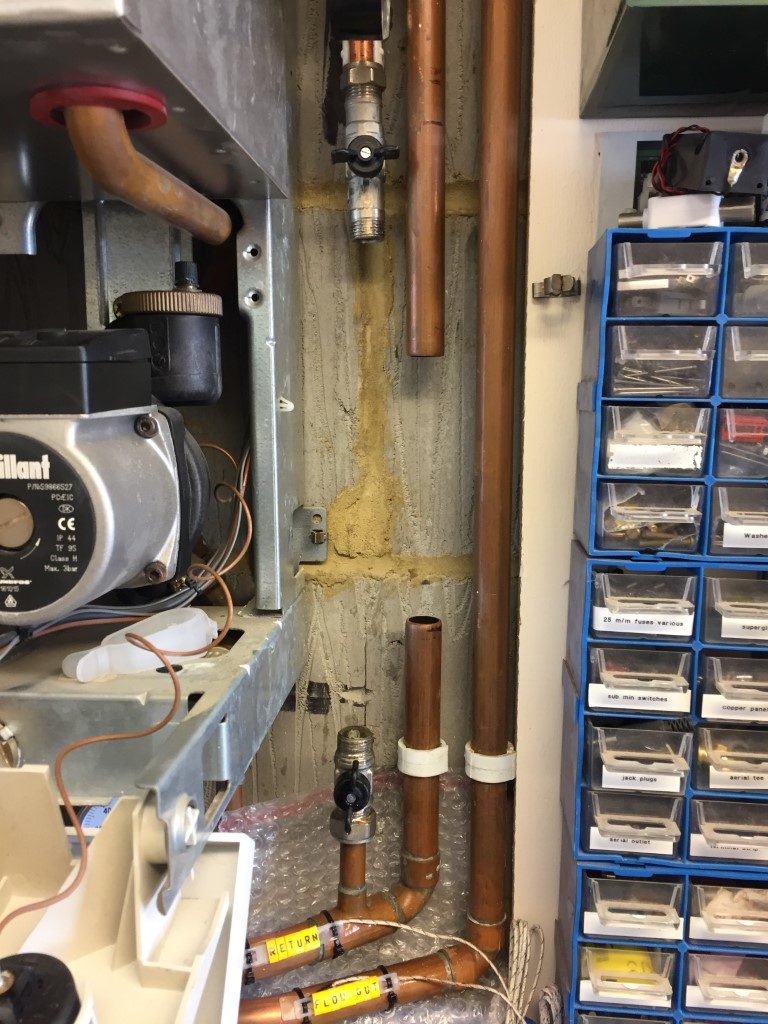
Using a 22mm pipe slice it was fairly easy to cut the pipe, due to the restricted working space, I had to use pump pliers to grip and turn the pipe slice through some of its travel.
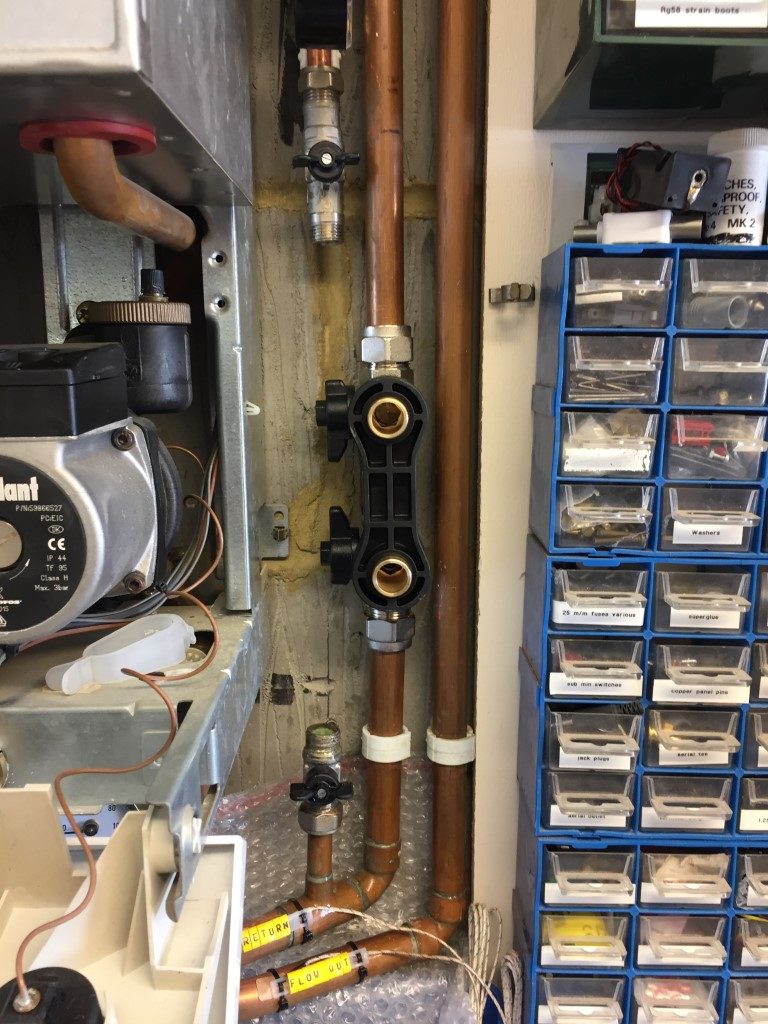
The Magnaclean has a slip socket allowing the unit to slide over the pipe, then once engaged, the unit is lifted slightly so the inlet pipe engages allowing a nut and olive compression fitting to be made, I used jointing compound on both top and bottom olives before tightening.
The isolation valves are on the left, rather than the right, I had to use this orientation so I could easily access the isolation valves, I was going to use obtuse street elbows to form a tight set in the return pipe, lifting the Magnaclean clear of the flow pipe so I could operate the isolation valves, but this was way too much work for no real gain, especially as effective fluid flow is a function of the Magnaclean canister and not the valve orientation.
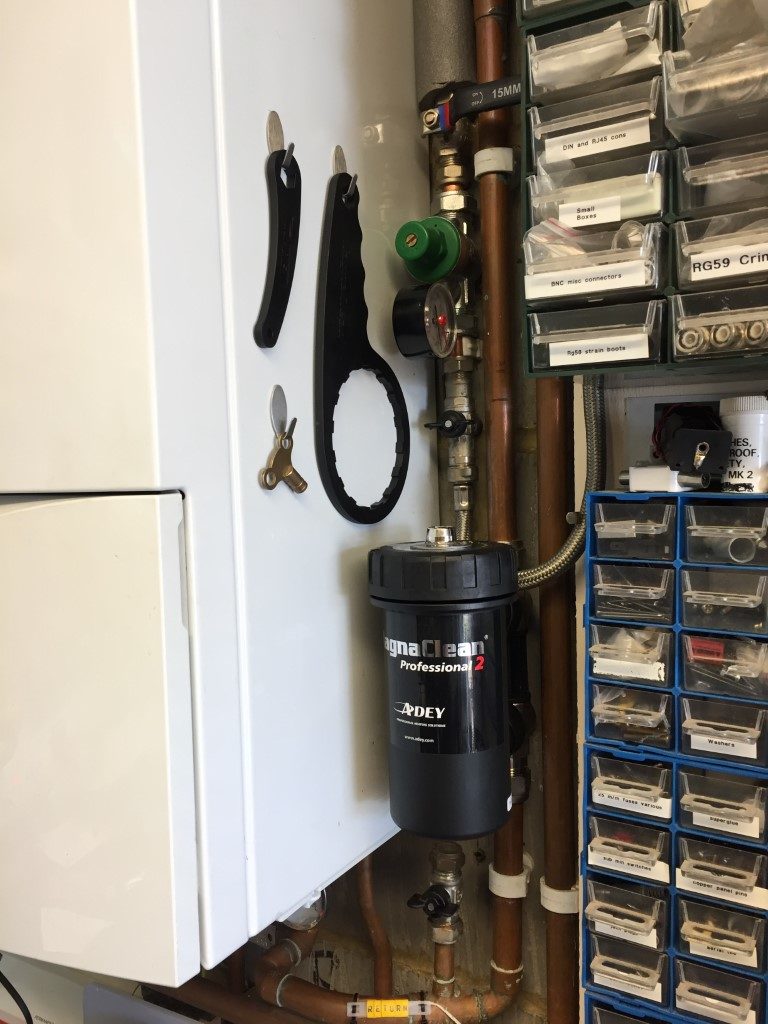
Once the canister was pushed into place and the lid was tight, I closed the radiator vents and started to fill the system watching for leaks, the filling system pressure reducing valve is set for 1.5bar, so this was left open as I went round venting the upstairs radiators.
With the first round of venting done, I vented the Magnaclean and boilers circulation pump before turning the boiler on to heat.
This was followed by more venting until the majority of the air subsided, I isolated the Magnaclean and drained it so I could add 500ml of Fernox F1 inhibitor to the system, using the canister as a dosing pot.
As I only partially drained the system, (downstairs radiators are below the boiler so I only drained upstairs), 500ml should be sufficient to top up protection.
The installation went well with no leaks, and once the Magnaclean was proved to be ok, I registered the device online for the 10 year warranty.
I’ll post pictures in a few weeks of the Magnaclean magnet to see what it has picked up.
5 May 18 – Checked the Magnaclean and this is what it had caught:
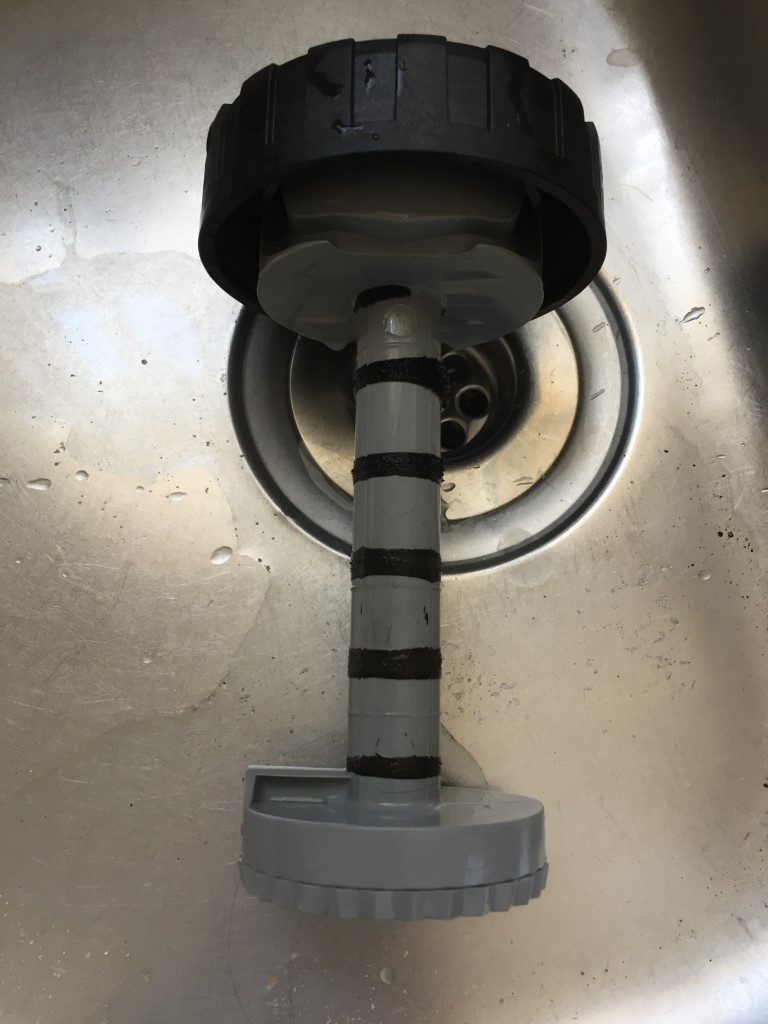
My Vaillant Thermocompact system was installed in 2003 and has 13 radiators piped in 10mm. I’m very happy with the low level of magnetite retained and nothing was trapped within the lower filter housing, I’ll check this again in a years time, but so far so good 🙂


with the filter in place what access do you have to isolating valves? From the picture I can see no space to get behind the filter and close isolation valves unless one has special tools or super thin fingers..
Hi Dosh,
No denying that its tight 🙂 , the Magnaclean comes with two spanners, a larger one for the lid removal and a smaller one to access the valves in restricted space, this is the one I use.
There is enough room, but you need to ‘feel’ the location of the valves to locate the spanner onto the valve, a bit tricky at first, but after a few times, its straight forward.
I think I have even smaller clearance to work with, looking at your pictures it seems you have 14 cm between boiler (left) and wall (right), I only have 12 cm gap, even tighter spot around return pipe. Given the diameter of filter cap is 98 mm, I only have 1 cm gap on each side- impossible to install. Must get new smaller boiler after all, Ideal Sterald W2000 50F I guess more than 25 yr old has been good, touch wood. Cast iron old school. Only needed new fan bearings once in 20 years I had it.
Hi Dosh,
Thanks for the update, its always good to understand the approach others take to things, your boiler sounds bullet proof lol and owes you nothing which is brilliant.
The original idea on my installation was to use an end fed elbow and long street elbows to get the MagnaClean further away from the wall so I could easily get at the valves and also give me the opportunity to centre the unit, as it was I didn’t need the bits as when it was offered up, it was tight but not impossible to operate.
The other fall-back idea I had was to install isolation valves before and after the MagnaClean to eliminate the need to use the built in valves if I had too.
You have very limited space compared to me, one consideration I had was for the filter to go in the airing cupboard, again it would have been tight, but possible, maybe an option for you, or use a smaller filter, such as the MagnaClean Atom.
I’m not a plumber, so their may well be better options or products out there, let me know how you get on.
Thanks for an informative log. My system has a limited run of straight pipe in which to install the MagnaClean. There is plenty of access to remove the filer etc but the pipes mean that I currently have 180mm of pipe which leave only 30mm over the 150mm section removal. I can extend this to 210mm by redoing some pipework- would 180-210 mm of pipe between elbows be enough space to mount? Thanks for any information you can offer as I’ve not found an answer despite hours on Google.
Hi James
The pipe size I have my Magnaclean on is 22mm, the depth of each compression nut is 20mm, so once the 150mm has been cut out, the compression nuts and olives need to be slid over the pipe before the angled valve assembly can be fitted, the compression nuts are then screwed onto the assembly.
The valve assembly uses a slip coupling so one end has no internal pipe stop whereas the the other end has an internal stop 15mm in, this means the valve needs to slide down by 15mm before the other pipe can enter the valve assembly and then the whole thing slid up to enable the compression nuts to be fitted.
This means the minimum pipe access room needed is 22mm + 15mm + 22mm + 150mm = 209mm
The overall distance of the fitted valve assembly, including the tightened compression nuts is 195mm.
Hope this helps.