When we first moved into the house I installed an external bibcock tap which I fed by ‘teeing’ into the cold water feed line in the garage which is used for the combination boilers filling loop.
In the previous house I had hot and cold available outside to wash the car, so the project was to do the same here. The two problems were the lack of available hot water pipes in the garage and no more wall space to add another external bibcock dedicated to hot water.
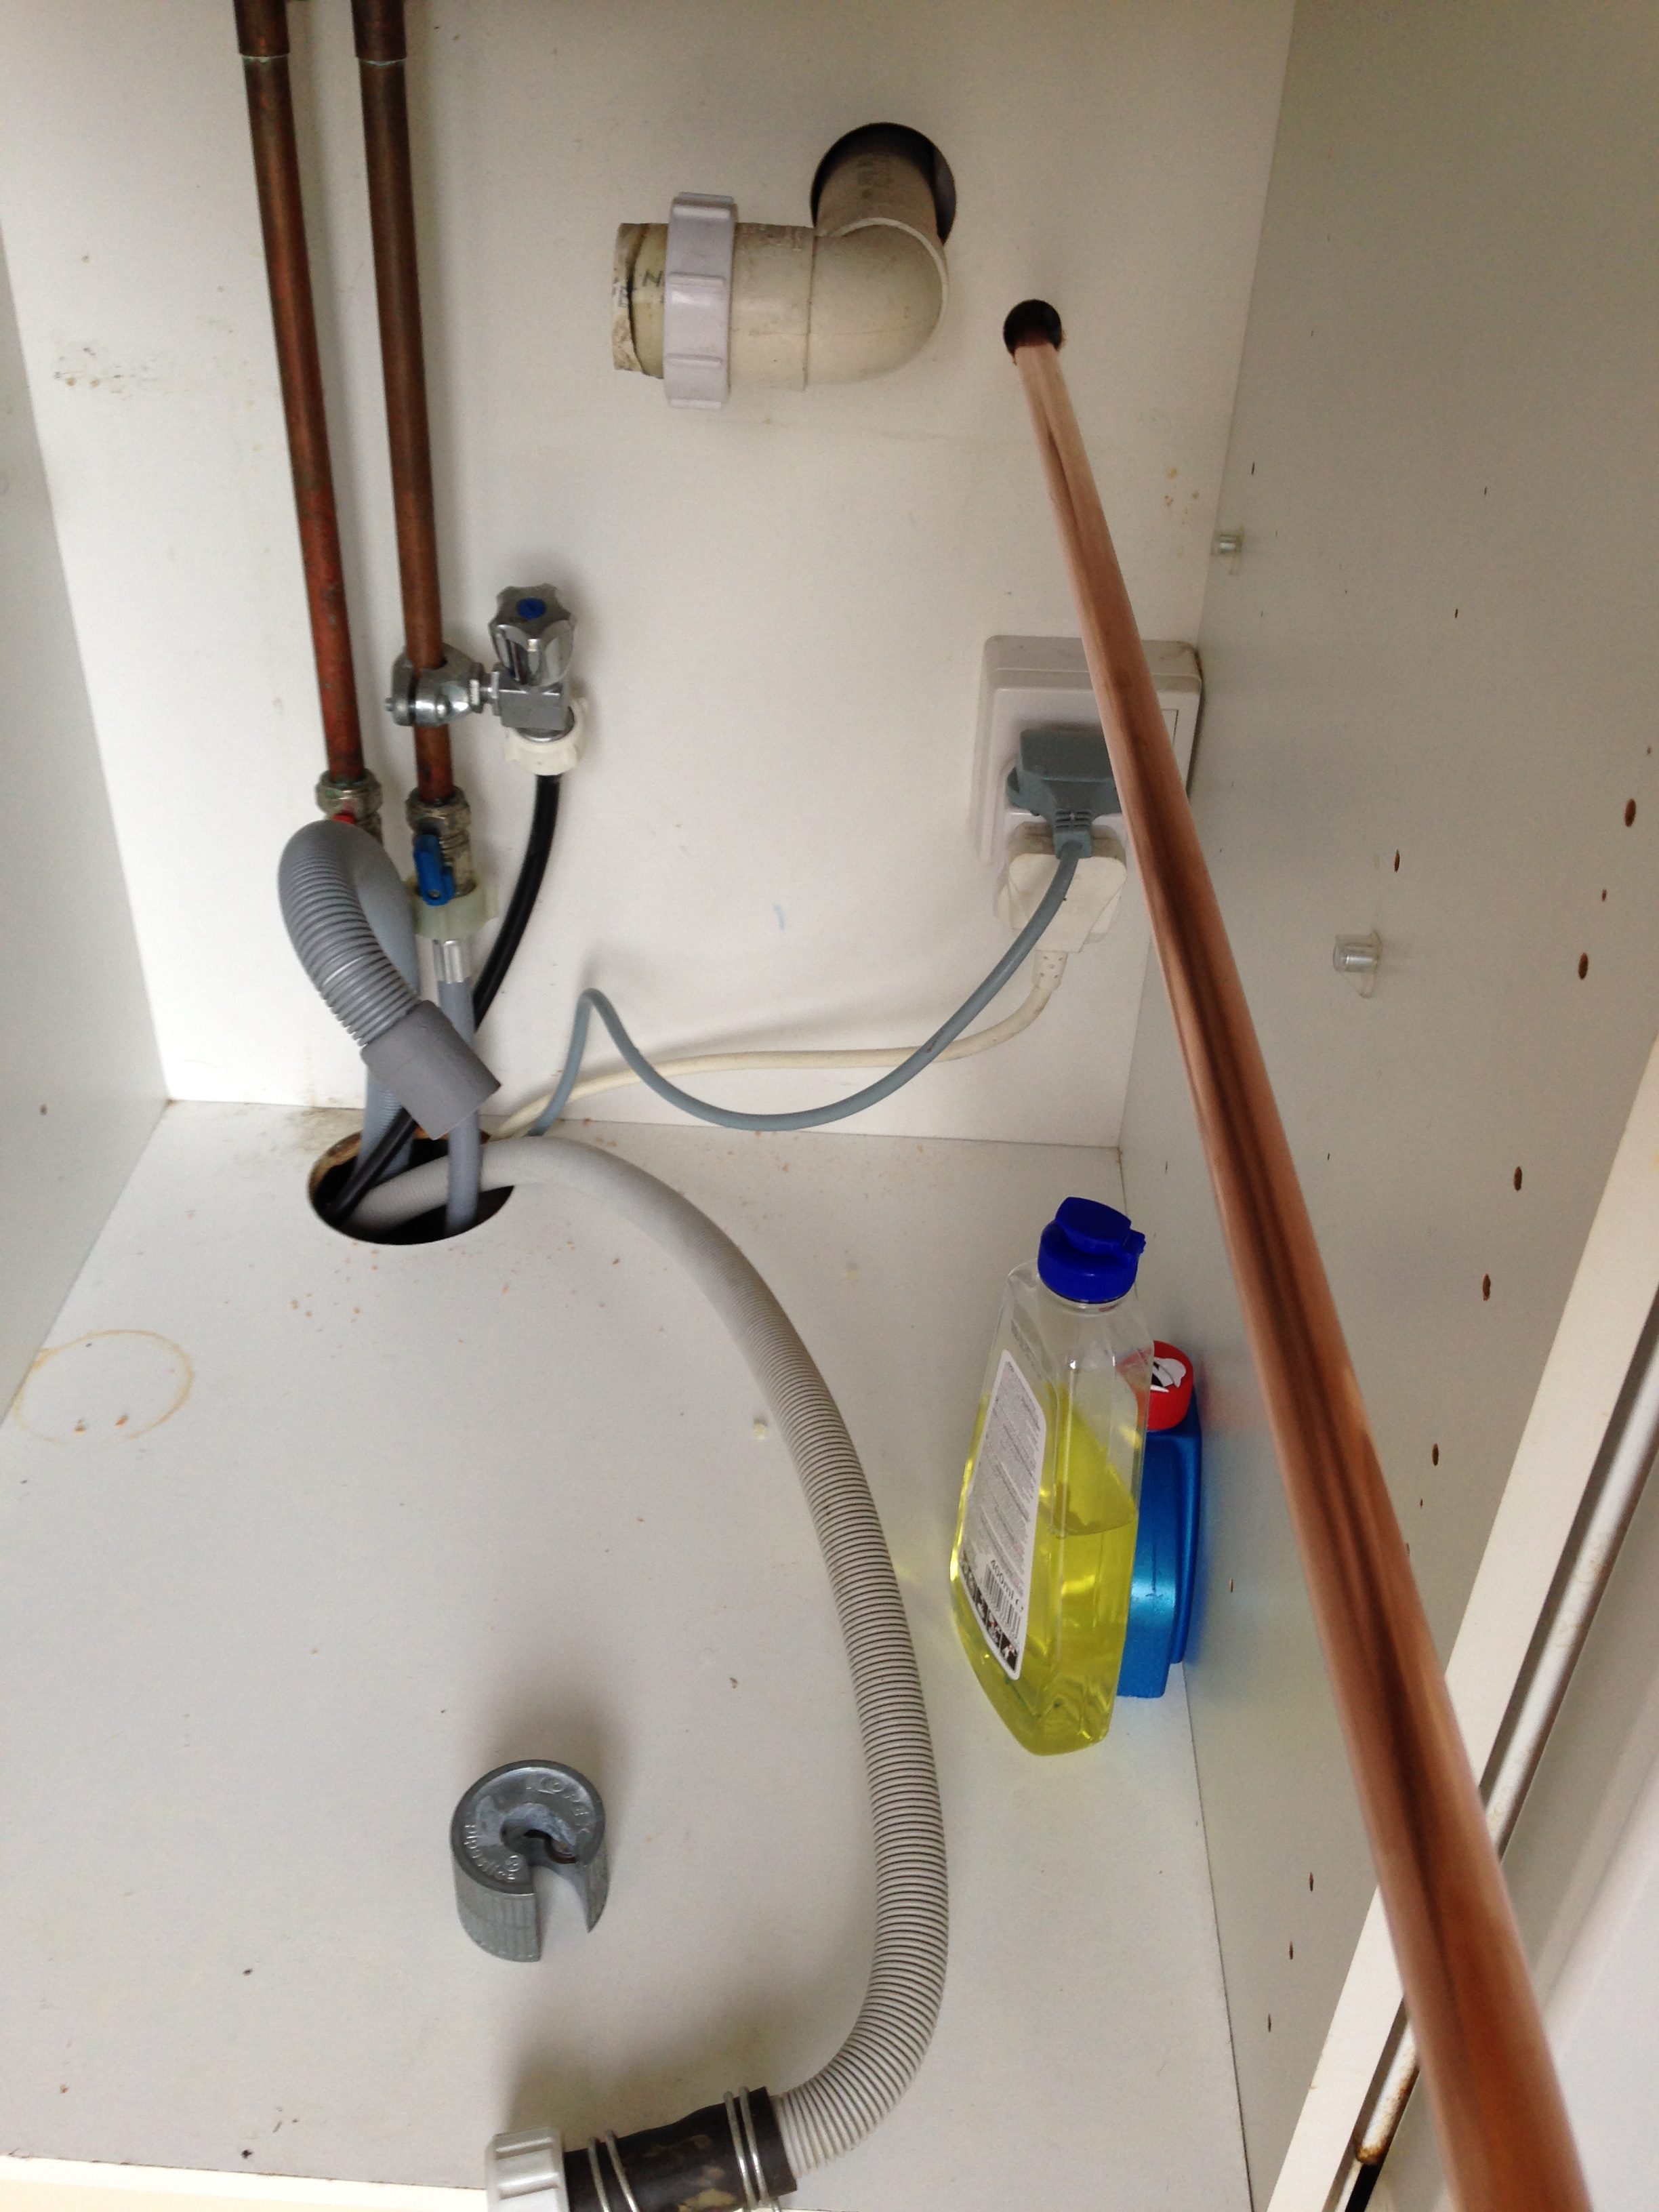
First things first, locate a source for the hot water, fortunately on the other side of the garage wall is a small utility room with a sink and plumbing for a dishwasher and washing machine.
Isolating the cold water fill to at the tank, I drained the hot water down into the utility sink and emptied the dead leg of the washer fill line using the tap at the bottom of the pipe, once this was done, I put the plug in the sink and removed the sinks waste pipe for ease of access to where I would be cutting and soldering.
Drilling a 15mm hole through into the garage from the house was easy as the internal double skin walls are built using low density thermalite block.
 Putting some tape over the open end of pipe, I pushed it through the hole into the garage where I soldered an end fed elbow with stub to a compression fitting isolation valve. From the isolation valve a stub with a tee and drain cock were soldered. A stub pipe from the tee had a plastic stop end fitted, the pipe was then pushed back into securing clips fixed to the garage wall.
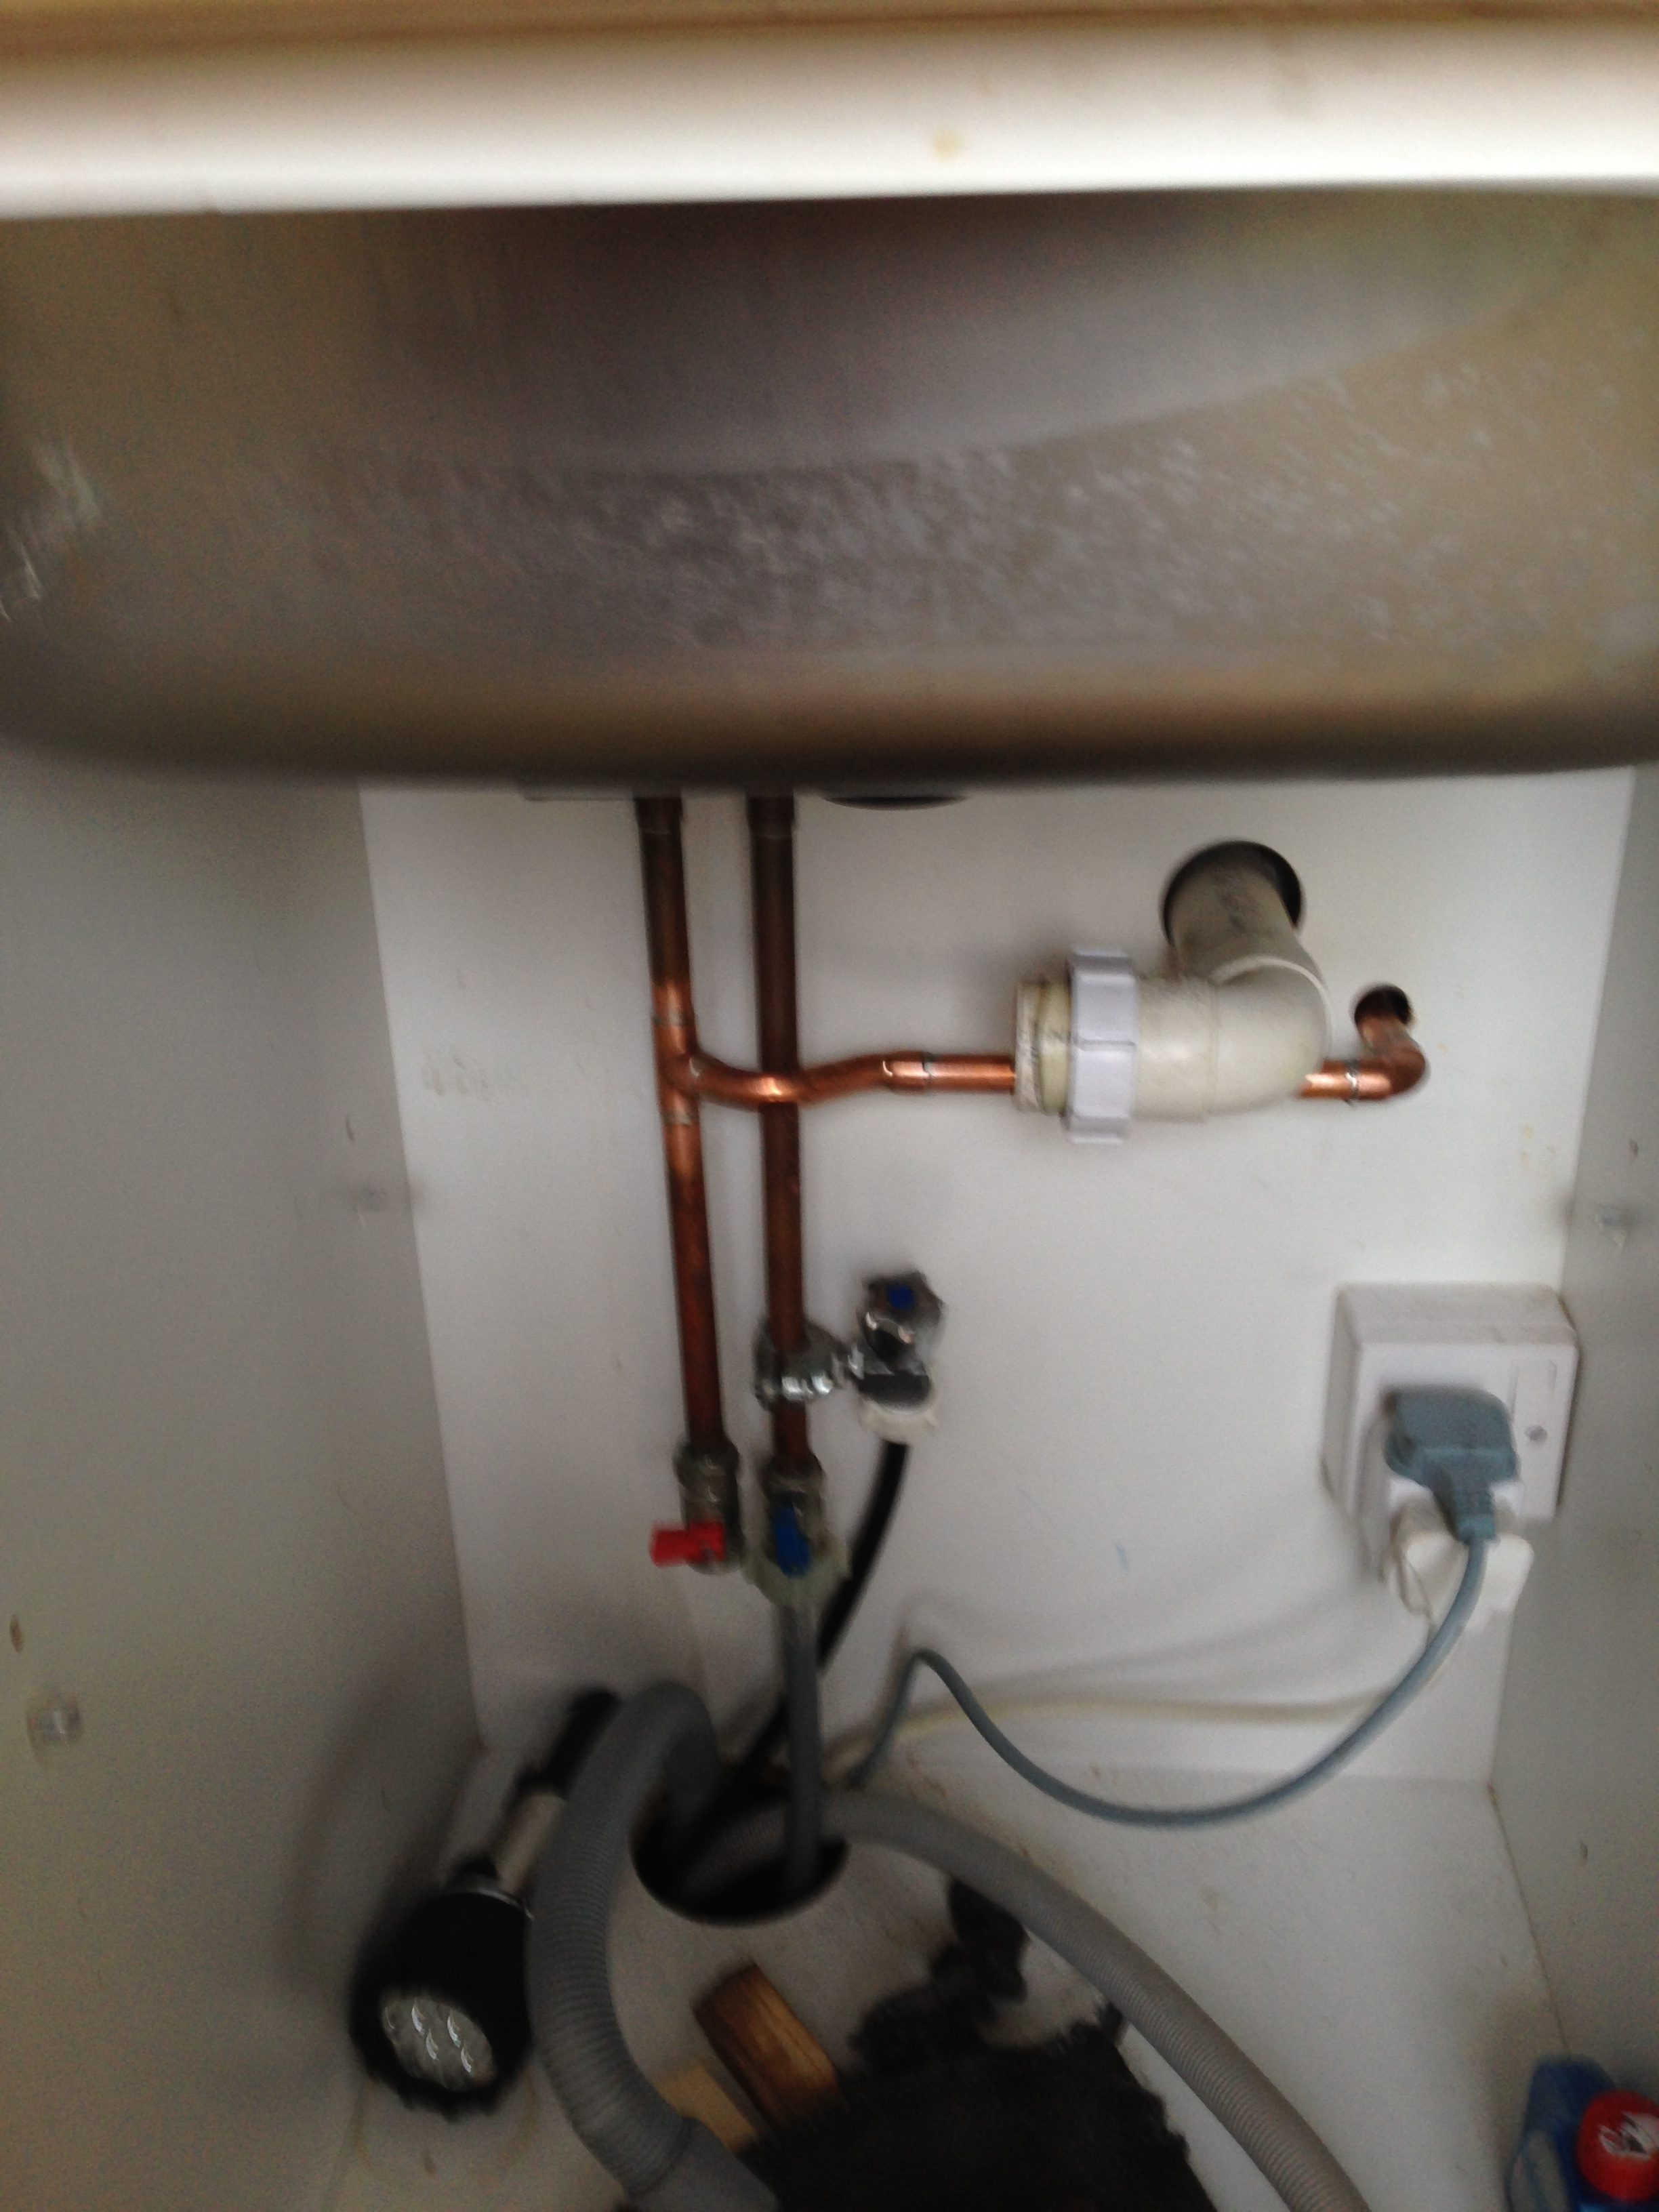 Using the pipe slicer tool shown in the first picture, I cut out a small section out of the hot pipe and put on a 15mm copper tee, using a half crossover to bridge the cold pipe, I then used a short piece of pipe to connect an elbow to the pipe to the garage.
Once the dry fit went ok, I dissembled it all to clean and flux the pipe and fittings before soldering, all the fitting were end fed here.
Once all the joints were soldered and making sure all the valves are closed, I cracked open the hot water tank fill valve and went to check for leaks after venting air from the system and running water through the garage drain valve to flush out any debris.
The garage has been converted into a workshop and I didn’t want to damage any exposed pipe when I throw stuff for storage, so the best option was to use plastic pipe and fish it behind the false wall as their was just enough room.
Drilling 110mm holes, allowed me plenty of room to push trunking lids taped together for the 4.5m run, string was attached to the end of the lid and pushed in place.
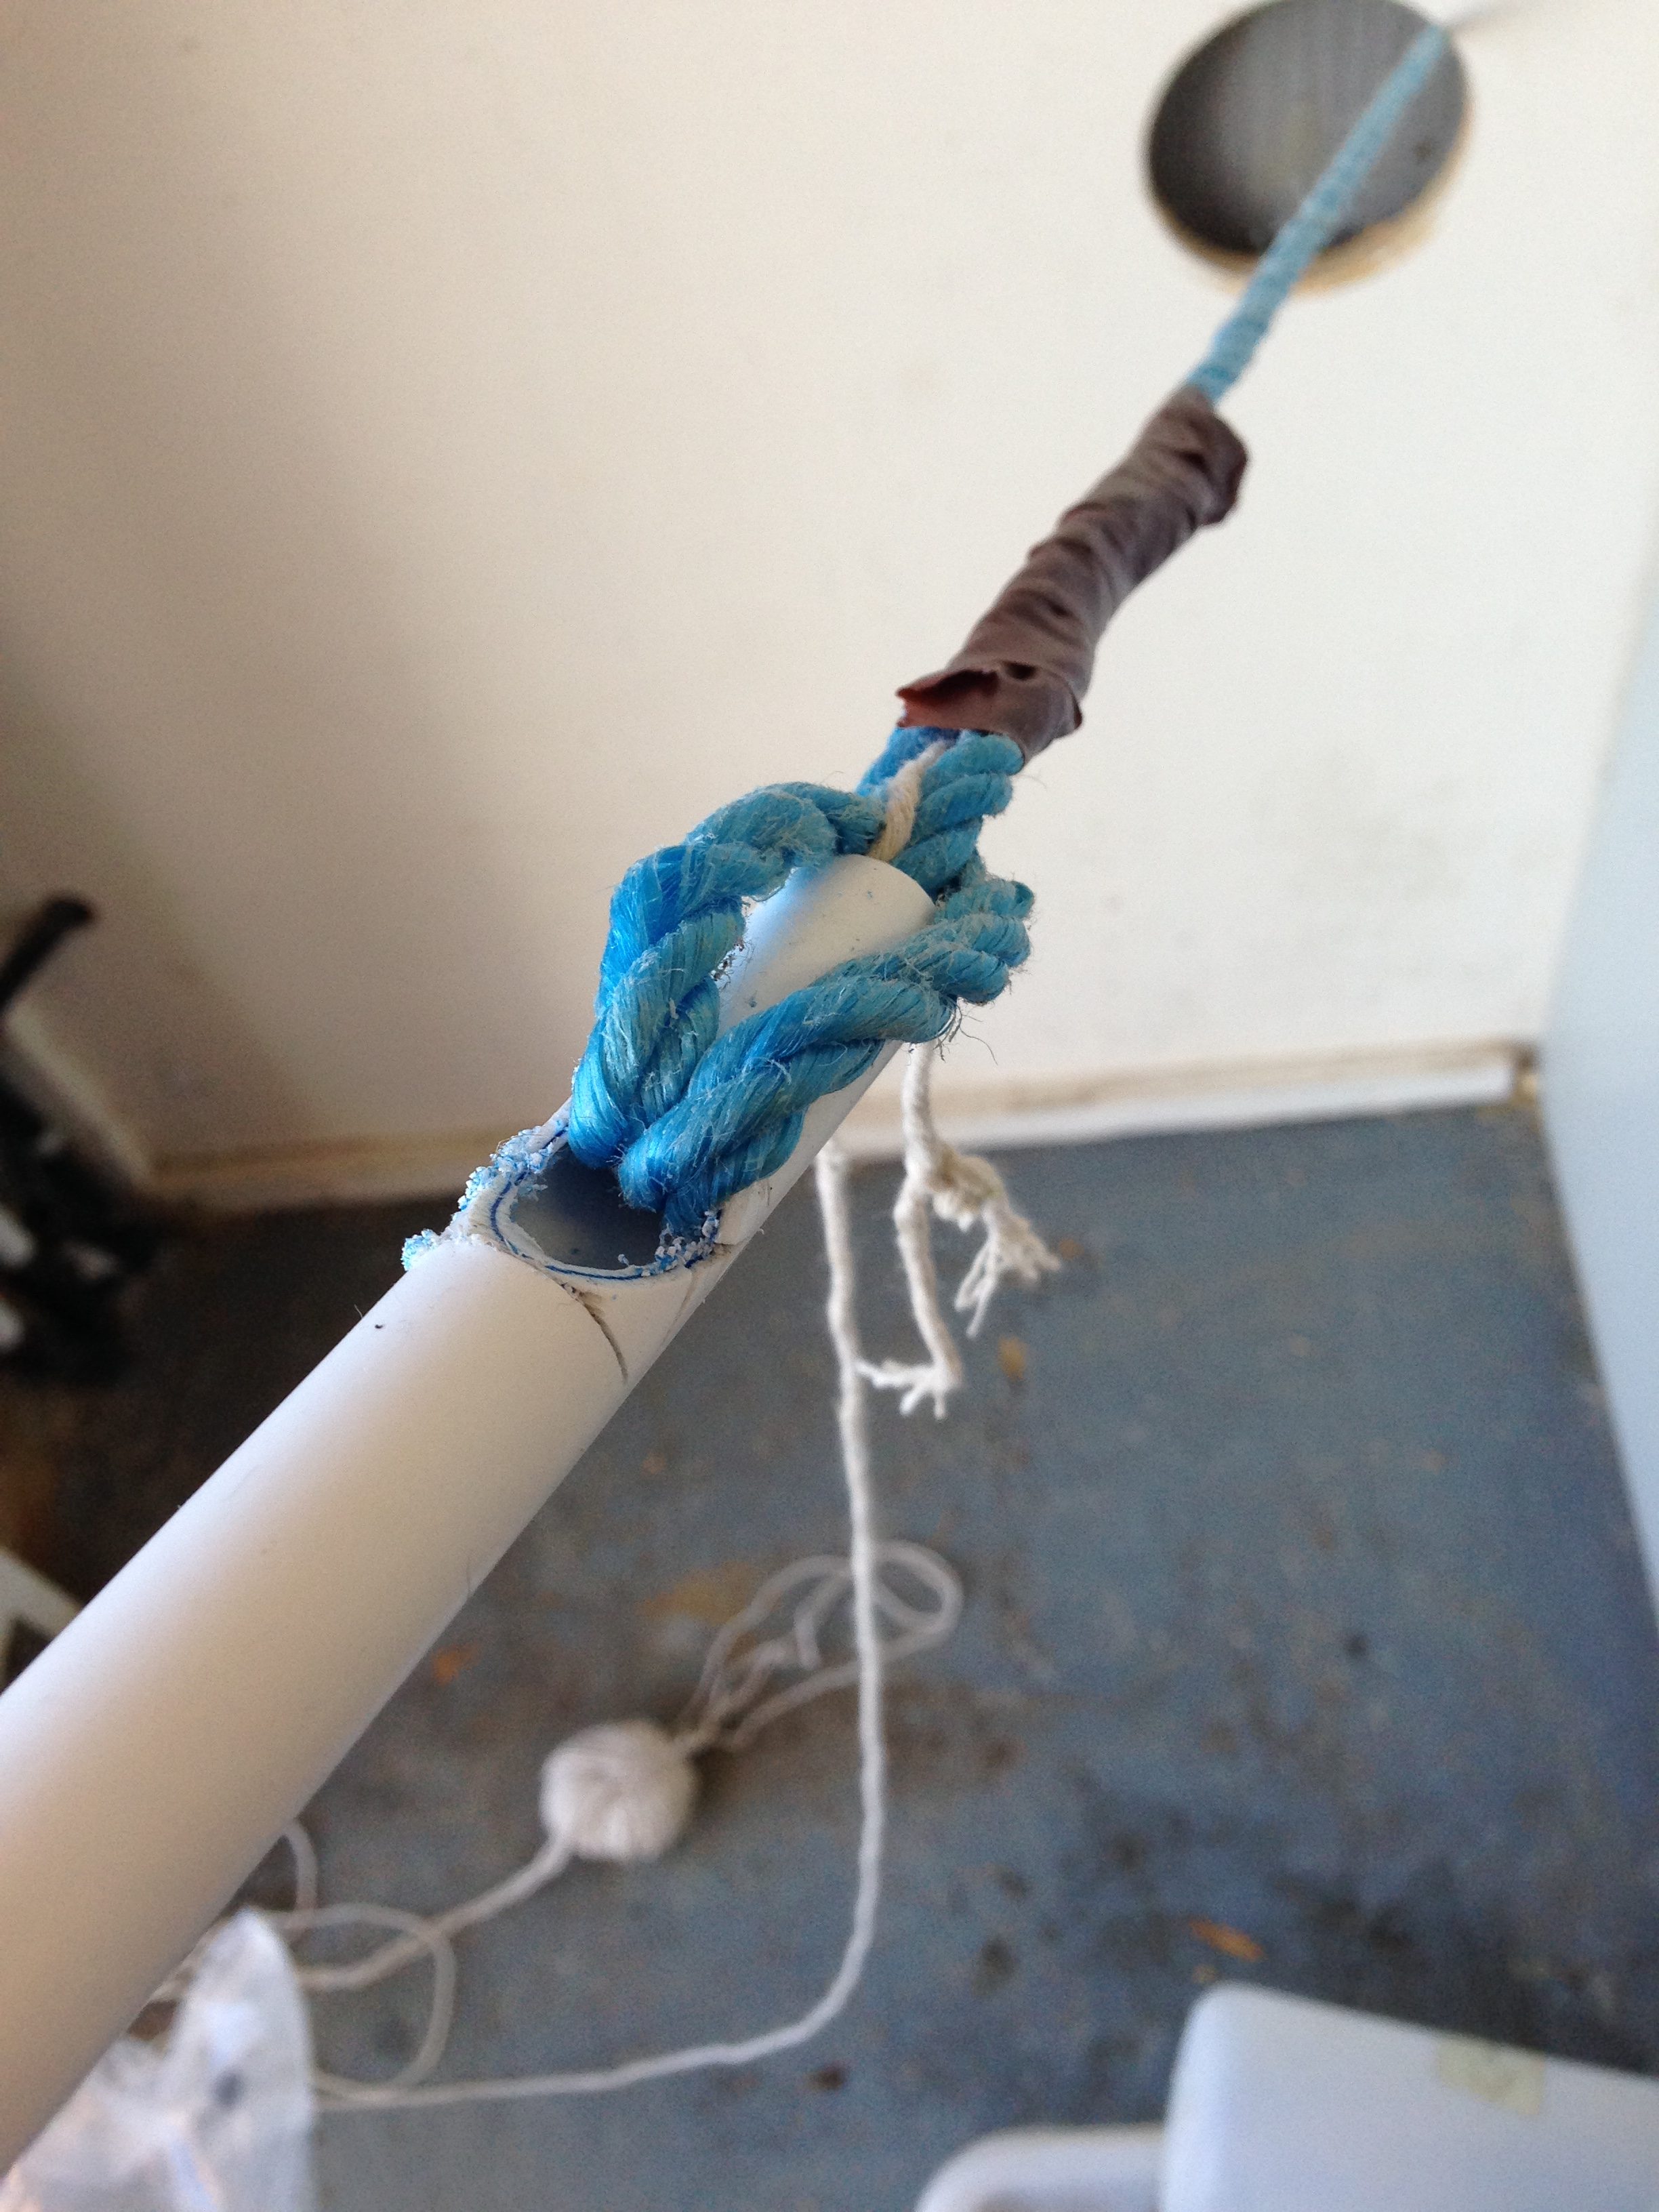
At the other end it was a pain to fish for the string using a torch, mirror and bent hook, however, once grabbed, I tied on stronger blue rope to the string and pulled this back to secure on the pipe as shown, (the last thing I wanted to repeat fishing!).
At the utility isolation valve end, I clipped the John Guest Layflat Speedfit pipe to the wall and used a cold form bend to hold its radius and take strain off the ‘plastic to copper’ coupling.
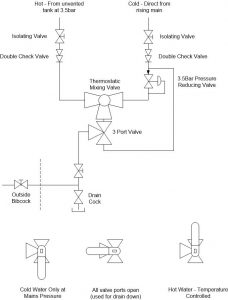
The design to allow me to use one external bibcock tap was to use a three port valve, this suggestion came from DIYNOT plumbing forum.
 Parts
Parts
The pressure reducing valve, 3 port valve, double checkvalves and themostatically controlled valve were from eBay, all other parts from Screwfix.
How it works
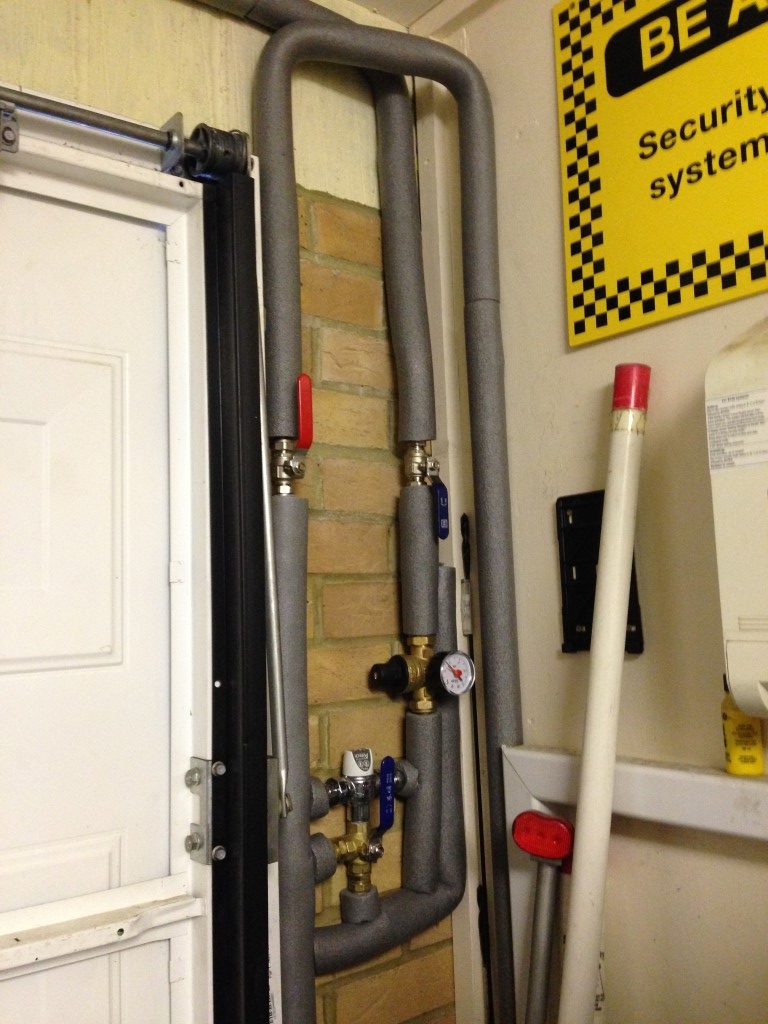
The cold water has a local isolation valve for ease of maintenance, a double check valve stops contaminants getting back into the upstream water system, a ‘tee’ allows the pressure reducing valve to be bypassed, and if the 3 port valve is in the right position, allows full mains pressure at the outside tap for use with the hose.
The pressure reducing valve is set for 3.5bar which is the same water pressure as my unvented hot water tank, therefore the water pressure for both feeds to the thermostatically controlled valve (TCV) is the same.
The hot water also has a local isolation valve and double check valve before it feeds the TCV, the temperature of the blended water leaving the TCV is 42C.
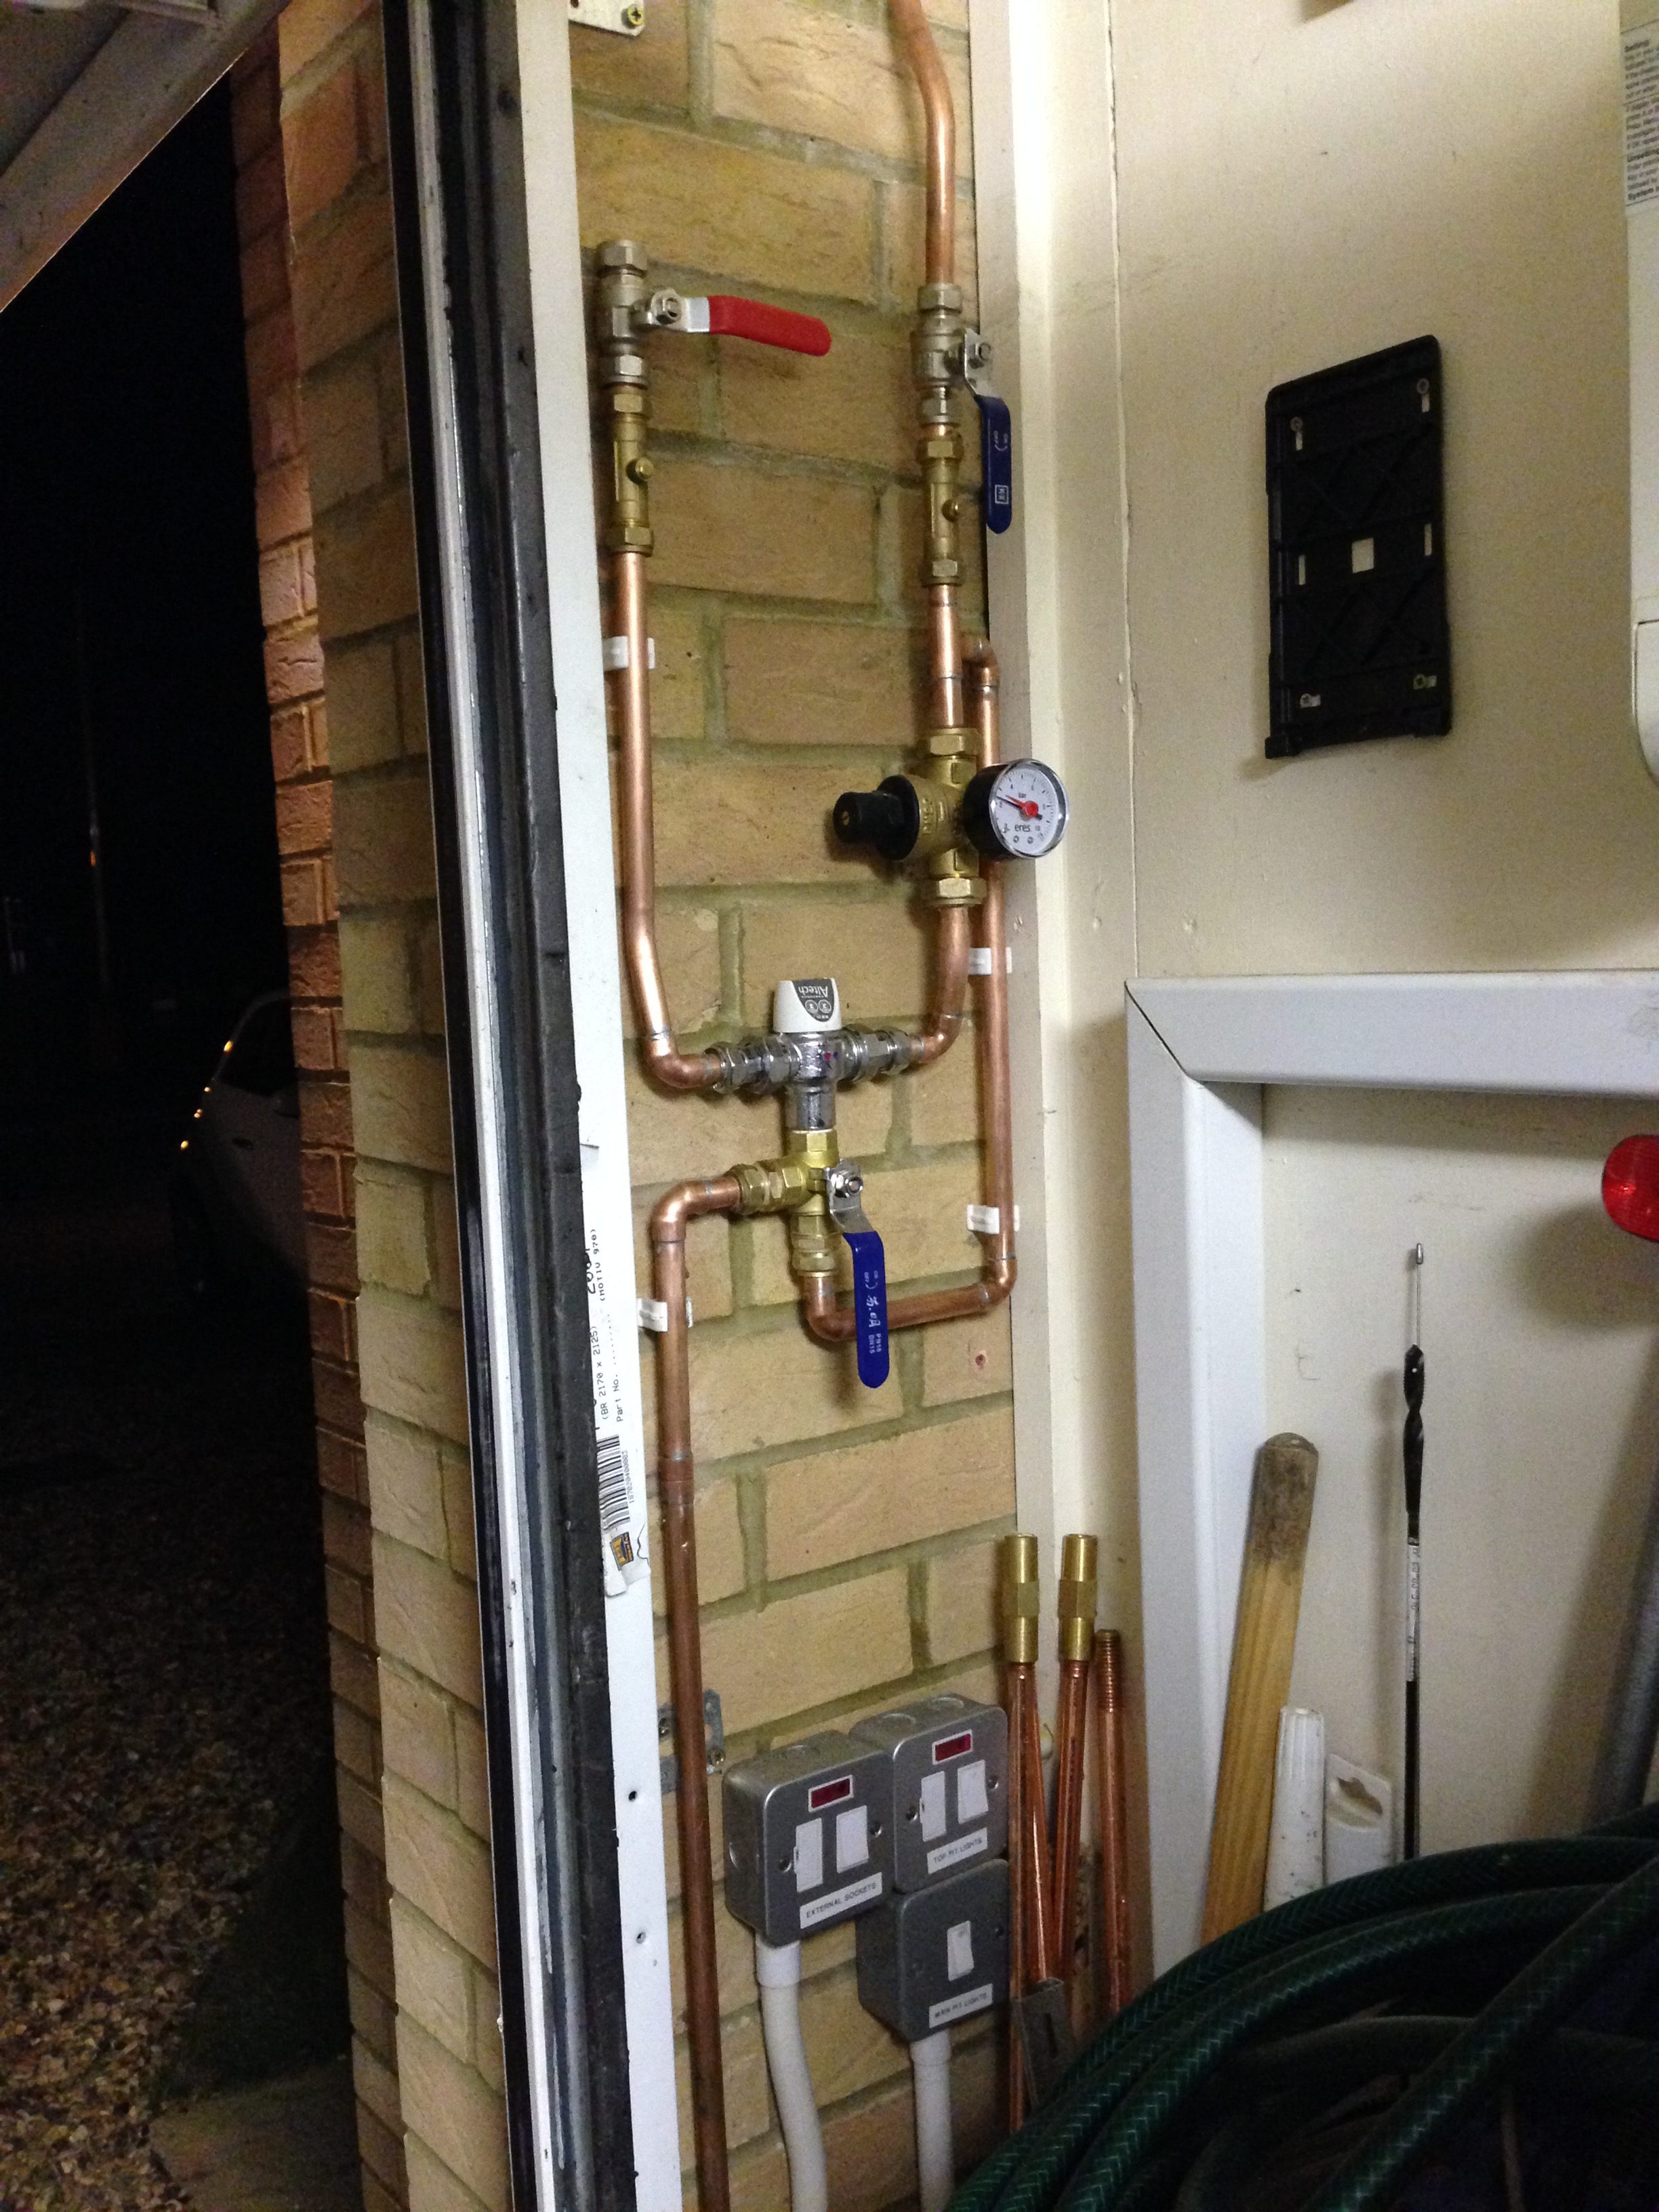 As the cold water was available, I connected this first to the valve and allowed pressure testing, the biggest problem I had was sealing the 1/2″ BSP threads on the 3 port valve.
I tried using fibre washers, PTFE tape and jointing paste but a couple of joints would still weep very slowly over time. I searched the problem in the DIYNOT forum and the advice from experienced plumbers was to use Locktite 55 , following the instructional video on the locktite site, I applied the sealing material onto the prepared threads and it worked, no more leaks.
At the end near the bibcock tap, I used another ‘plastic to copper’ coupling and piped up and over to the hot water isolation valve.
A hot water drain cock was installed where the pipe emerged from behind the false wall so I can drain down if needed.
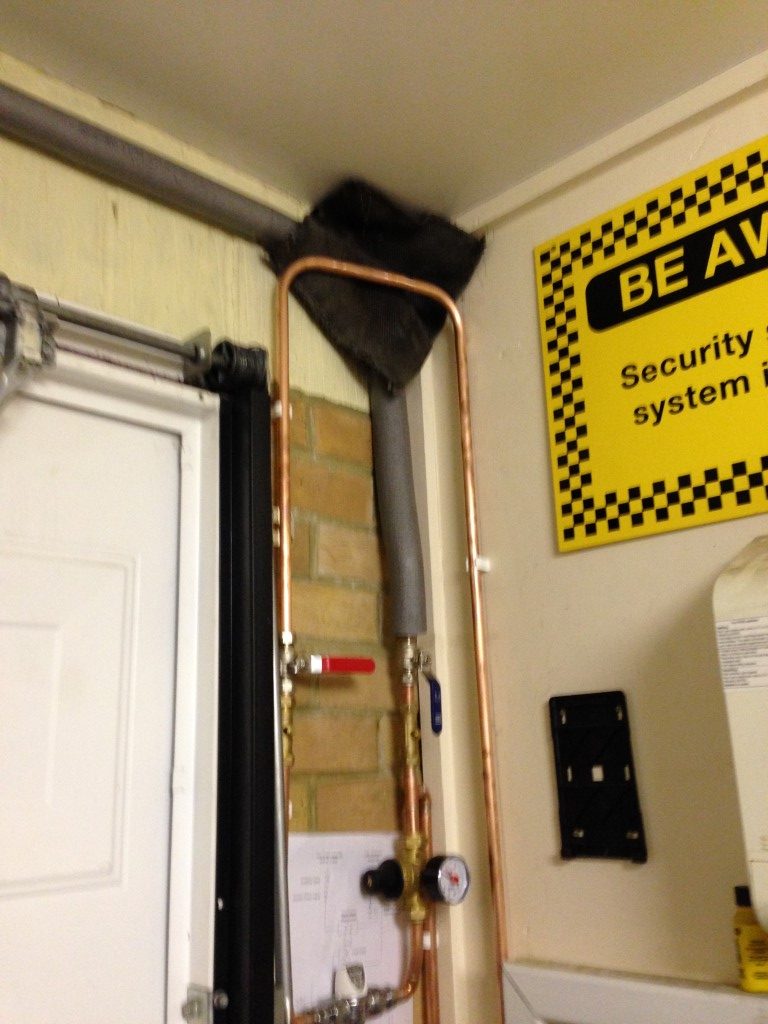 This shows the hot water pipe coupling about to be soldered, hence the heat resisting mat, on the right of the picture is the cold water valve which is open and testing for leaks.
In the garage is another isolation valve directly behind the bibcock, this stops unauthorised use of the external tap.
The final job was to flush the system thoroughly and check that the water coming out of the bibcock tap is at the correct temperature, once proven, all exposed pipes were insulated and where the risk of damage was high, boxed in.
The most expensive part of the job was the plastic pipe as this comes in a minimum of a 25m roll and I only needed 4.5m. The option of pulling in straight lengths with a connecting coupling behind the false wall was discounted as I didn’t want any inaccessible joints, so I had no choice but to pay for more than I needed.
Apart from hassle of sealing the weeping threads, the job went well and I’m happy with the result.