Weather Station – Relay Outputs

My weather station software is Weather Display which is unbelievable in what it can do, the author of the software is very receptive to ideas and modifications and has introduced a feature which I and others have asked for, that is the ability for a physical relay to change state when a condition has been met.

Weather Display used to have the feature to operate a 1-wire single relay, but this has been superseded by an 8 Relay module which was not coded to work with the program.

I bought a board and sent it to Brian Hamilton of Weather Display, and within one afternoon had it working  (it did take a few days to get there as Brian lives in New Zealand)!

The feature Weather Display offers is not only control of relays via Weather Display, but using a Phone or Tablet app.

hobbyboard1

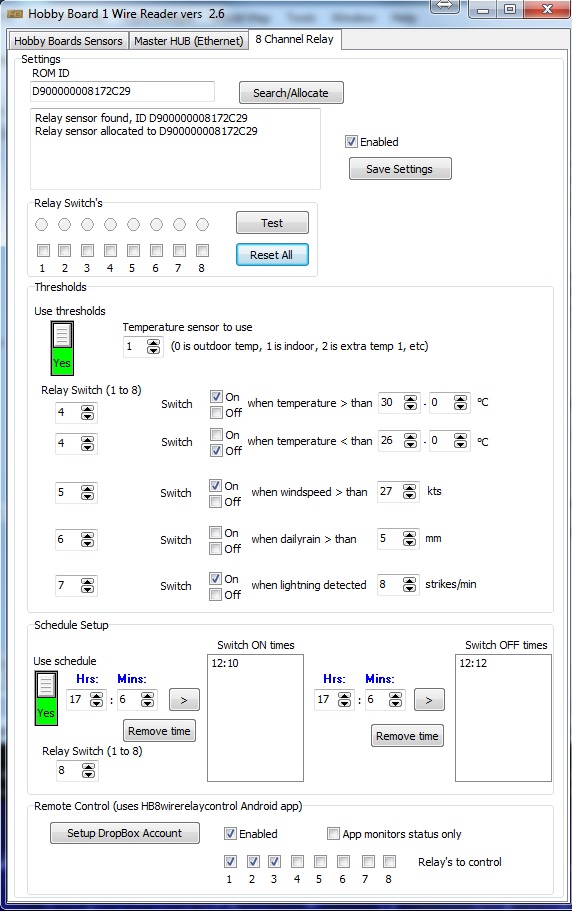
The relays can be assigned to Temperature, Wind Speed, Rain, Lightning (depending on sensors) or a timed schedule, these parameters are set and adjusted from a tab within the program.

SAM_5542 (Medium)

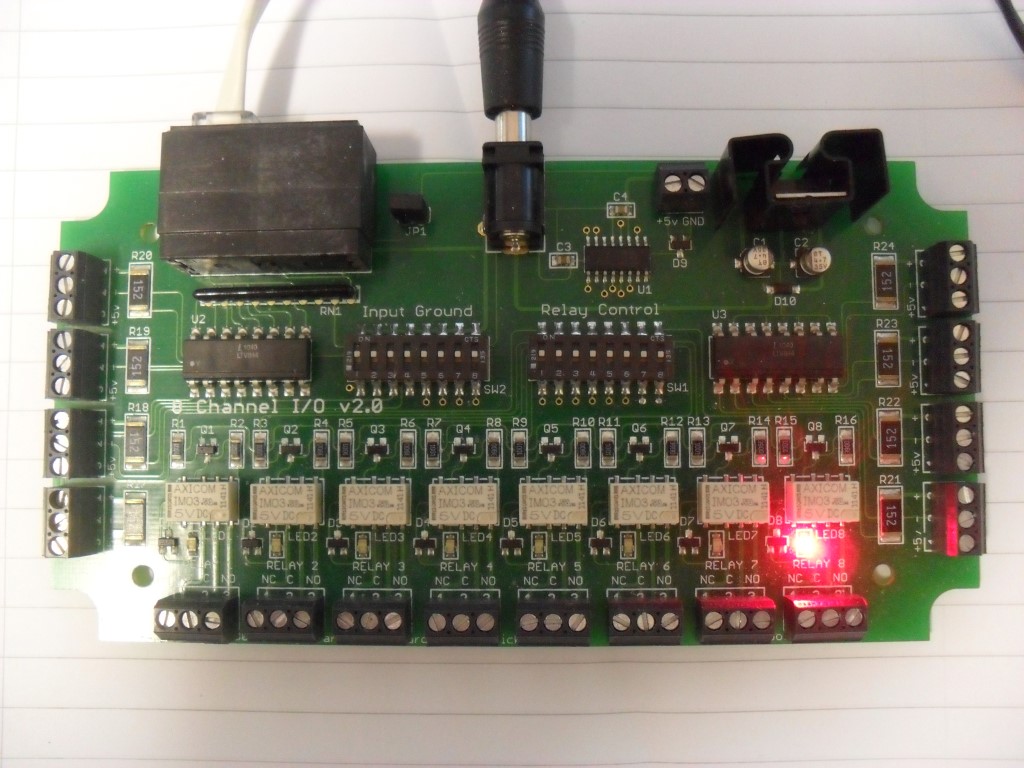
The relay board is powered by an external 12v supply with a 1-wire data lead going through a USB interface to the PC, activated relays are indicated by the LED.

SAM_5537 (Medium)

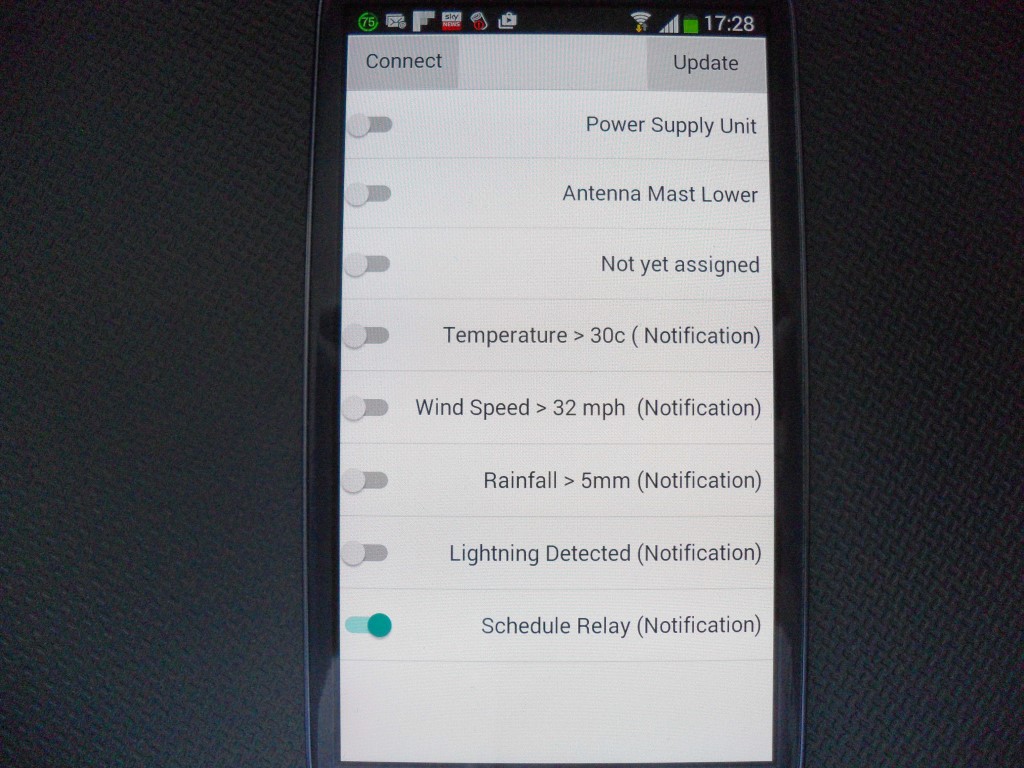
The app allows full control of the relays if configured, or for relays that have been set to ‘monitor’, the state of the relay is reflected on the app.

This addition has brought a new dimension to the weather station, and I will be connecting the ham radio mast motor to the relays, so that on detection of high wind or lightning, the mast will automatically retract (and maybe ground all the antennas so the transceivers wont get damaged).

A further benefit not related to weather is that a relay could be remotely switched to operate the heating or lighting etc, I’m using one to turn on a power supply unit so I can remotely operate power to my transceivers.

Note:   The HobbyBoard relays are not rated for high currents, I will be using these relays to operate higher switching capacity relays.

8 Channel Input/Output Manual shows the versatility of this module.

ON8JL D’Star BabyStar Node

Recently bought a Icom 7100 for the additional features this radio offers, one being DStar enabled, unfortunately I’m unable to access a  remote repeater, hence the BabyStar nodebabystar

This is a small unit with only two physical connections required, these being power (7 Vdc to 15Vdc) and an hardwired internet connection.

When the BabyStar is first powered up it will use an available ip, and this is displayed for a few moments on the screen, typing this ip into your browser opens the BabyStar configuration and status pages.

I have setup in the Icom 7100 a repeater called BabyStar Node, I then lower the RF power of the rig to 0% and simply transmit to the BabyStar and via this, using the internet, to repeaters and reflectors worldwide with FM quality audio both ways.

The version of Firmware on the unit I bought was v1.02, shortly after v1.03 came out, you will need Hyperterminal and a programming lead to complete the update, the process quite easy as the instructions within the User Guide are really good, I found the drivers for the USB to Serial lead here.

Users_guide_dstar_hotspot_v1_01

Hyperterminal is found on older versions of Windows, such as XP, so make sure you have an old PC about!

22 May 2016 – Updated Firmware to 1.04 (I have a copy if you need it)

Updated – 19 September 2021

Removing Mains Hum From Kenwood TS-2000

Since getting headphones, the mains hum on my Kenwood TS-2000 needed to get sorted as it was really distracting.

To confirm the source I powered the rig on a battery and the hum was still their, unplugging the antennas made no difference until I unplugged the RS232 serial lead to the PC, at that point the hum stopped, I then powered the rig from the Power Supply Unit and the hum only reappears when the serial lead is plugged in.

The issue stems from the fact that the PC running Ham Radio Deluxe (HRD) radio program is fed from an Uninterruptable Supply and this has caused a Ground Loop to be created.

I bought off eBay an RS232 opto isolator thinking this would cure it, unfortunately this stopped HRD communicating with the radio so I was stuck! posting the problem on the Yahoo Group forum came up with the answer.

The simple answer from Dave (G4UGM) was not to connect the Serial  pin 5 Ground wire making sure the outer shells of the D9 Socket & Plug were connected, and this did the trick.

(Scroll down for update)

The Serial connections on the Kenwood TS2000 are:

1- Not connected

2- RXD

3- TXD

4- Not connected

5- GND (did not use)

6- Not connected

7- RTS

8- CTS

9- Not connected

The finished unit with pin 5 disconnected goes in the back of the radio, the male and female connectors were soldered back to back, pin for pin except the break of Pin 5  –SAM_5535 (Medium)

29 September 2015     ***UPDATE***

Not sure what changed, but the mains hum came back!!, knowing that a 3 wire opto-isolator didn’t work, I bought an 8 wire opto-isolator from Tronicore, this comes complete with serial leads and a 12vDC PSU (American Power Plug).

I powered the unit from my rig supply, so didn’t use the PSU which came with it, the only other thing I needed was a 9 pin gender changer (Female to Male) to connect to the serial port on my PC.

The interface only works one way round so watch for that, mains hum has gone 🙂

rs232-optical-isolator-3-MEDrs232-optical-isolator-2-MED