
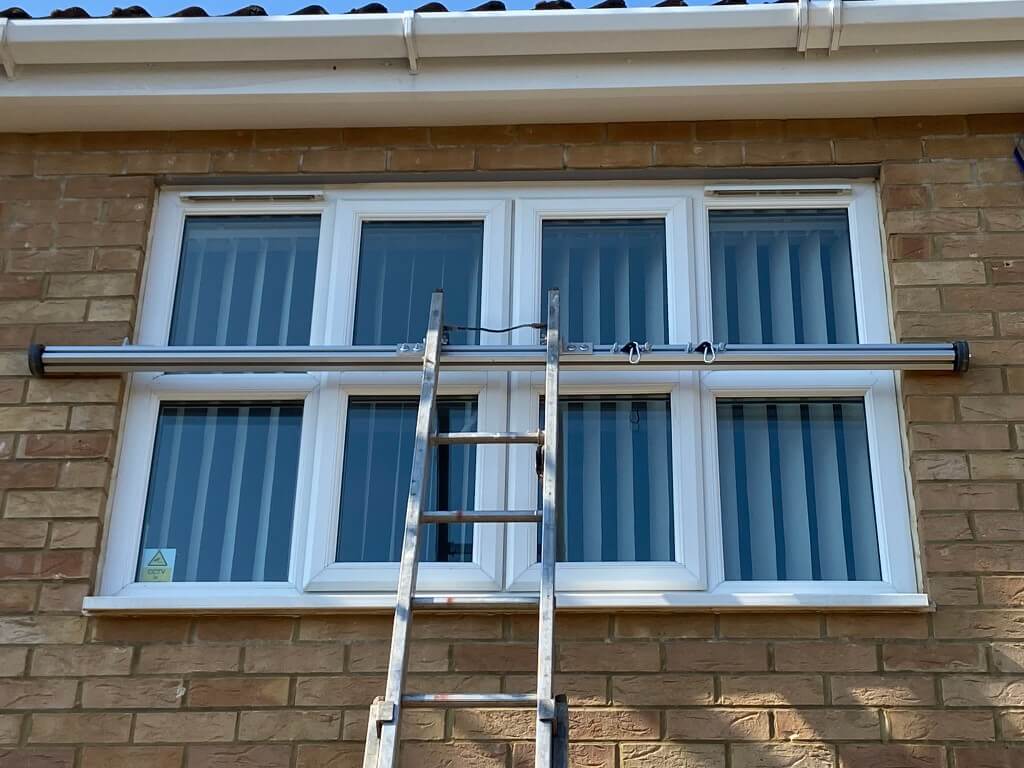
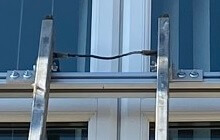
Homemade WindowBridge across a1900mm window reveal in action, securely fixed to the ladder and with a couple of convenient sliding ‘snap hooks’.
Problem to solve
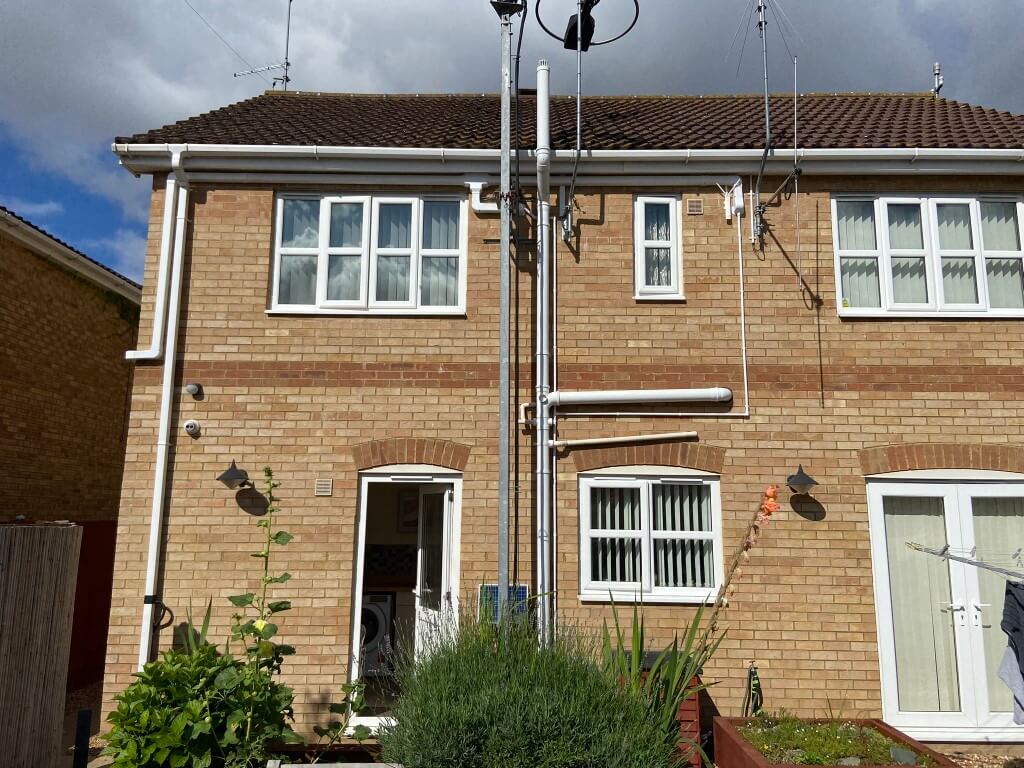
Cleaning the gutters and upstairs windows has always been tricky with ladders, as I had to try and get the top of the ladder wedged between the top two courses of bricks and underside of the soffit, the problem was compounded when I had Air Conditioning installed and the pipework trunking used this area over a bedroom window.
At the front of the house, the top half is painted render, so I had wo wrap the ladder with a towel when cleaning the upper window so I didn’t damage the wall paint, the WindowBridge sets out to solve this problem, safely.
Looking online, the only alternative was a ladder standoff clip on bracket which I already have but don’t feel 100% safe using, I did message a company who made a product called Windowspan, but received a weird email reply and checking with Companies House, the company is registered as dormant.
This left no option but to make my own, which I’m calling the WindowBridge.
Build

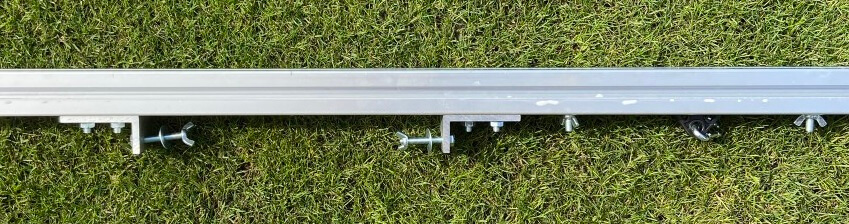
This is a very easy project to build with parts readily available online, the finished WindowBridge weighs in at 4.8kg, I opted for a heavy duty 45mm x 45mm aluminum slotted profile as this was the first one I had built, I wanted to avoid any sag in the span when the ladder was loaded.
A 4 channel profiling for chosen for use with M8 T-bolts to give me total flexibility of any attachment fixings in the future although other profile options are available.

The finished length of profile used is based on the maximum opening that I needed to bridge, in my case it was 1900mm, therefore, the length of the profile in my project was 2100mm giving a 100mm overhang at each side, with the addition of the wheels, the overall length is 2160mm.
I bought 2200mm of profile and cut a 100mm test piece from this using a Screwfix cross cut circular saw, this saw was also used for cutting the brackets giving a neat cut, details of the blade are in the materials list.
Wheels
75mm diameter, ball bearing, rubber wheels were attached to the profile by M8 high tensile steel bolts, the bolts fastened into nylon locking nuts embedded in the profile.
I opted for rubber wheels to give a level of sideways slip resistance and also they are kinder to a painted rendered surface which I have at the front of the house.
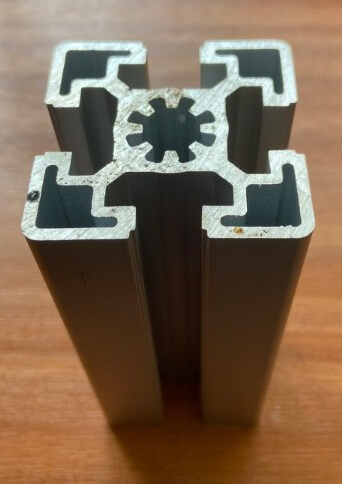
Test off-cut of profile showing the center casting, using a 12mm cobalt drill, I drilled into the center just deep enough to accept the M8 nylon locking nut so its flush with the face of the profile, make sure you clamp the profile securely as it will ‘snatch’ when drilling.
The nut is an ‘interference’ fit in the drilled hole, so the use of a hammer is needed at this stage of the build.
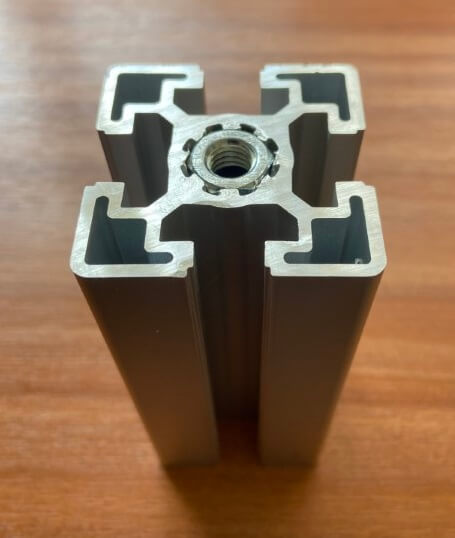
Test piece with the nut installed, this is a really solid fixing, the completed wheel assembly is shown below:

Ladder Attachment
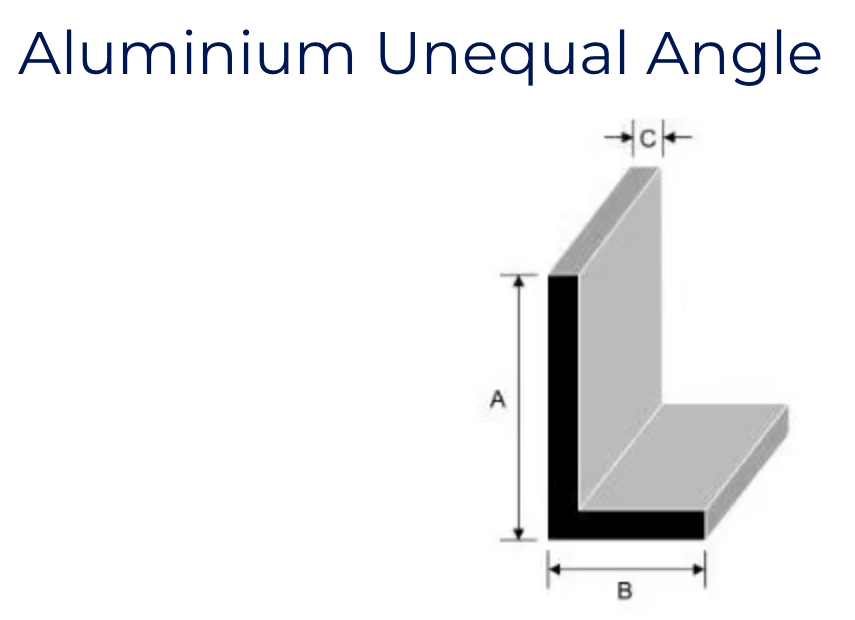
I used two pieces of aluminum unequal angle brackets to secure the WindowBridge to the ladder, one bracket for each side of the ladders external side rail, the brackets were attached to the profile by two M8 ‘T-Bolts’.
I drilled a 8mm hole in the center of the smaller part of the bracket and with the ladder in-situ, drilled though the ladder side rail to accept the M8 x 50mm bolt which uses wing nuts for ease of assembly.
Another method would be to pass a length of M8 treaded bar through the ladders hollow rung and brackets to avoid drilling the ladder, for me it didn’t matter, but its worth consideration.
The aluminum I used for the brackets was not ordered, but picked up on the day from the factory in Leicester, so I don’t have any details other than dimensions:
- A – 75mm (3″)
- B – 40mm ( 11/2″)
- C – 5mm (1/4″)
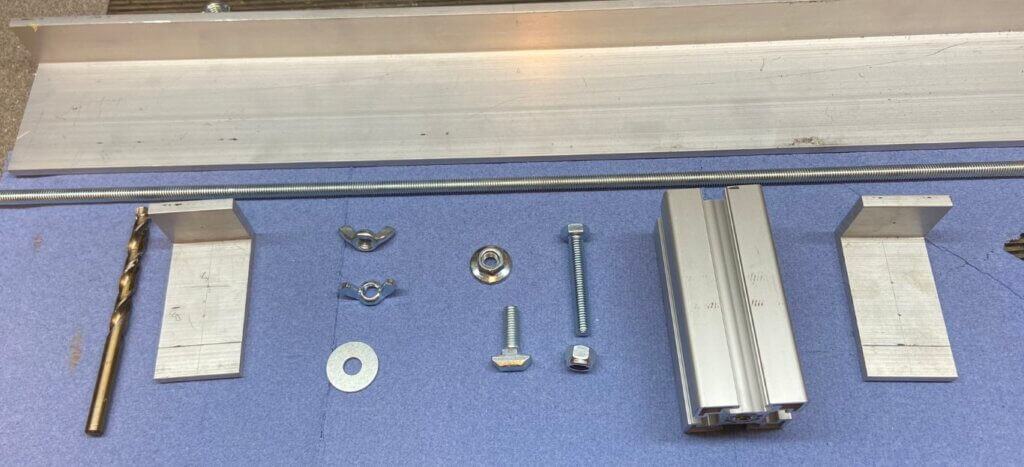
Materials
Conclusion
I should have made one of these years ago, no more precariously positioning the top of the ladder or over-reaching when cleaning the windows.
The most expensive item was the aluminium profile, the rest of the items were relatively inexpensive.
Cutting aluminium needs the right drills and blades to give a decent finish, I have included in my parts list tools I purchased to help me.
I could have made the WindowBridge slightly shorter in length to reduce weight marginally whilst still allowing a reasonable span across the window reveal, but overall I’m really happy with it and it is manageable to use.