
It all started so innocently, I thought I would give the post supporting my porch a coat of paint, so armed with a blow torch and scraper I started to prepare the post until my scraper sank into the soft wood at the bottom of the post 🙁
At this point I could have stopped and simply painted over the rotten wood, but as it was a nice day I got a screwdriver out and explored the extent of the rot.
This ended up being quite extensive.
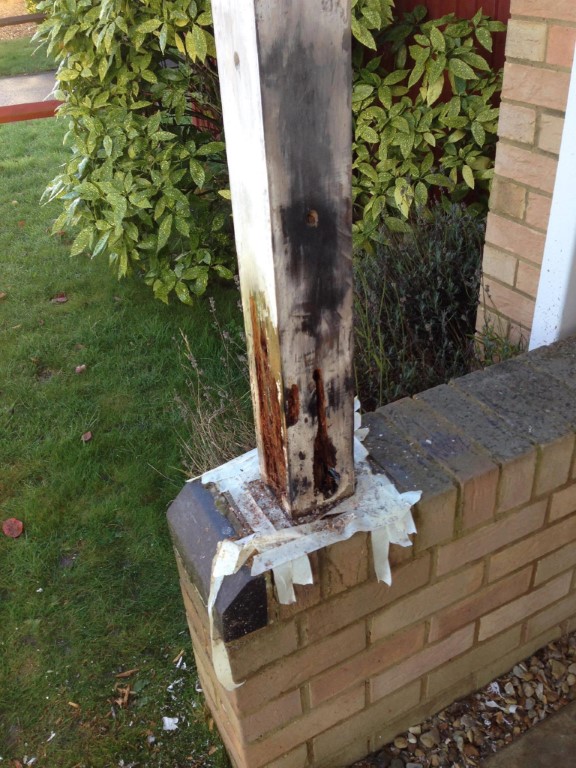
I scraped out all the dead wood and tried to figure out how it had rotted, the post is inside a galvanized shoe, and all I can imagine is that water has sat in the shoe and ‘wicked’ up the post and rotted it.
Once it was back to decent wood and left to dry out, I used Ronseal exterior wood filler over a number of sessions to make good and finally sand down and give two coats of gloss.

Once painted up it wasn’t a bad job and I was really pleased with how it turned out.
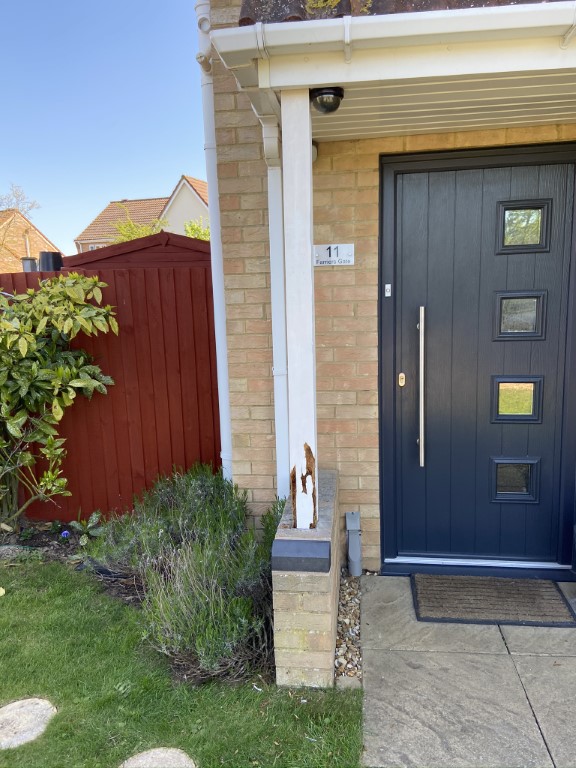
Rolling the clock forward 4 years and as my first retirement project and in the March 20 lockdown, I thought I would spruce up the front of the house starting with painting the post, so out came the sandpaper.
Once I started to rub the paintwork, it was obvious that the wood was soft in areas where the filler wasn’t previously and it was at this point I decided to bite the bullet and replace the post.
The unknows were how is the post secured at the top and at the post base also could I replace the post with little or no damage to either the wall or the UPVC barge board and cladding.
The two thing I knew was that the porch will need support once I remove the post, and the second thing was that I’m rubbish with wood so splicing into good wood on the exiting post was out of the questions.
Very little information exists about the construction method used to support the porch, hence this blog to help others who have a rotted post problem.
Before starting I sourced and bought all the materials which I thought I needed.
The replacement post was a Stop Chamfered Porch Post 2100mm x 95mm x 95mm and bought online from RMJM Joinery Ltd and cost £56.97 including shipping.
The part number is SCPP2100 and is engineered timber meaning it is two pieces of wood laminated together giving a high strength, warp resisting, structurally sound post with no knots.
I bought a couple of used Acrow props of Facebook marketplace for £20, which was cheaper than hiring and started to figure out how I was going to do the post swap with minimal damage to the UPVC facias.
Checking the online forums, the general consensus was that getting the polytop pins out which hold the facias on was impossible without damaging the soft surface finish.
I ordered a small number of 30mm and 65mm polytop pins from ebay for £5.70 and looking for replacement UPVC cladding, I couldn’t believe my luck that a wholesaler who sells to the public was based in the town.
AJW Distribution had everything in stock I needed to replace anything I would damage, also they were very friendly and helpful.
I started by removing the guttering and porch roof tiles so I could figure out how the post is attached at the top, trying to save the UPVC was futile, so off all that came too.
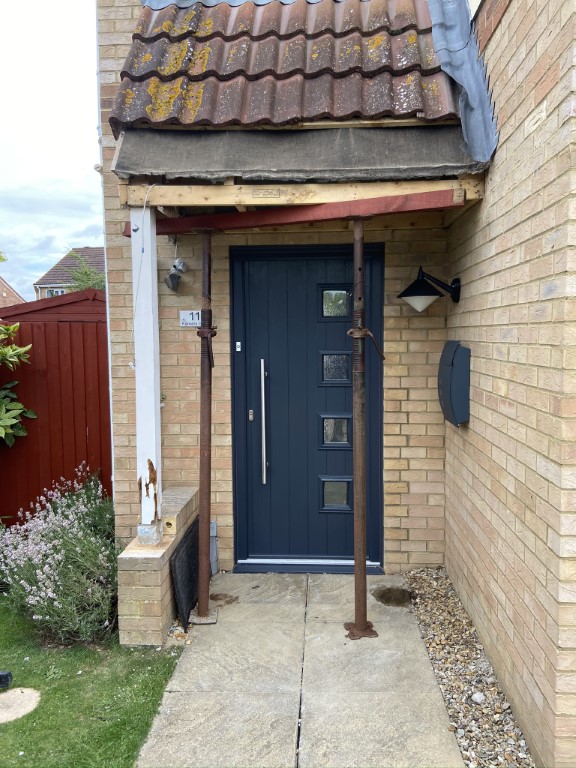
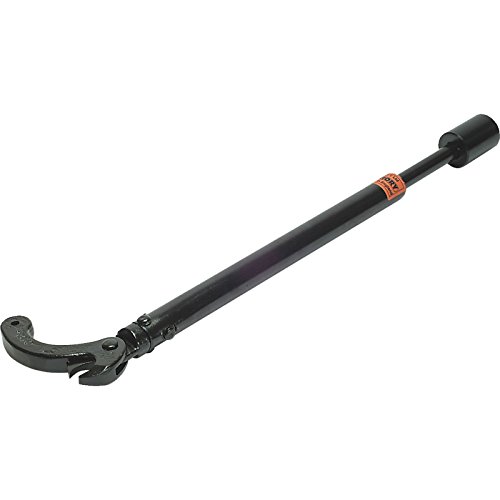
Before the post was cut, the porch was supported by a substantial diagonal brace and bricks enclosing the base of the post removed. Using a nail puller, the nails at the top of the post came out easily, leaving the post to be cut and removed.
The post base was seated in a galvanized shoe, once the soldier bricks were removed it exposed that the shoe base was sitting about 10mm off the second course of the brick wall.
Once I pulled the shoe out of the wall it exposed a locating spike which must have been sitting on the third course of bricks and all the weight of the porch was being transferred as point loading through the spike to the bricks below, a really rubbish construction.
Checking online, it look like the shoe has been modified as the base of the spike should have had a plate attached to spreads the loading, but I might be wrong.
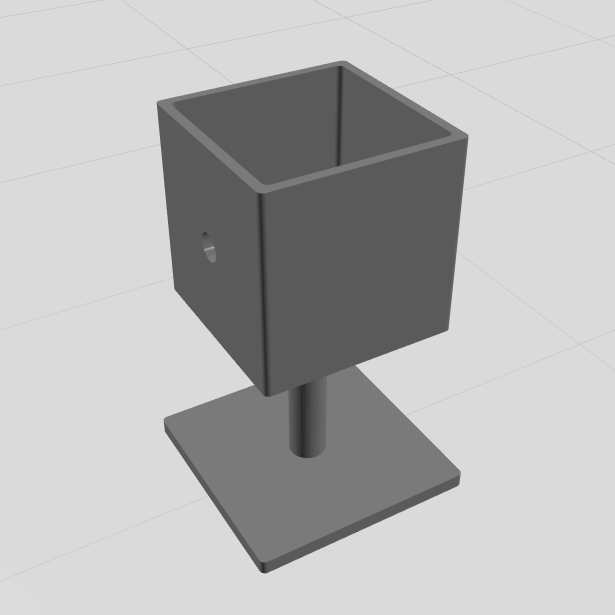
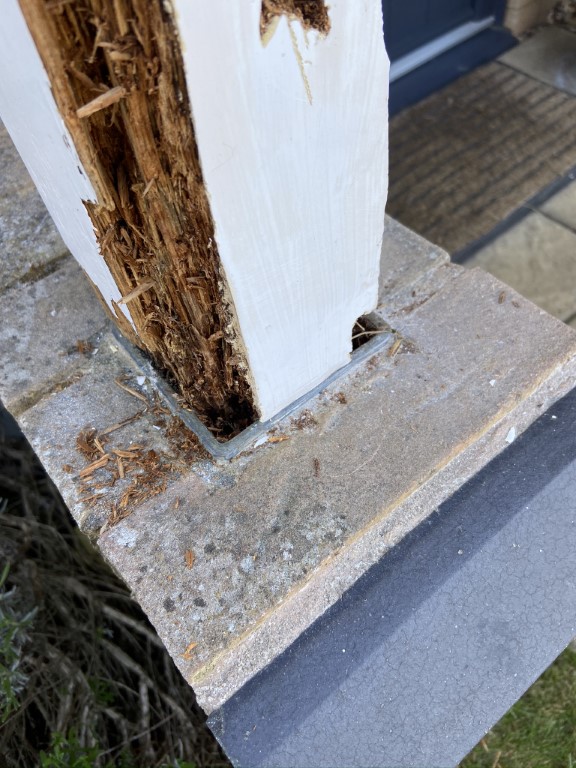
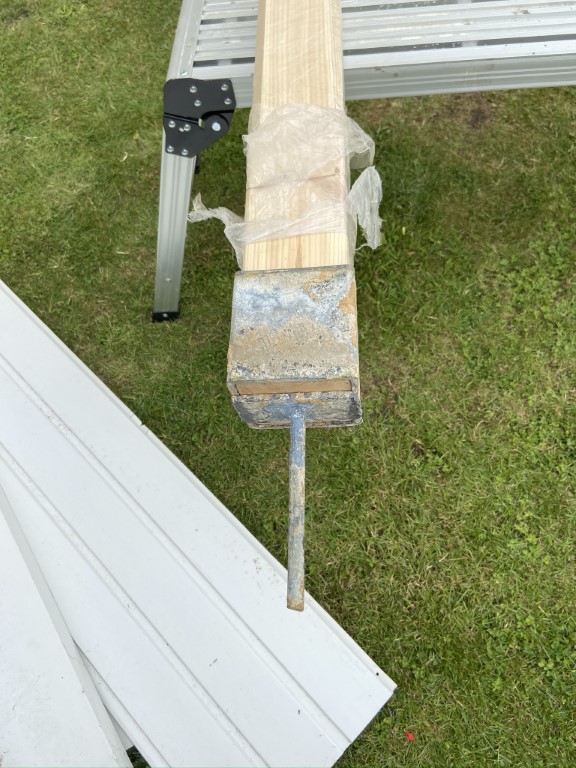
The picture below shows the shoe fitted to the new post, the spike had been bent during original installation and I can only assume this was done in order to get the post level and true vertically.
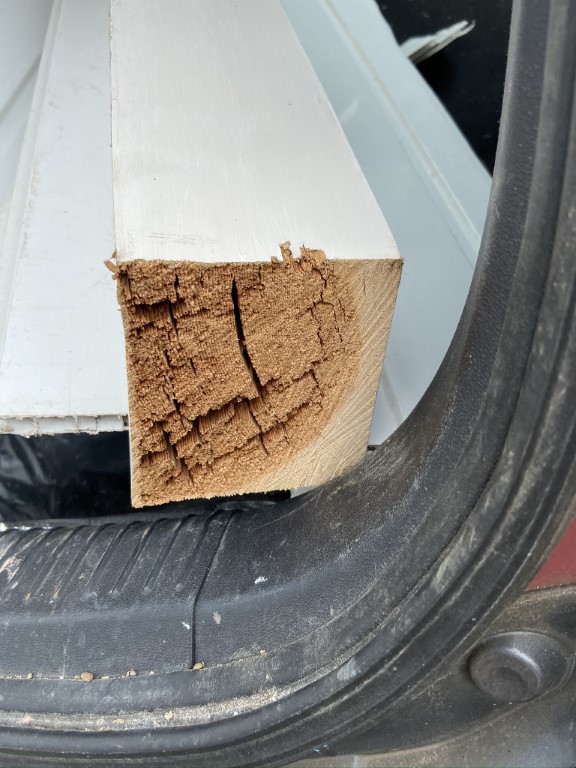
Once the post was cut out, it was quite a job to get the residual wood out of the shoe to allow me to reuse it.
The picture shows the post damage over 300mm up from the base where I made the cut in removing the post.
The new post was an ‘interference’ fit into the shoe as I didn’t want their to be a gap allowing water to ingress between the post and the shoe, this meant I used a big hammer to knock the shoe over the post, it certainly wont come out in my lifetime 🙂
Fitting the new post back was very straightforward, once measured and cut to length, the post shoe spike was located back in the gap in the wall and the top of the post securely bolted at the top on both elevations.
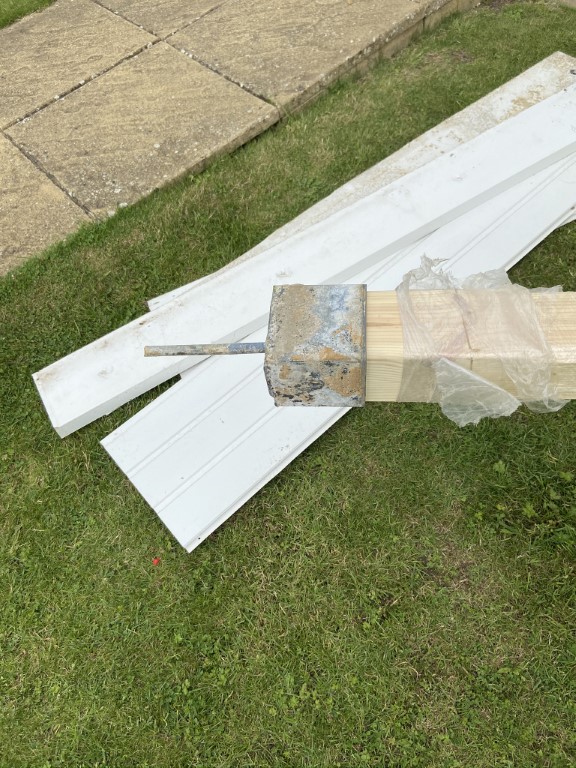
I had packed the shoe base with mortar as it was being installed to spread any loading. I had to get two new bricks which unfortunately don’t match the existing (London Brick Company, Honey Buff), but I kind of like that as it shows the post has been changed.
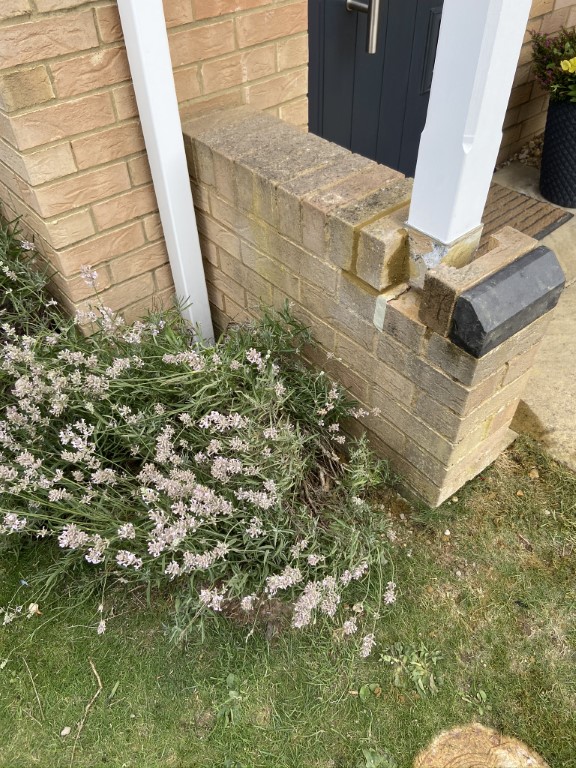
In the picture above you can see a strip of masking tape, this is covering a piece of 15mm copper pipe flattened into an oval shape which goes under the shoe and will act as a drain should water try and collect at the base of the post again.

The finished job, I replaced all the facia boards and cladding, including adding cladding edges, which was a significant improvement on how the house builders finished the porch, the overall cost was less than £150.00 including undercoat and top gloss paint.
Not much to look at once its all done, but I know it will last another 20 years and hopefully longer.
Thank you for this informative guide on replacing a rotten wood replacement porch support post! As a homeowner, encountering rot in structural elements can be concerning, but your step-by-step instructions provide clarity and reassurance.
Your most welcome 🙂
Thanks for that. Very informative. I could not figure out how the posts were secured at the bottom!
Hi,
The post sits inside a metal ‘shoe’, the bottom of the shoe has a spike which simply sits on the bottom course of bricks supporting the weight, the bricks either side of the post stop it moving sideways.
To be honest its not the best design and the original builders ‘winged it’, that said, its still standing 🙂