
I laid my first block paving path over 20 years ago at a different property, so I knew the basics when we needed to give my existing path a makeover.
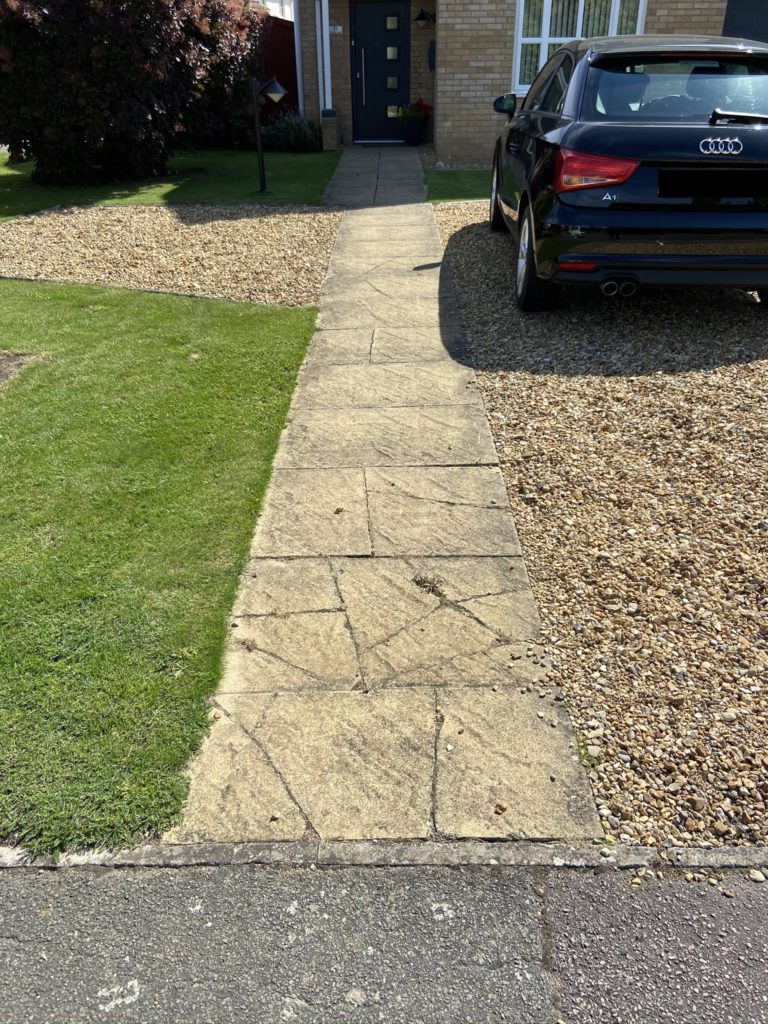
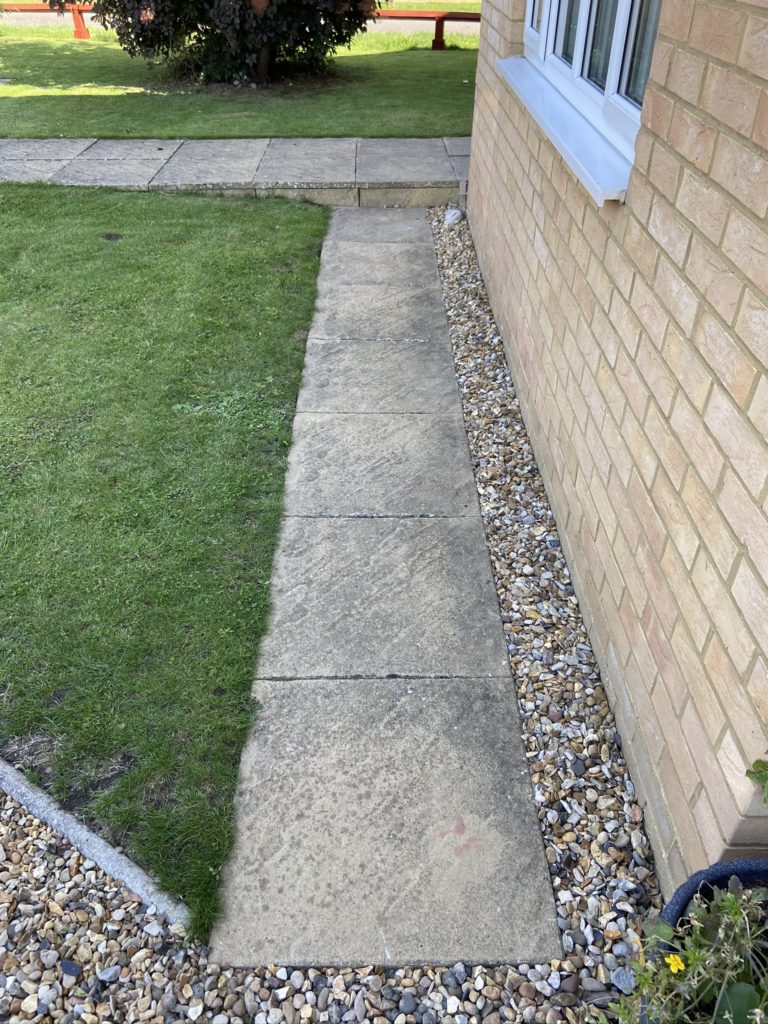
We knew it was going to be paving blocks, but the colour and pattern needed to be worked through. We did know that only pedestrian traffic would use the path, so the block thickness only needed to be 50mm.
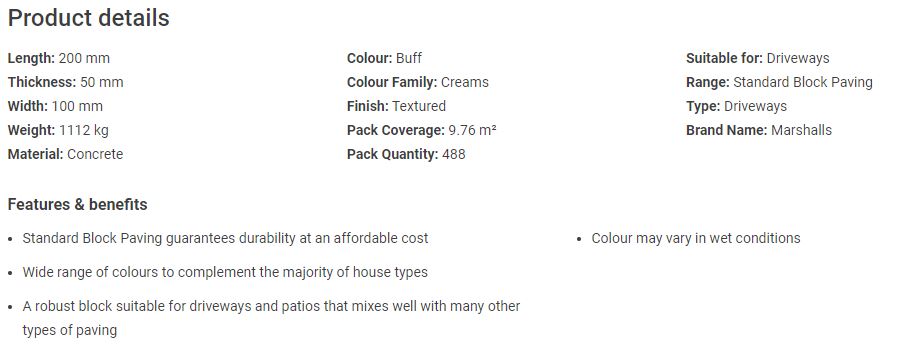
Looking online. the colour of block which is in sympathy with the house brick is Buff, Wickes turned out to be the most competitive at the time of purchase.
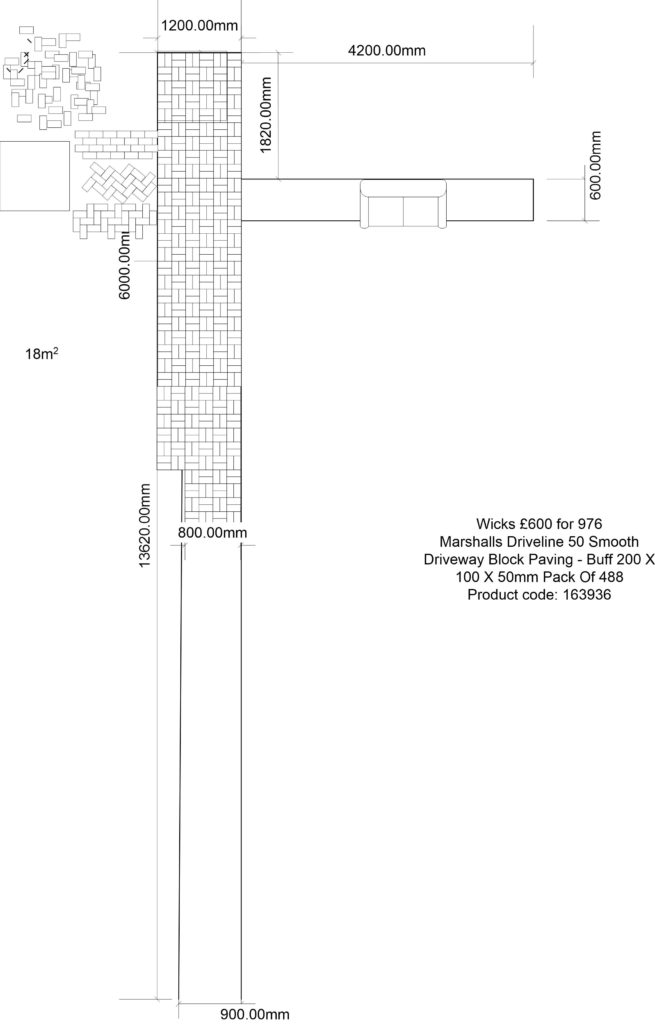
Block Setout Plan
Drawing a plan, gave the overall number of blocks required and we went for a very simply laying pattern to reduce block wastage to an absolute minimum after comparing laying options, (my previous attempt used a ‘Heringbone’ pattern which looks really nice but is very cut intensive and generates a lot of waste).
Materials
After ordering the pave block, I needed the following:
- Concrete edgings
- Metal edgings
- MOT1 hardcore
- Sharp sand
- Kiln Dried sand
- Skip
It was time to get the shovel out and get rid of the old path!
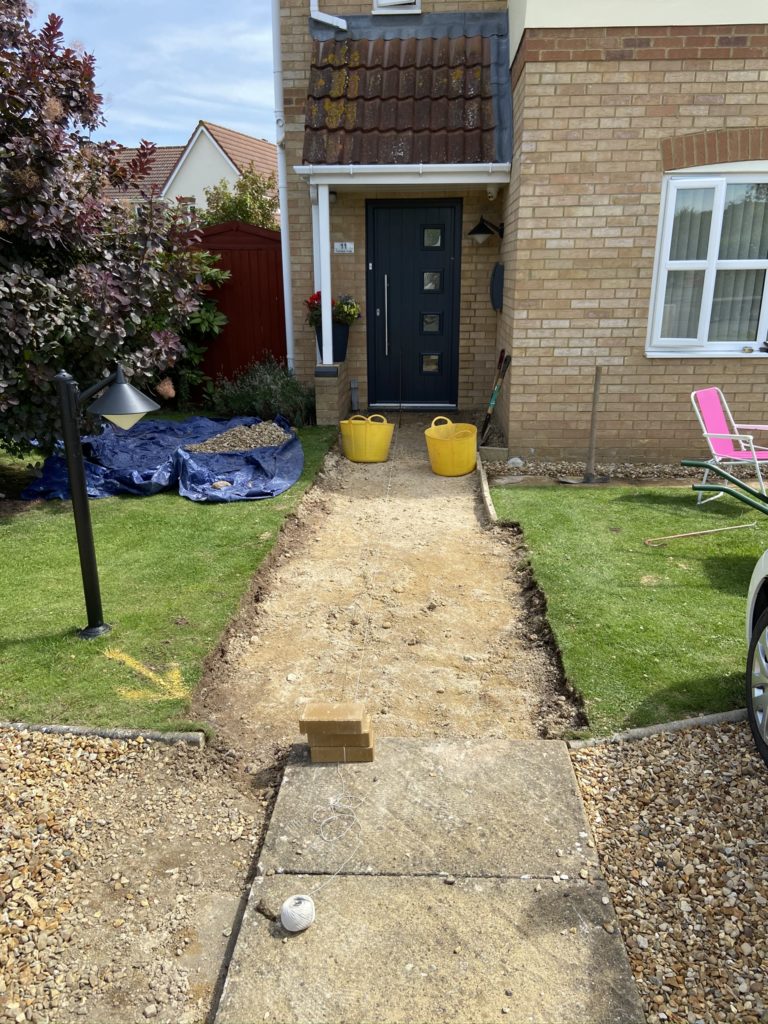
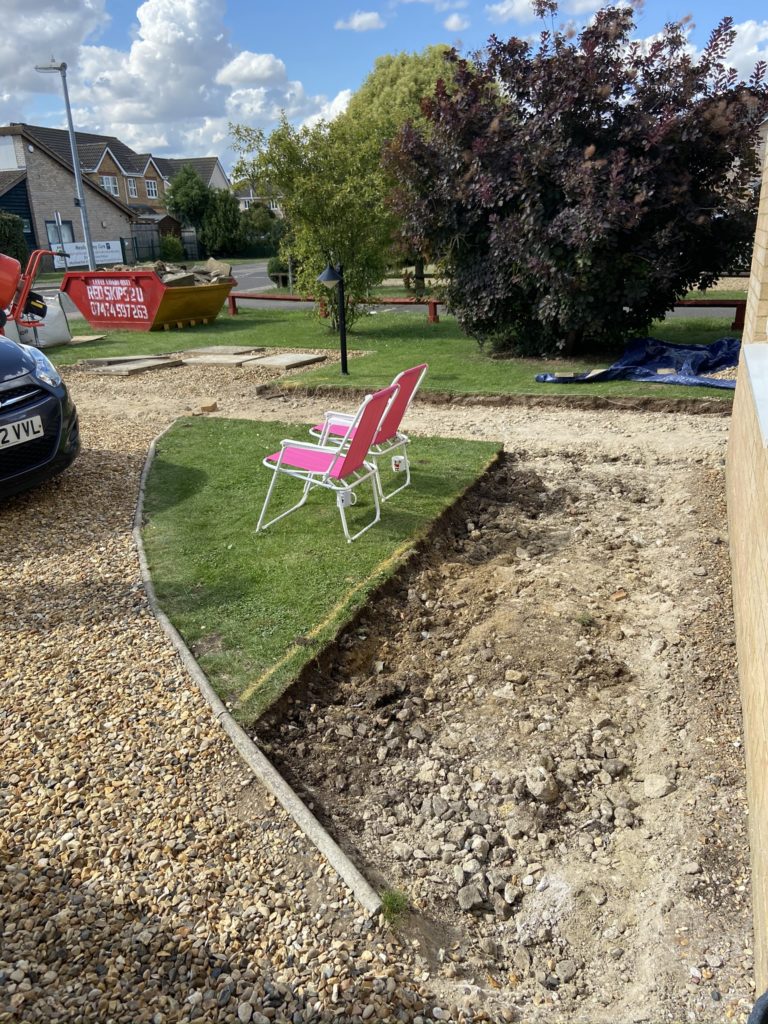
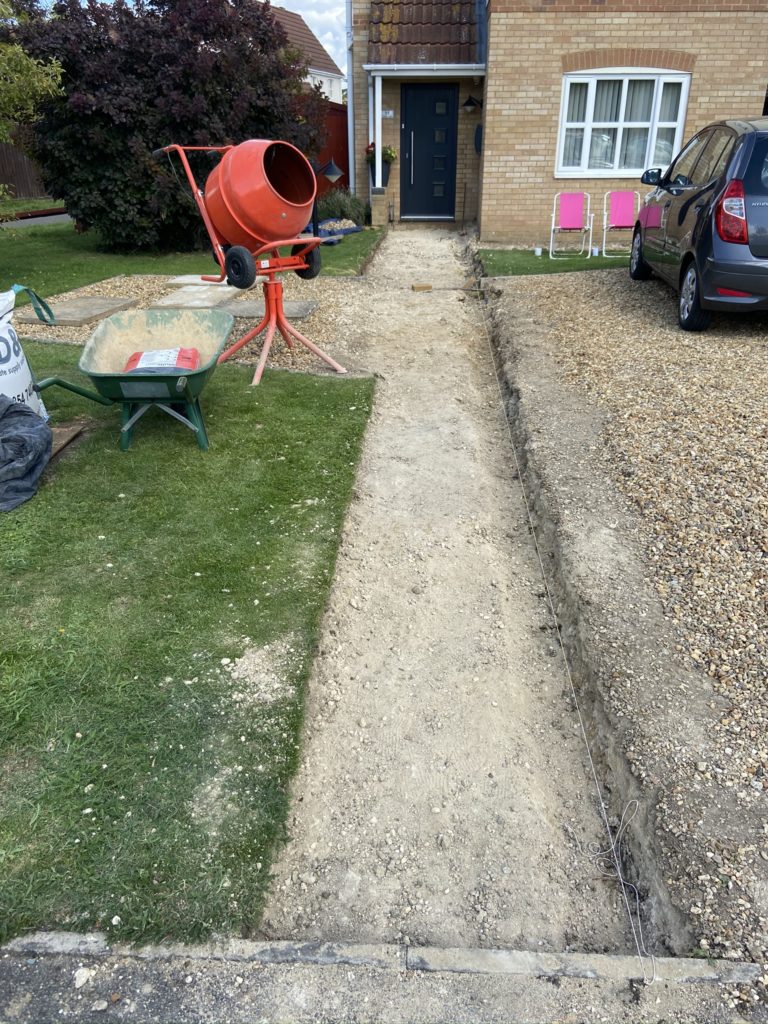
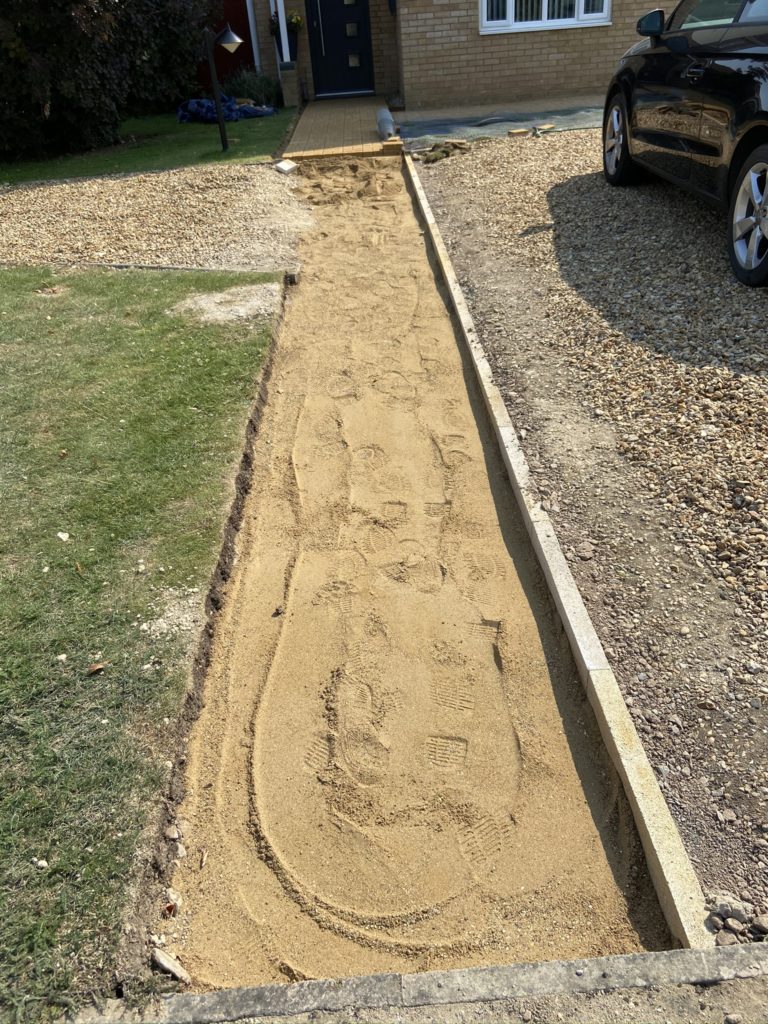
Once all the path was dug up, it was time to run a string line out for my straight edge, the width of the path isn’t that critical at this point, as I can take space from the lawn to add width.
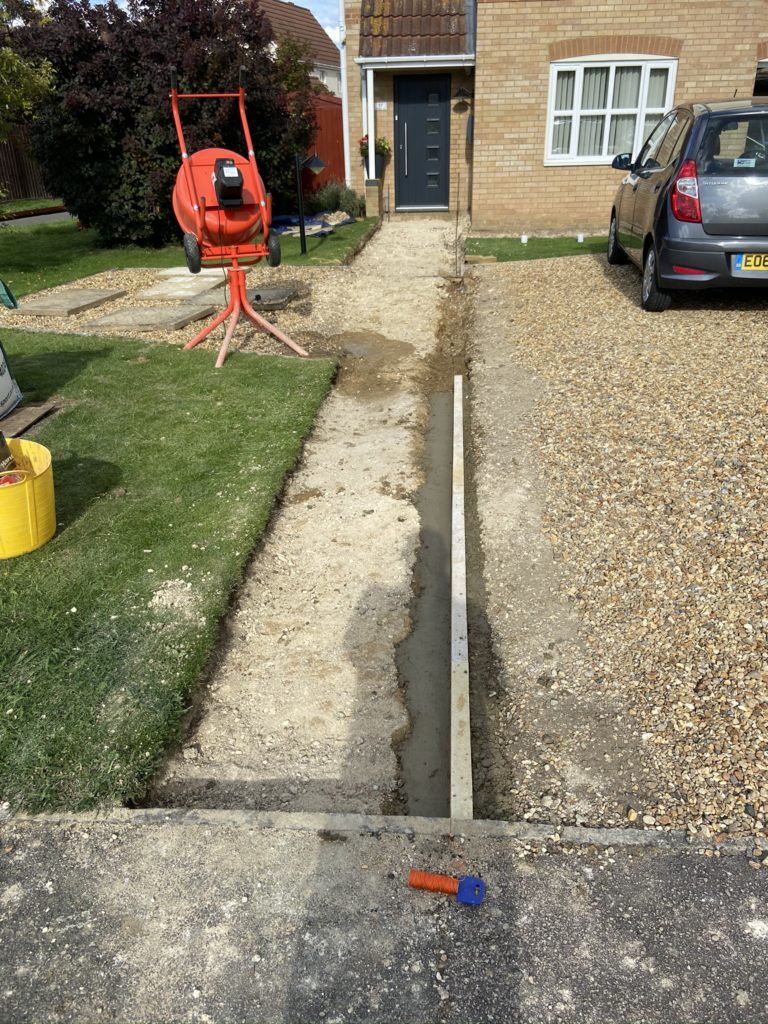
Concrete edging cemented into place, taking time to follow the string line for both height and straightness.
Getting the sand level correct
Once the edgings had set, we laid MOT1 and used a friends ‘Wacker Plate’ to compact this, before applying a 50mm layer of sharp sand.
My spirt levels height was the same as a pave block (50mm), the base sand was compacted and I used two lengths of 25mm galvanised electrical conduit as runners which were embedded in the sand.
The level was then used to scrape the sand using the conduit as rails, adjusting the depth until the sprit levels top edge was 10mm proud of the edgings top, this was to allow for the bricks compaction at the end of the laying process so they lay flush with the edges.
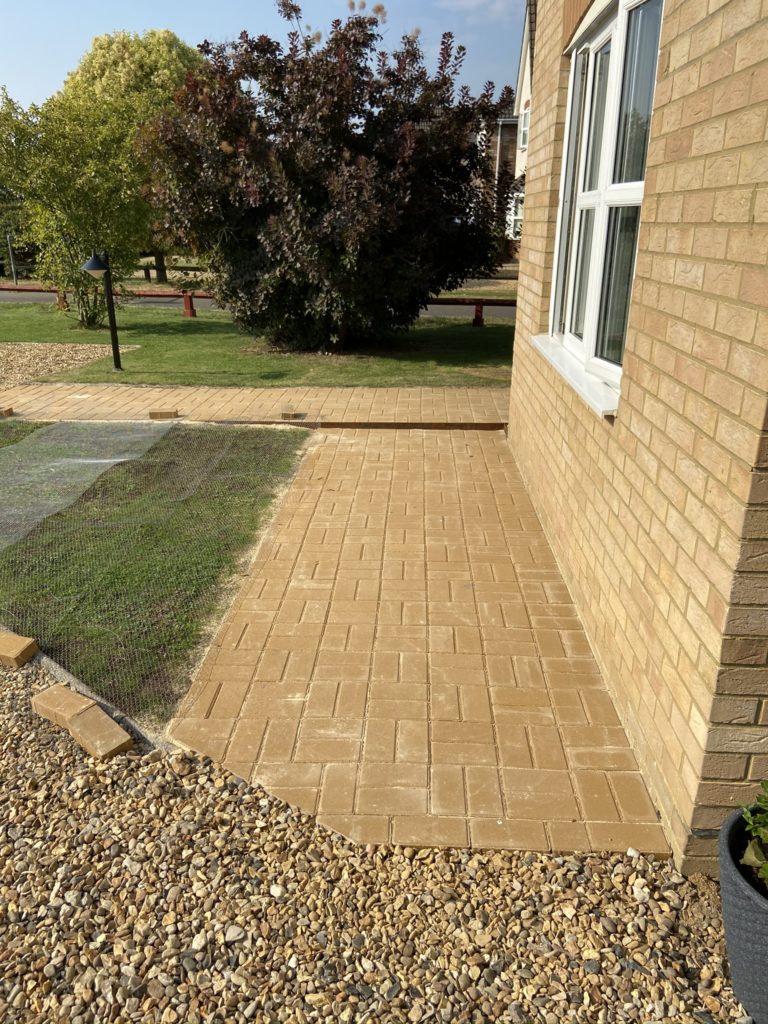
Where the blocks butt up to the lawn, I used Corten steel edgings, as these are very thin, strong and will last for decades.
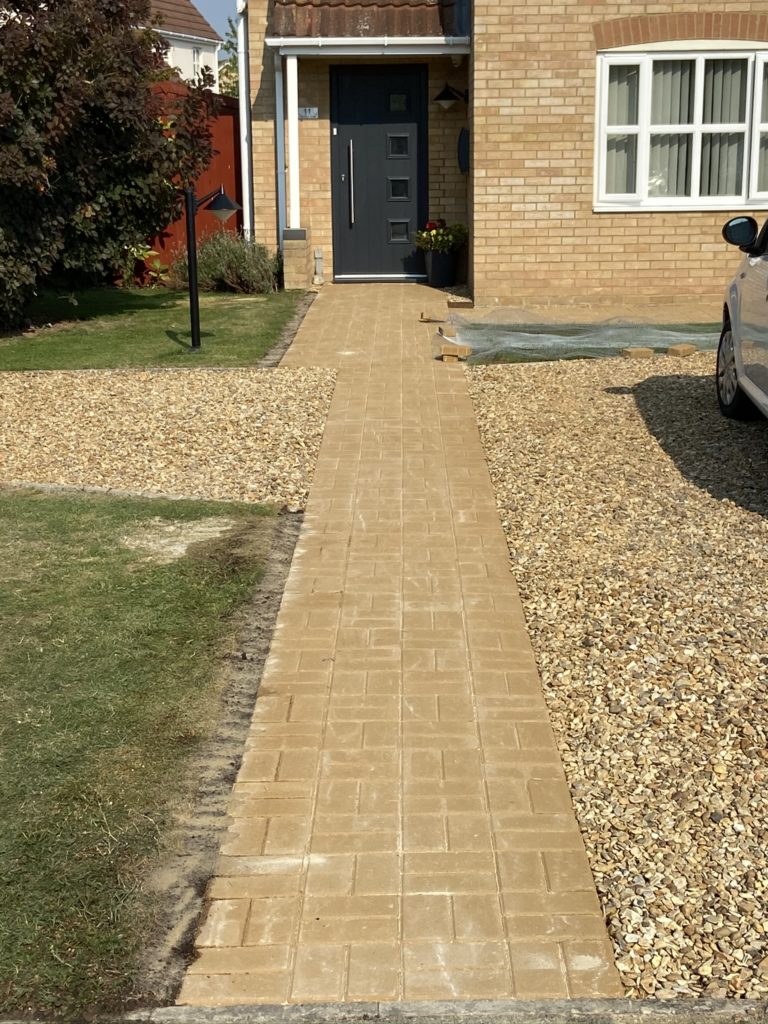
With the blocks laid, the ‘Wacker Plate’ was again used, after a liberal layer of kiln dried sand was added, to vibrate the sand into the gaps and effectively ‘lock’ the blocks in place.
The lawn was then reseeded, hence the mesh.
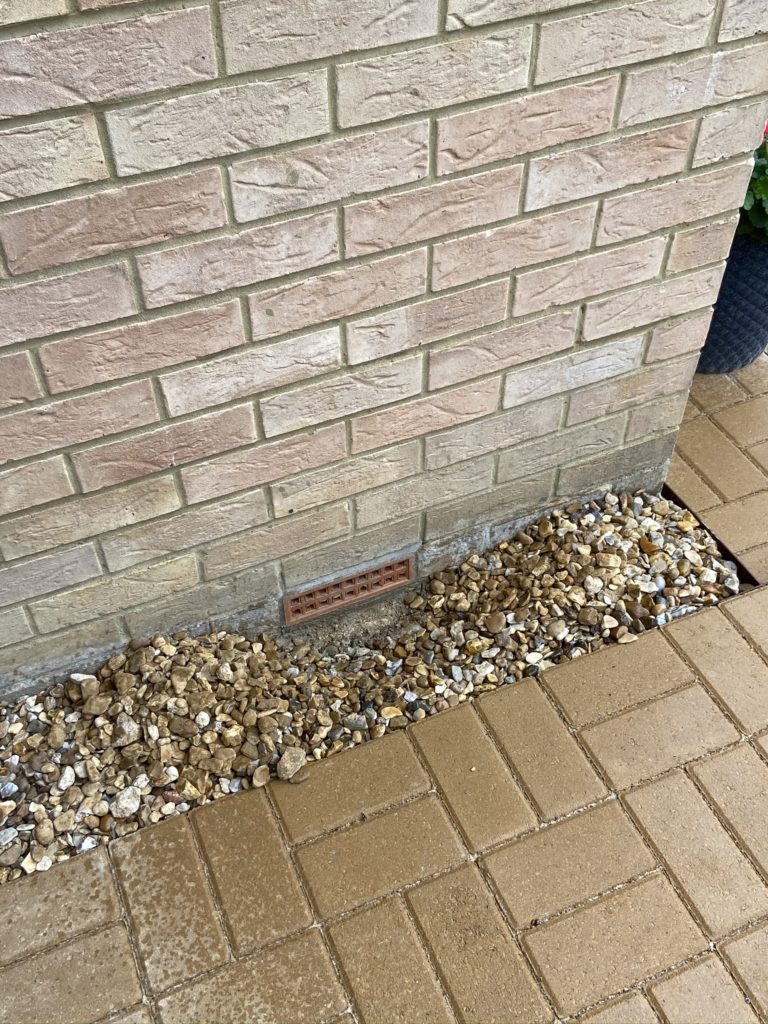
One good thing to come out of this apart from a path, is that the house builders had simply filled an air brick hole up with gravel which was below the paths grade, so hidden.
This was sorted very quickly with a new air brick installed, but the builders should have known better, but the quality of construction in certain areas is questionable!
Conclusion
The weather was very kind to us when we were doing this project and their was no rush, so it turned out to be a pleasant job to do, still physically hard work, but it does look good for an amateur job, (although I do say so myself :-))
Hello Ian. I discovered your post at a perfect time as I plan to give my current path a new look. Your content is very informative and helpful. I am new to a block paving project, so I’m a bit nervous about whether my decisions will turn out right. I also want to use kiln-dried sand for block paving. But will I have a problem with the side sticking with this material? Will it fill the joints without risk of overflow?
Hi and thanks for getting in touch.
The thing that I like about block paving is that you can lift it, re-level the bedding sand and re-lay it if your not 100% happy with it, so go for it 🙂
Regarding the kiln dried sand, the blocks have small ‘nibs’ on the side faces, so when the blocks are pushed together their is still a channel for the sand to flow into and lock the bricks, use a liberal amount on the surface of the finished blocks and give it a few passes with a wacker plate to make sure the sand is fully vibrated into the gaps, the side edges of the path will need some kind of firm support otherwise the blocks will not hold tight.
Good luck with your project and let me know how you got on.
My bloc paved drive is quite large and on a slope. I don’t like
it because it’s too high maintenance. When it rains the sand
washes out and flows all down the road. The weeds are really
terrible and difficult to get rid off. My husband had it put down
over 20 years ago and now that I’m on my own I hate it.
Hi Gail,
As you have found, block paving does require maintenance, even on my small area, over larger areas the recommendation is to use a ‘paving sealer‘ as this limits the sand being washed out and weeds growing.
Most of the DIY places sell it, maybe worth looking at.
Cheers
Ian
This is a really well-thought-out guide — I like how you drew a set‑out plan first to reduce waste and chose a simple laying pattern. Your method of building a compacted base with MOT1 and leveling with sharp sand is solid. Using kiln‑dried sand plus a wacker plate to lock the blocks feels like a pro move. And the Corten steel edging is a smart touch — slim but durable. Thanks for sharing these practical tips!
Hi Julian,
Many thanks for checking out my blog and your kind comments.
All the best