Installing mains water sub-meter and auto–close valve linked to Home Assistant

Updated 17 February 2026

Jump to Home Assistant Details

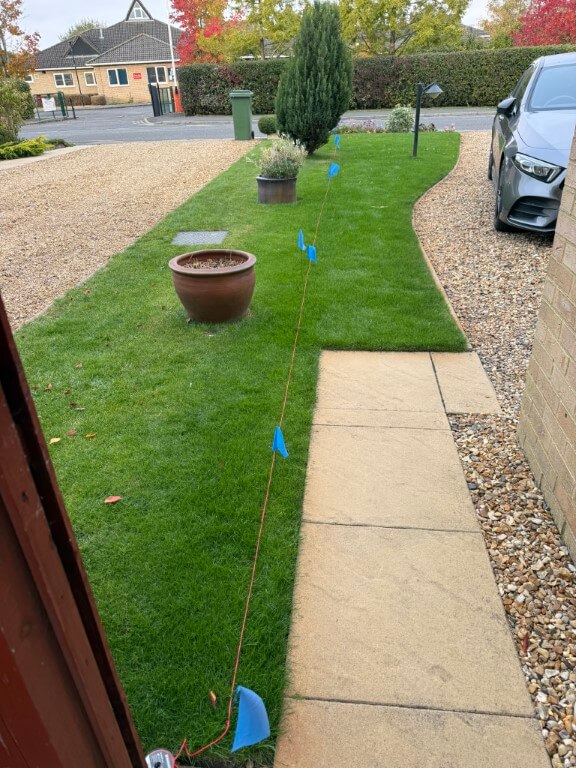
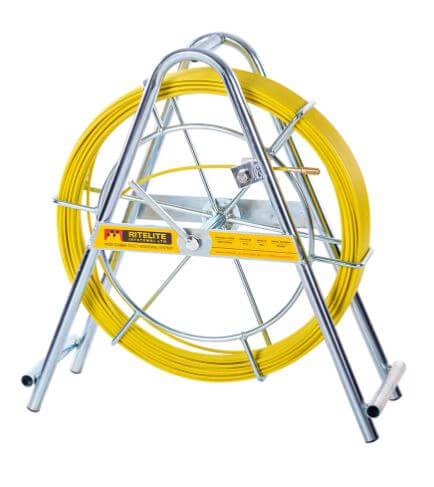
This blog covers the installation of a sub meter between the house and Anglian Waters boundary meter, the blog on locating this pipe can be found HERE.

The primary reason I want to monitor my water consumption in real time, is that Anglian Water supplied smart meter can’t do this as the App is typically 24 hours behind, a secondary reason is that I can take the opportunity to add an automatic shut-off valve linked to Home Assistant, so should a leak detector activate in the kitchen, the water supply to the house will close and also an alert will be sent to my mobile.

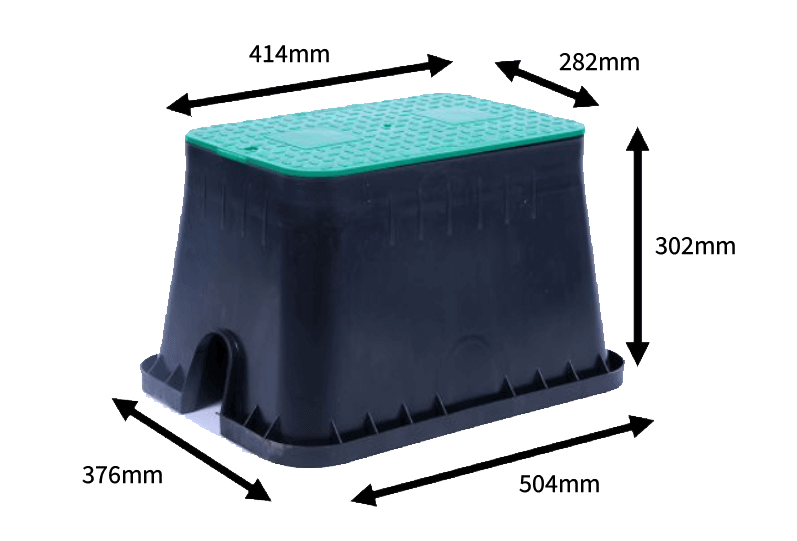
The equipment will be installed a standard size irrigation valve box.

valve box

The original idea was to install the valve box as near to the house as I could in order to reduce cabling and ensure a decent Wi-Fi signal gets to the control system, this idea failed when it was discovered that the water pipe near the house id over 1.5m deep.

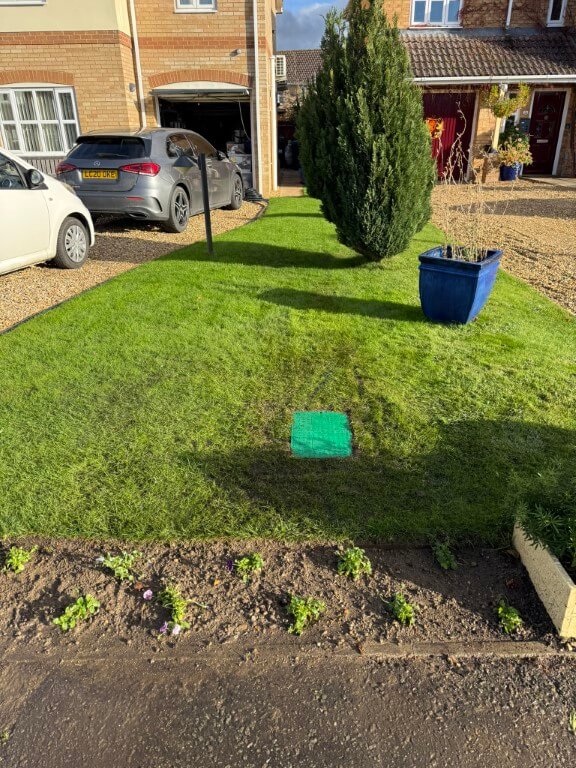
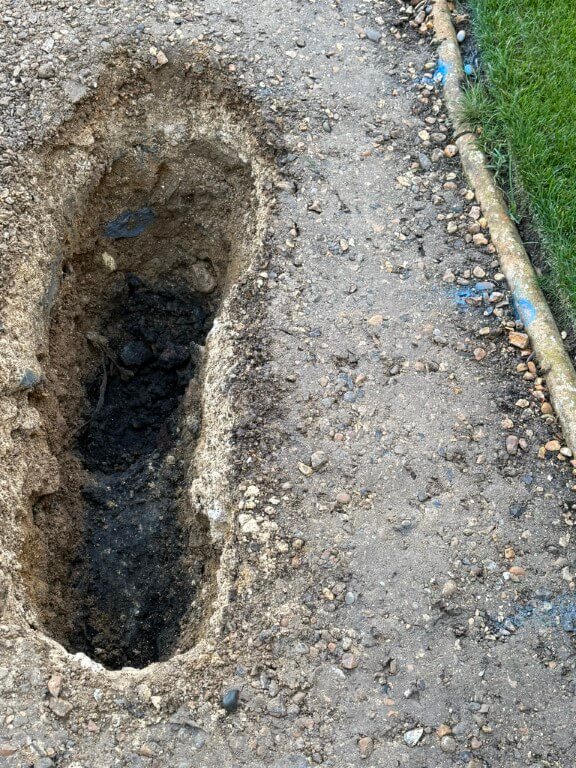
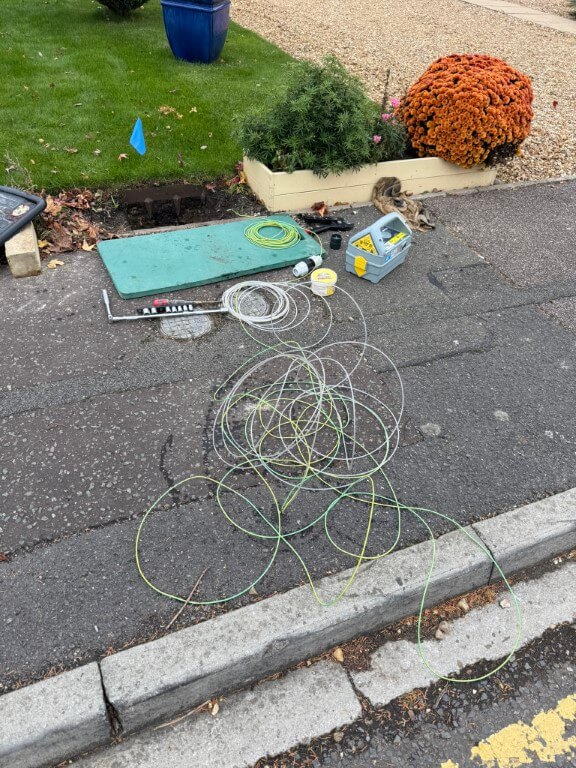
The next best option was to place the valve box in the hole I’ve already dug near the boundary meter which was used to trace the pipe.

boundary dig

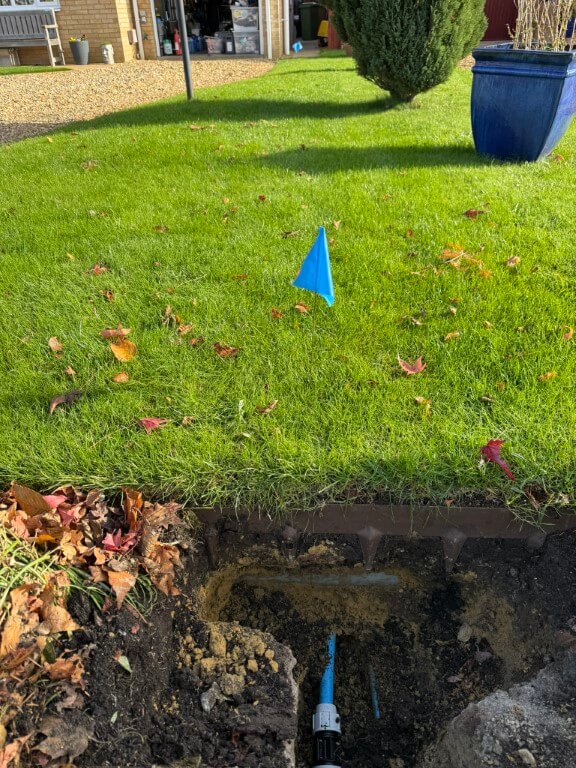
This plan was to install the meter and valve inline with the pipe with the valve box sitting over the top of the kit, impinging slightly into the lawn.

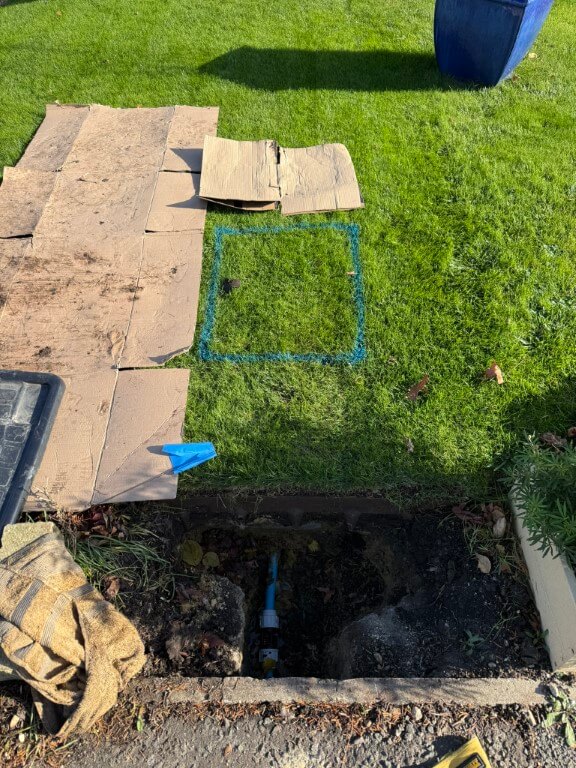
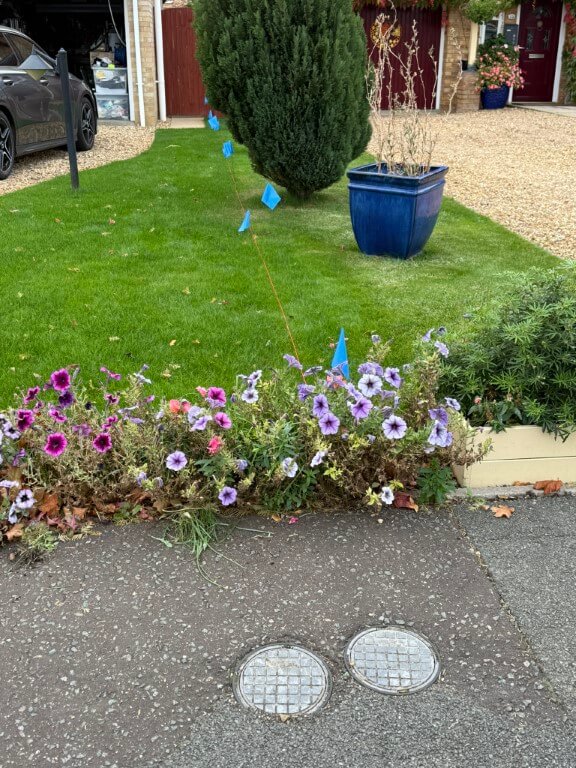
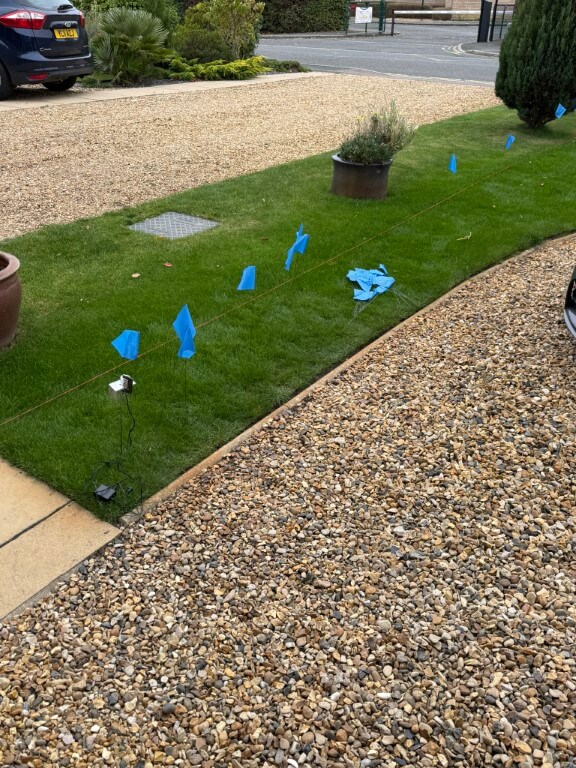
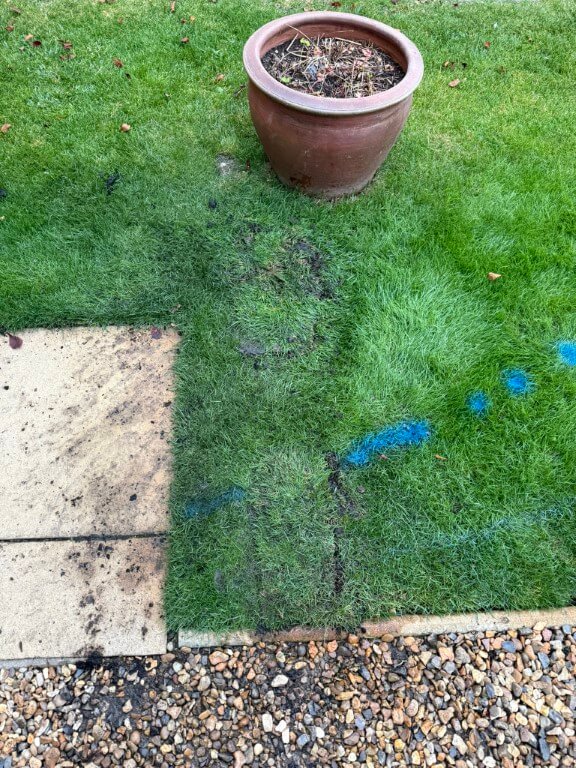
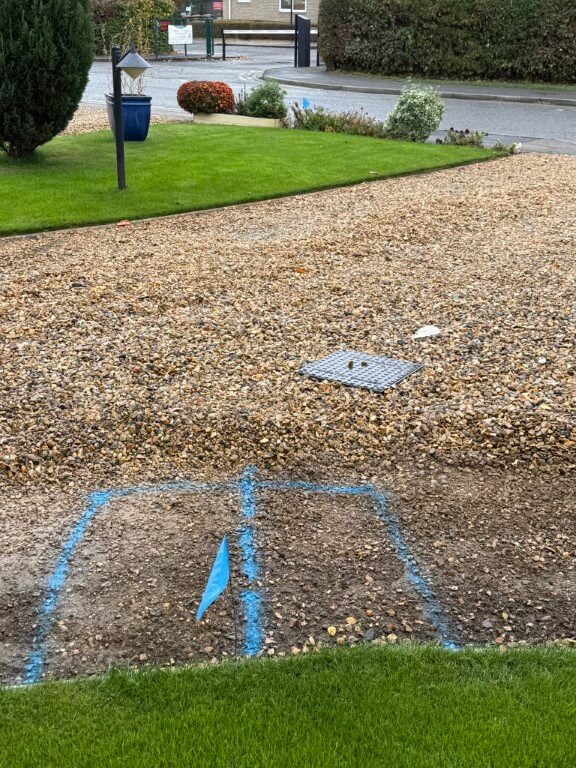
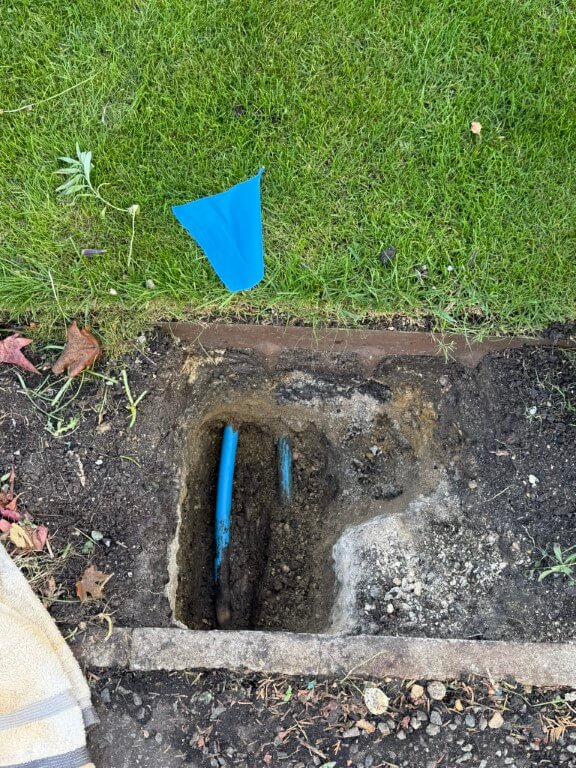
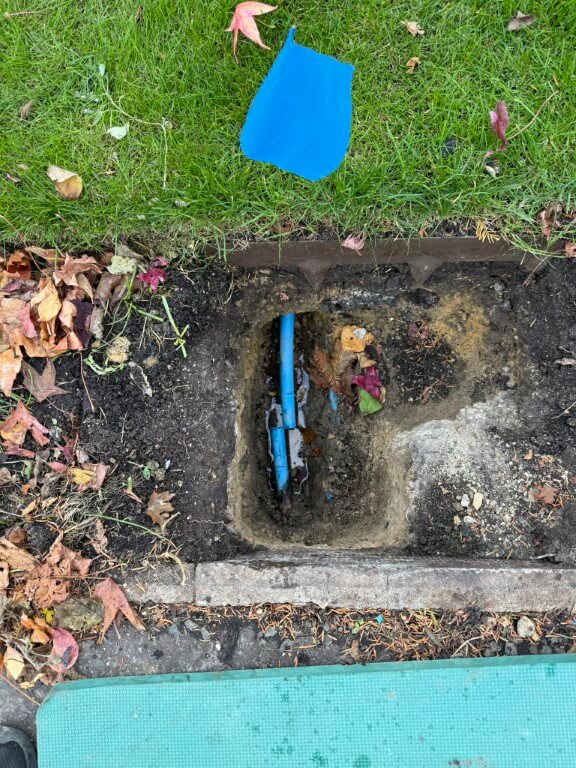
This came to a halt when I uncovered an Openreach duct under my lawn with the water pipe passing under it, so the only option left to me was to put the valve box just past the blue flag in the lawn marked in blue.

marked hole

The dig went quite well, I was aware of the garden irrigation pipes which pass to the right side of the dig and also in front of the box.

first hole

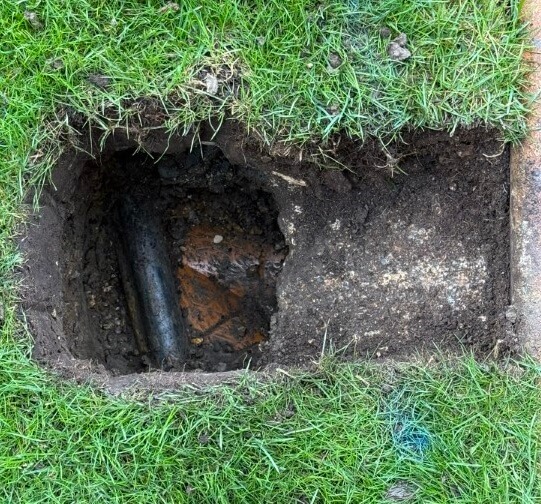
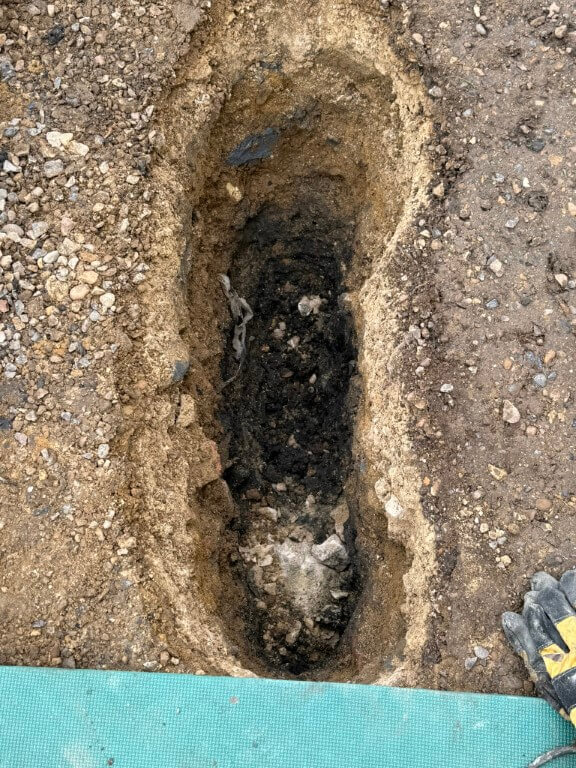
Typical with this project, I discovered the expected water pipe, but also the gas pipe and further down, the electrical duct to the house, all basically touching each other and off-center in relation to the valve box.

dug before box

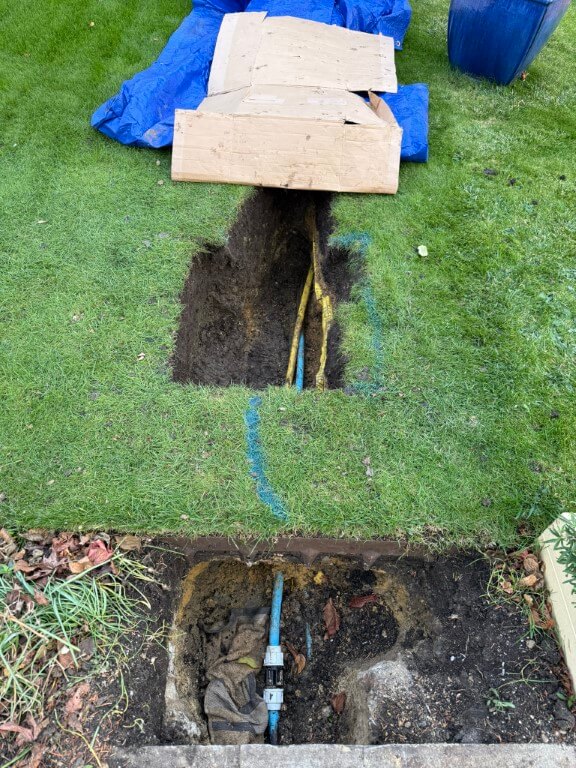
Due to the lay of the pipes I moved the valve box dig slightly to the left, this meant I needed to reposition the inlet and outlet water pipes.

zoom hole

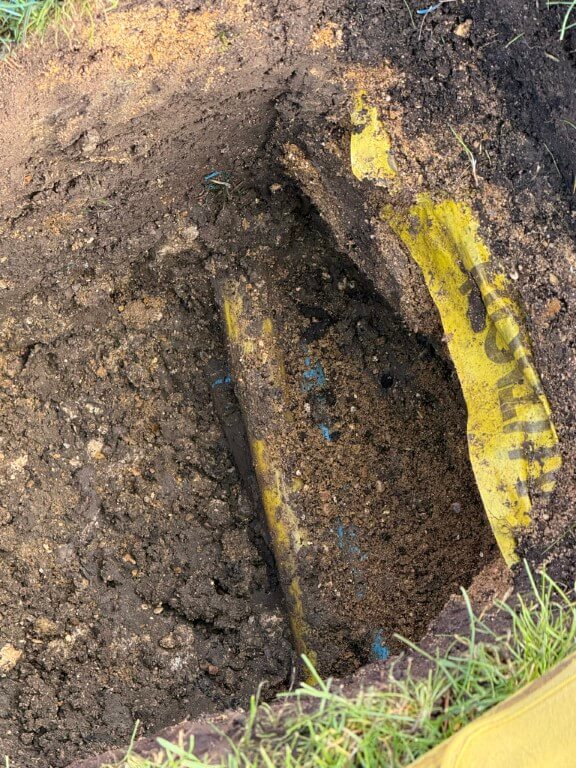
To compound the issue, the water pipe feeding my property is underneath the gas pipe, the close up on the above finished dig showing the irrigation pipe with marker tape, below this are the gas and water pipes.

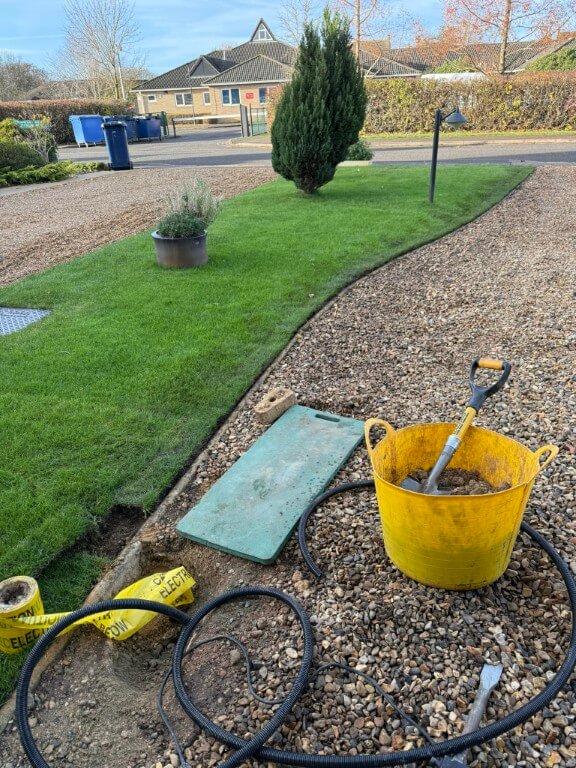
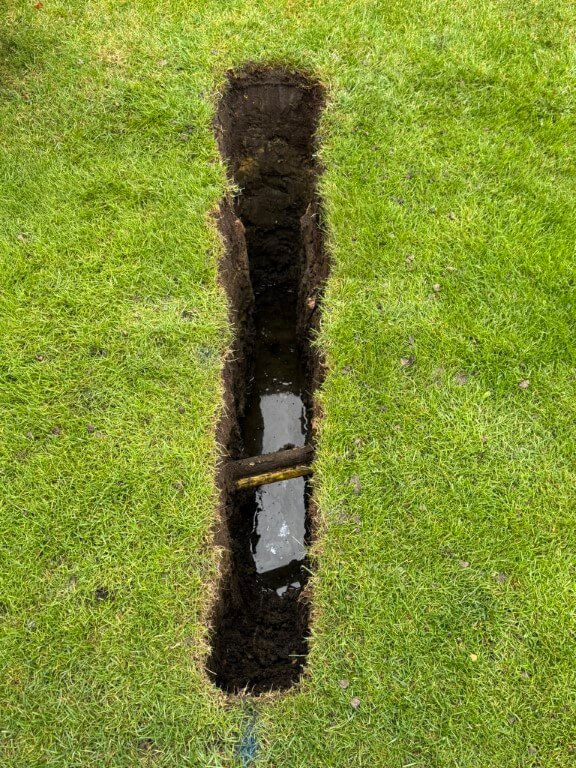
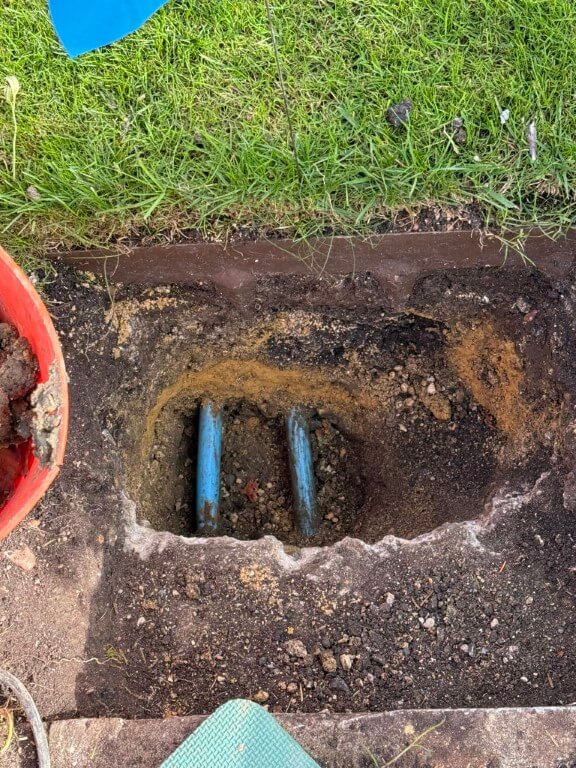
I dug further back to give me better access to the water pipe, also the length will give me additional flexibility, the plan is to cut the water pipe and get it from under the gas pipe so it will enter the valve box in the correct position, also the existing pipe to the boundary meter will be removed at the slip coupling and rerouted to the left of the existing position, again to get the pipe central in the valve box.

box start

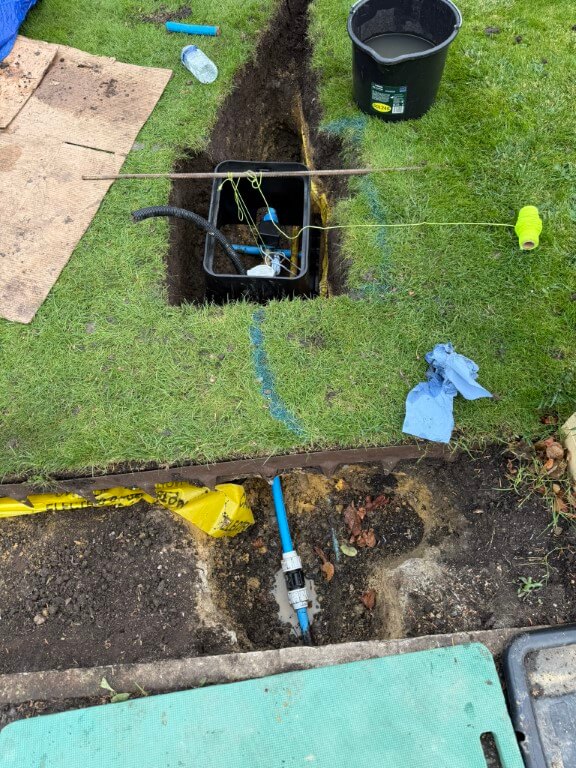
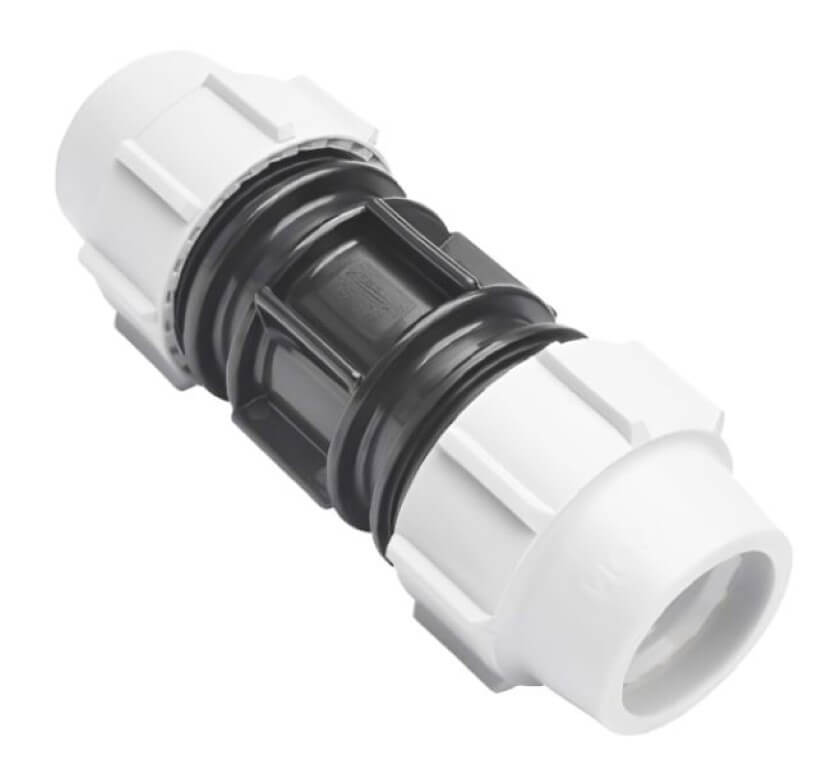
Valve box in temporary position after water connections made, the water connection turned into a problem for me as the pipe from the boundary meter under the grass to the new hole had been compressed and deformed to an oval shape by the Openreach Duct pressing down on it, with a stone beneath the pipe, a perfect storm.

The meant that I had to hammer the pipe through the soil from the slip coupling, only to find that I needed 1m of 25mm pipe to replace the damaged section, fortunately Taymor Plumbing Merchants at March were brilliant and cut me a piece for free, I did go back with chocolates and a Thank You card as they got me out of a right pickle.

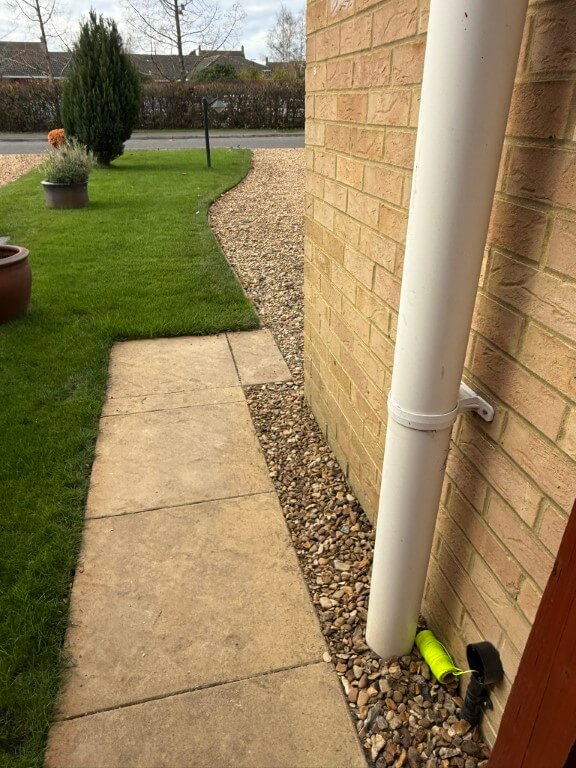
The 25mm flexible conduit is to carry 12v power to the ESP32 which controls and reads the valve and meter respectively.

valve box top

New pipe from slip coupling to sub meter via protective sleeve, exit pipe from the auto-valve to the house no longer under the gas pipe, making for a tidier install.

meter in place

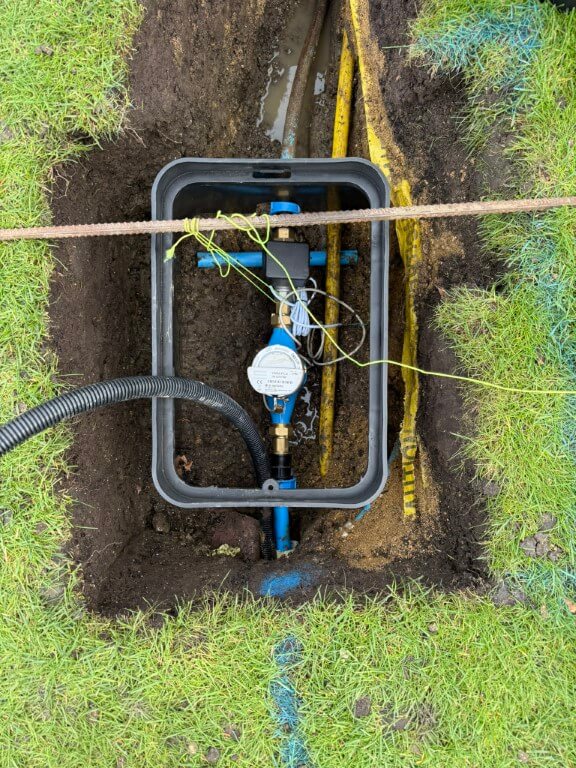
Valve box fixed in place with pea gravel and leveled to the grass, water pipes covered in builders and sharp sand to protect them and the longer section of exposed pipe to the house had pipe insulation fitted before being covered.

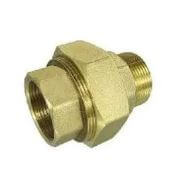
As I have pipe ‘fixed points’, the water meter is on flanged couplings allowing easy removal, I have also used a brass male to male cone seat union on the auto-valve, again to allow easy removal and replacement when required.

box lid

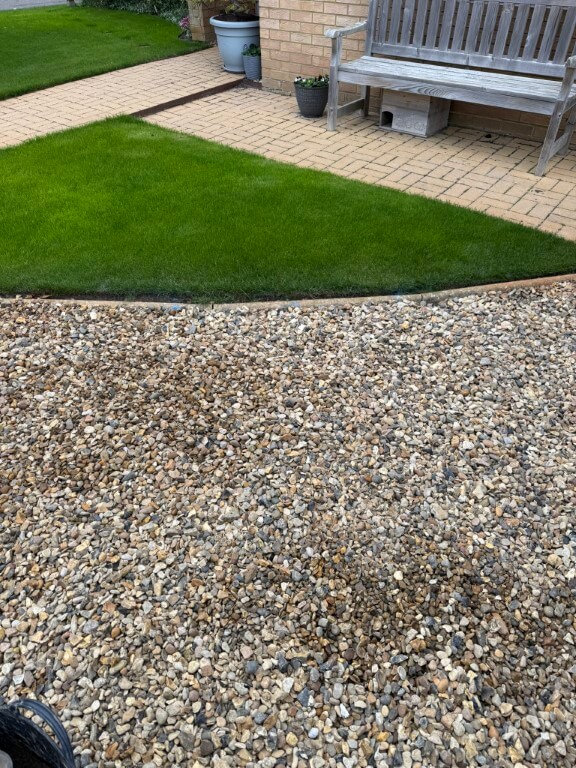
Grass and border restored to make the job look a lot neater, once everything starts to grow, the box lid will melt into the lawn.

conduit

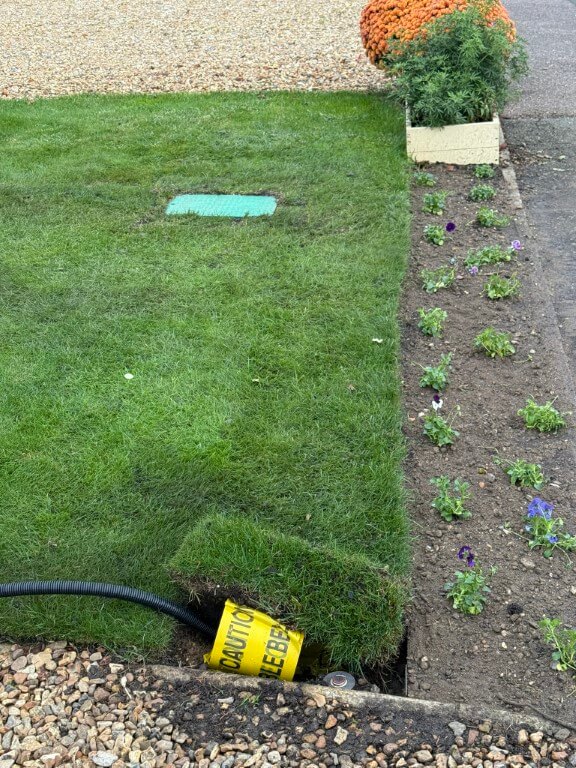
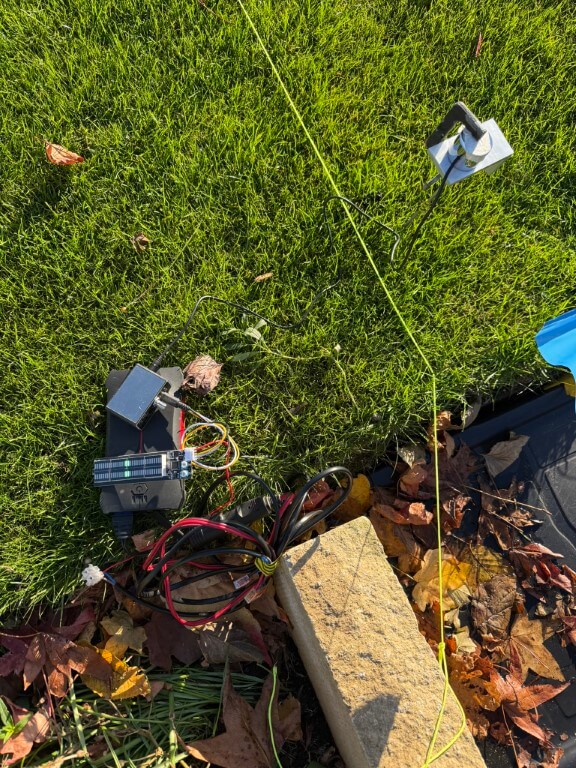
25mm Flexible conduit being installed back to the garage, the conduit has a marker tape over it and a shallow covering of sharp sand, due to concrete haunching supporting the round nose edging, the conduit is quite shallow, but I I wont be aerating the lawn this close to the edge, so it will be fine.

conduit going in

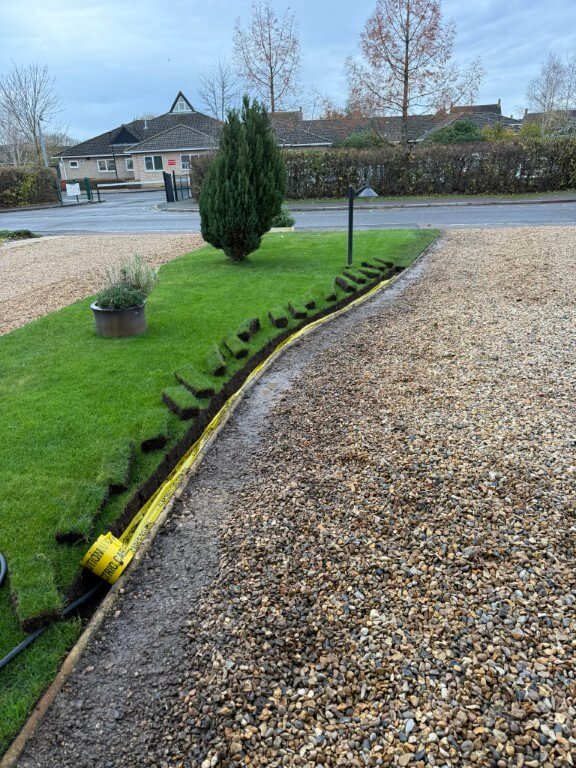
As it had been raining recently, the grass sods were easy to cut and lift out.

lawn edge

Conduit under the edging ready to drop in a trench in the drive which is yet to be dug, the last sod of lawn is next to go back and levelled down with the back of a spade, after that a mix of sieved soil mixed with lawn seed will be spread down the cuts and joints of the lawn where I have worked.

finished conduit

Flexible conduit all installed and draw cord in place ready to pull in 1.5mm2 two core cable for the 12v DC power to the ESP32.

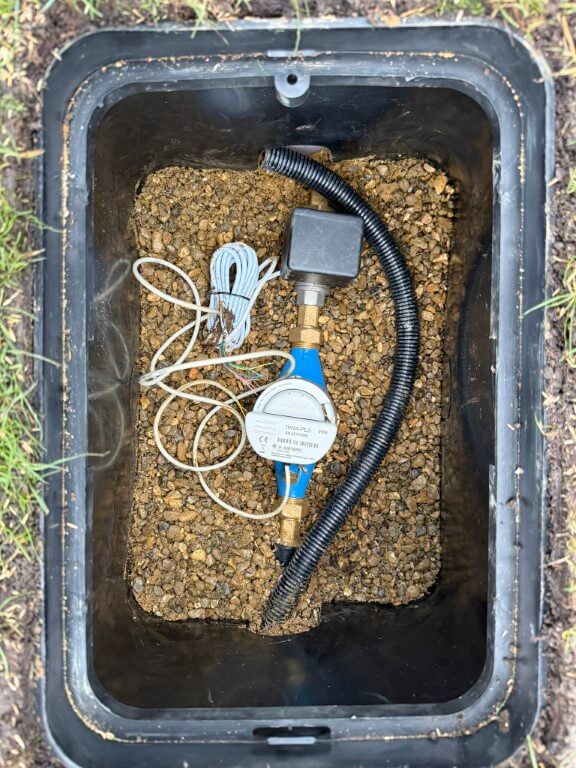
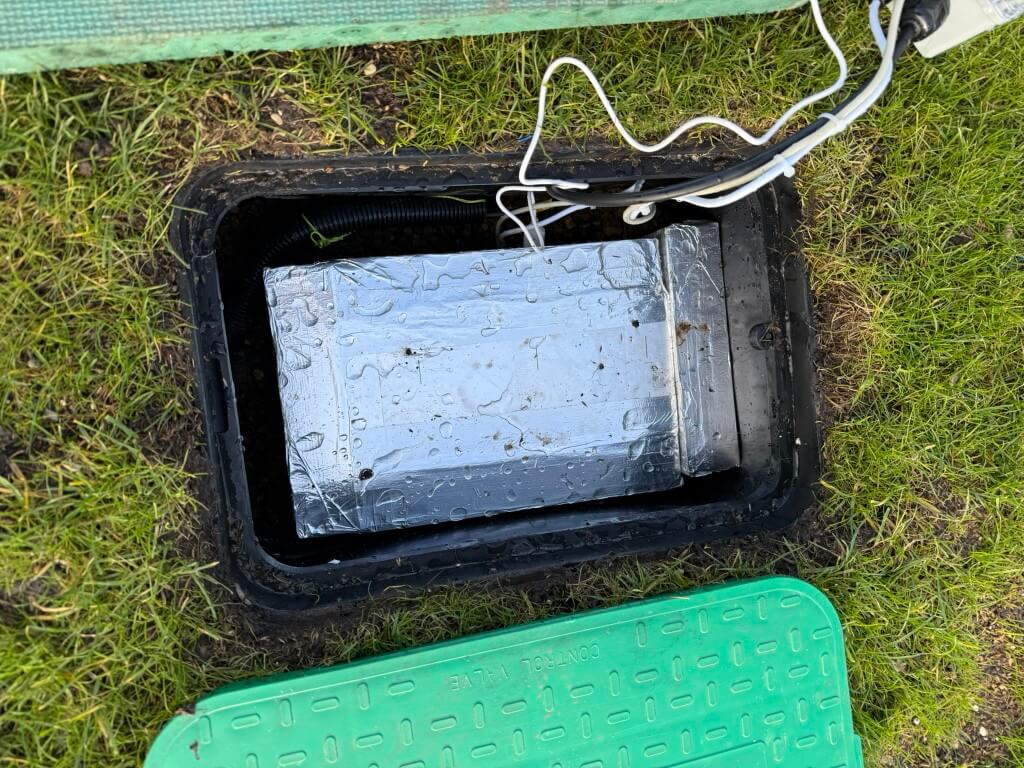
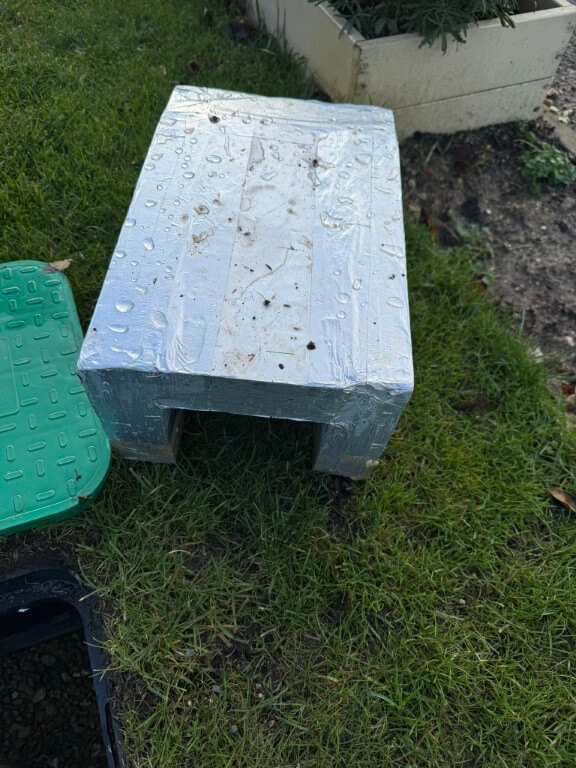
In the meter pit I have installed an cover for the equipment in the valve box using 50mm Kingspan insulation.

Home Assistant interface, equipment and wiring

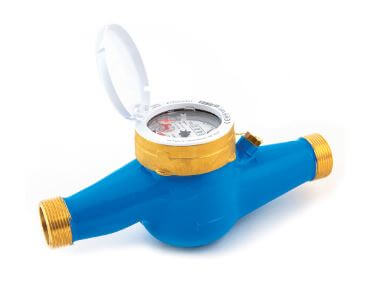
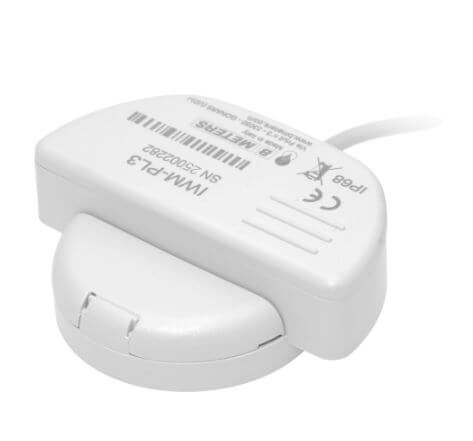
Working from the boundary water meter owned by Anglian Water, the connection was made in 25mm MDPE to my sub-meter which is a BM Meters model GMDM-I with a IWM-PL3 pulse emitter fixed to it and configured to register 1 pulse every 10 litres, both of these were bought from stockshed.

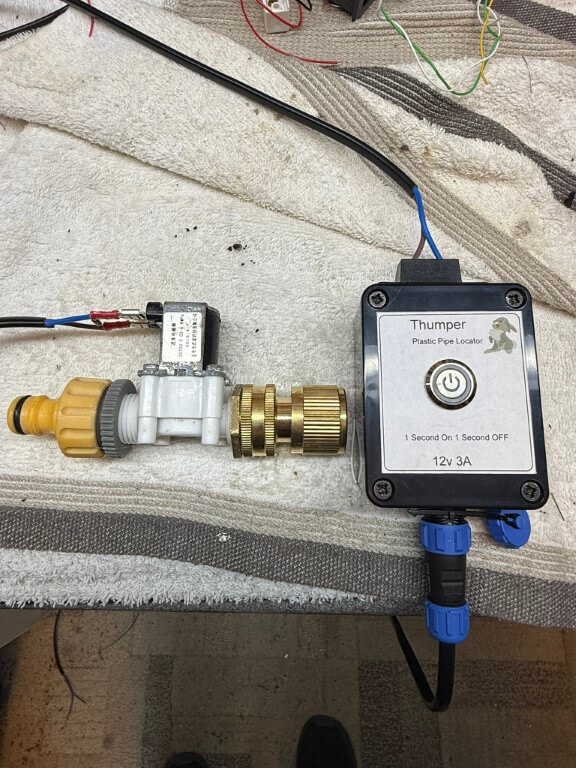
After the sub-meter is the automatic isolation valve, this is a ‘full bore’ valve so as not to reduce the water pressure to the house, (both the sub-meter and valve are 3/4″).

The automatic valve was bought from solenoid valve world, I opted for a version that monitored if the valve was open or closed and had the ability to be manually fixed open.

auto valve

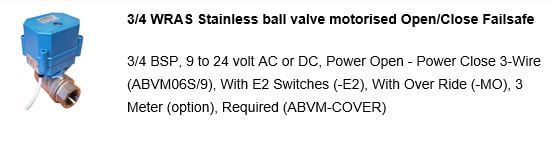
The valve operates on 9 to 24v, in my setup I’m using a 12v DC power source. My configuration is 12v permanently available to the valve and to close the valve, a switched12v hold open positive is removed, to open the valve, a 12v positive is reapplied to the control input.

12v

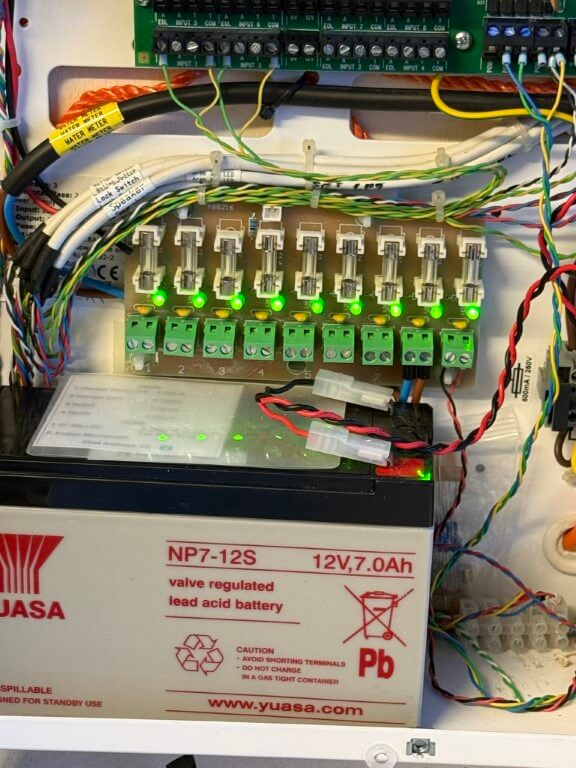
12v DC to the ESP32 and valve are via a separate fuse from my home alarm system power supply as this is battery backed up.

The valves position and operating commands are via an ESP32 connected to my Home Assistant dashboard by WiFi.

dashboard

To enable future maintenance when dealing with two fixed pipe points, I used a 3/4″ male x female brass union end on the auto valve, this means I can easily remove/replace, either the meter or valve should the need arise.
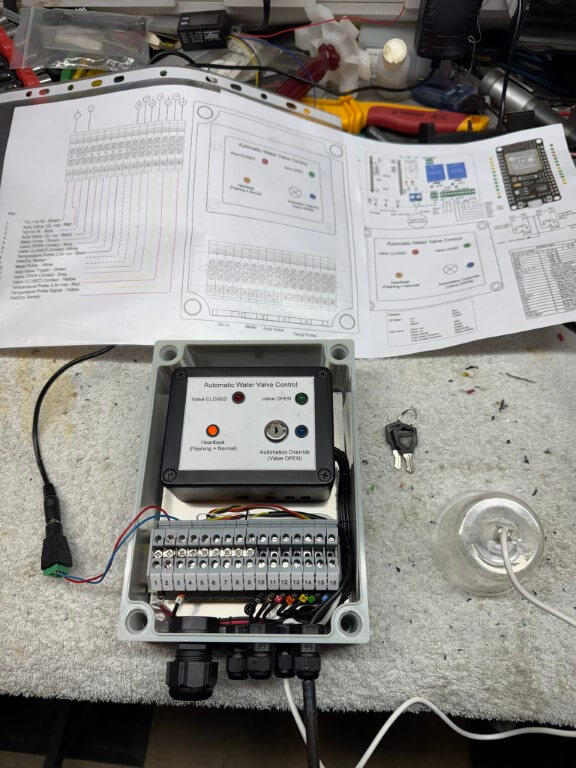
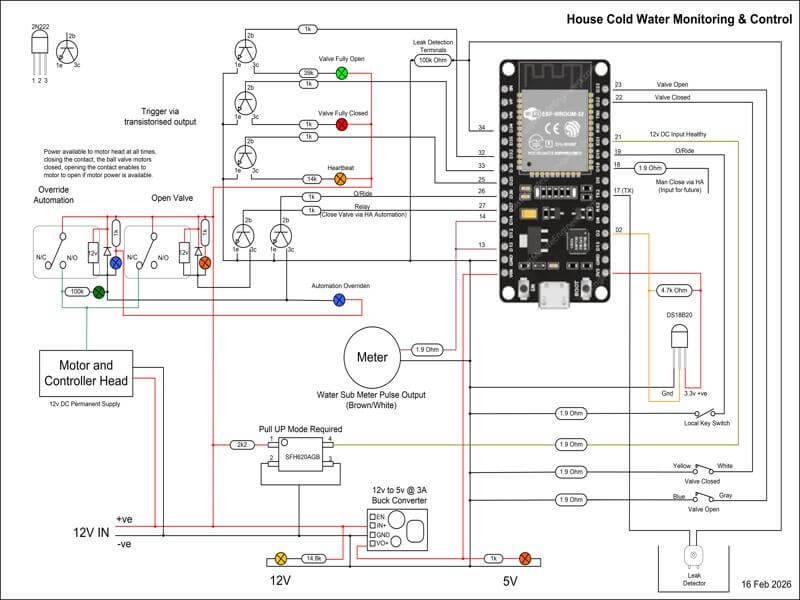
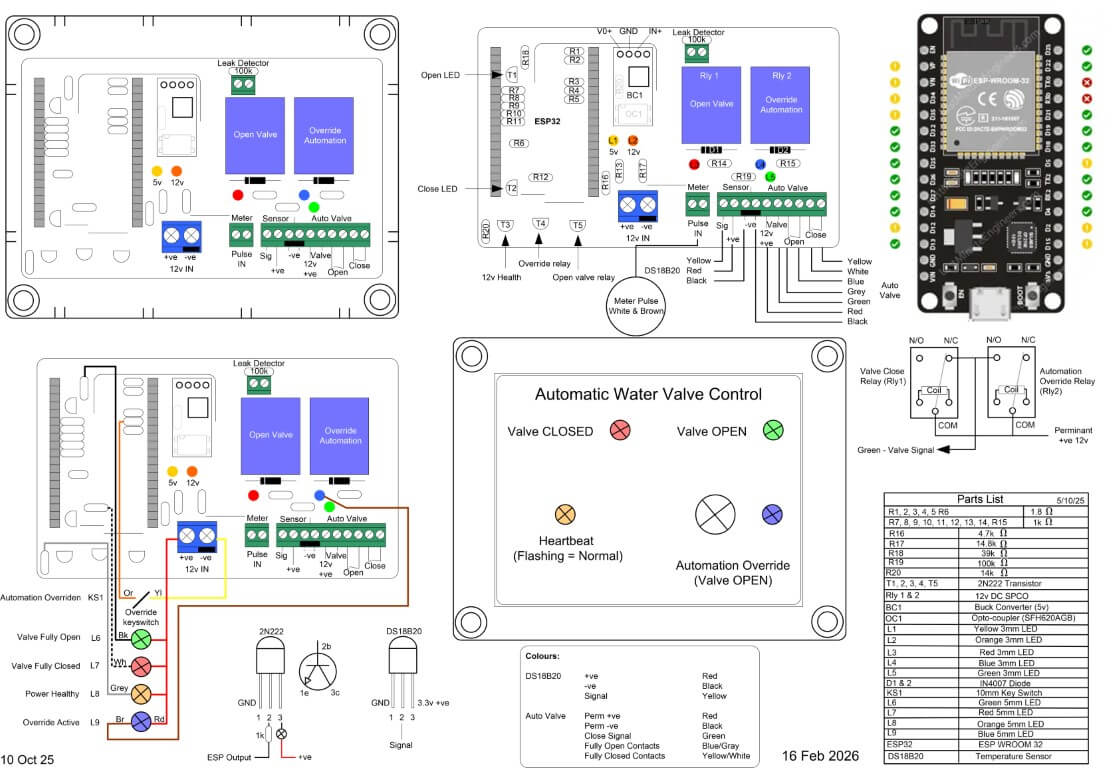
TB76 34

ESP32 Controller

completed controller

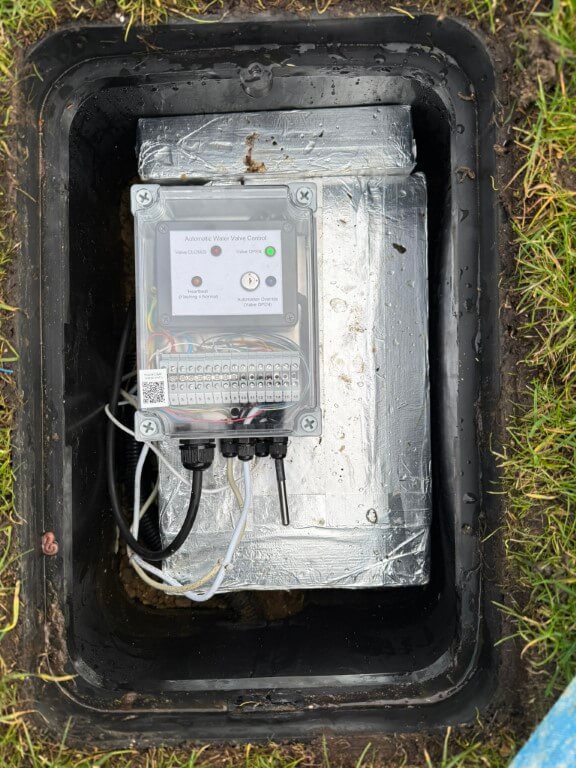
The above picture shows the completed controller boxed inside an IP68 rated enclosure, all cables pass through compression glands in a hope to reduce moisture ingress.

The QR code is linked to my ‘Home Manual’ on my local NAS, this enables rapid access to anything related to this project.

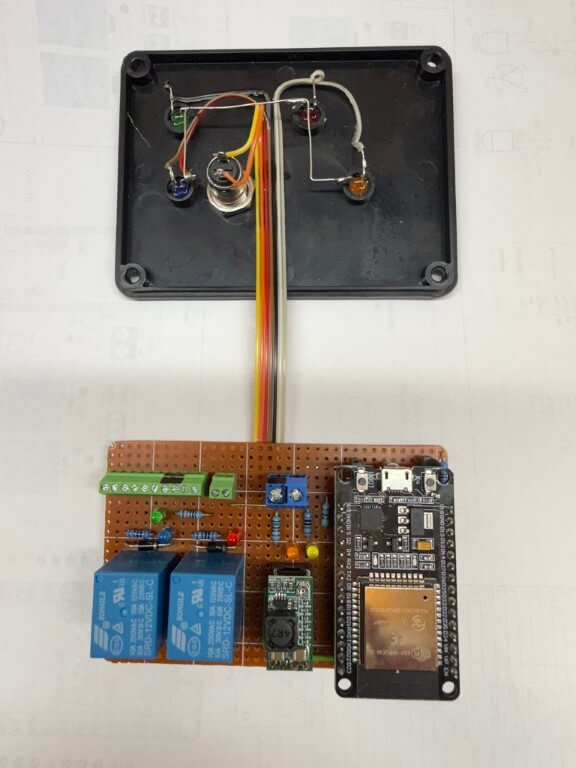
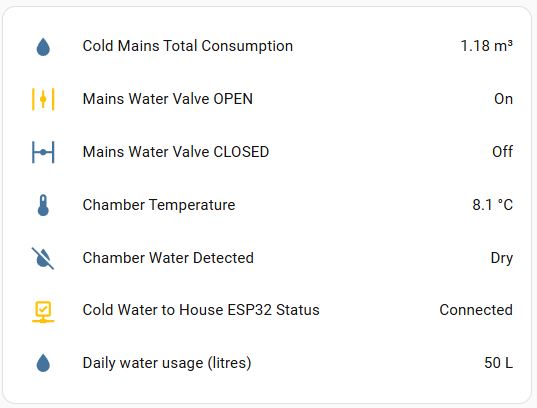
The ESP32 is the brains of the project, performing monitoring and control the following information to Home Assistant:

  • Auto-Valve position
  • External Temperature
  • Meter/Valve chamber – Dry or Wet
  • Remote override enable (to prevent any automations closing the valve)
  • ‘Heartbeat’ (power and WiFi connection are ok)

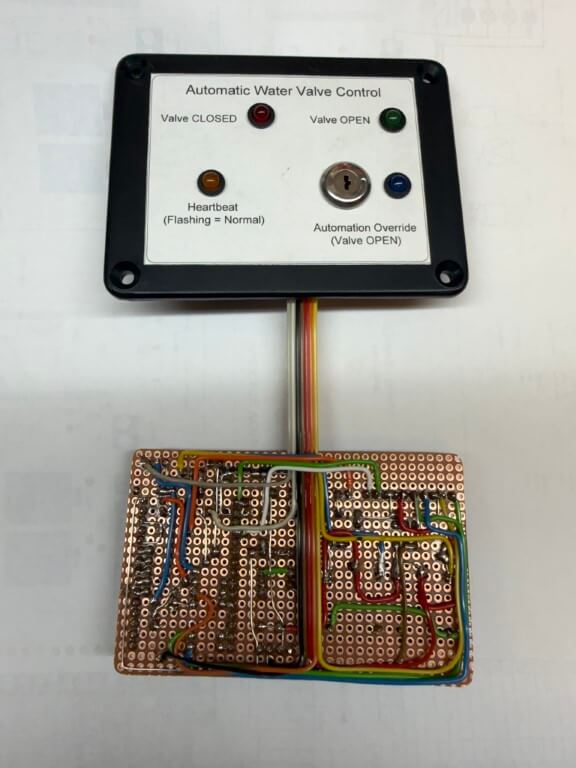
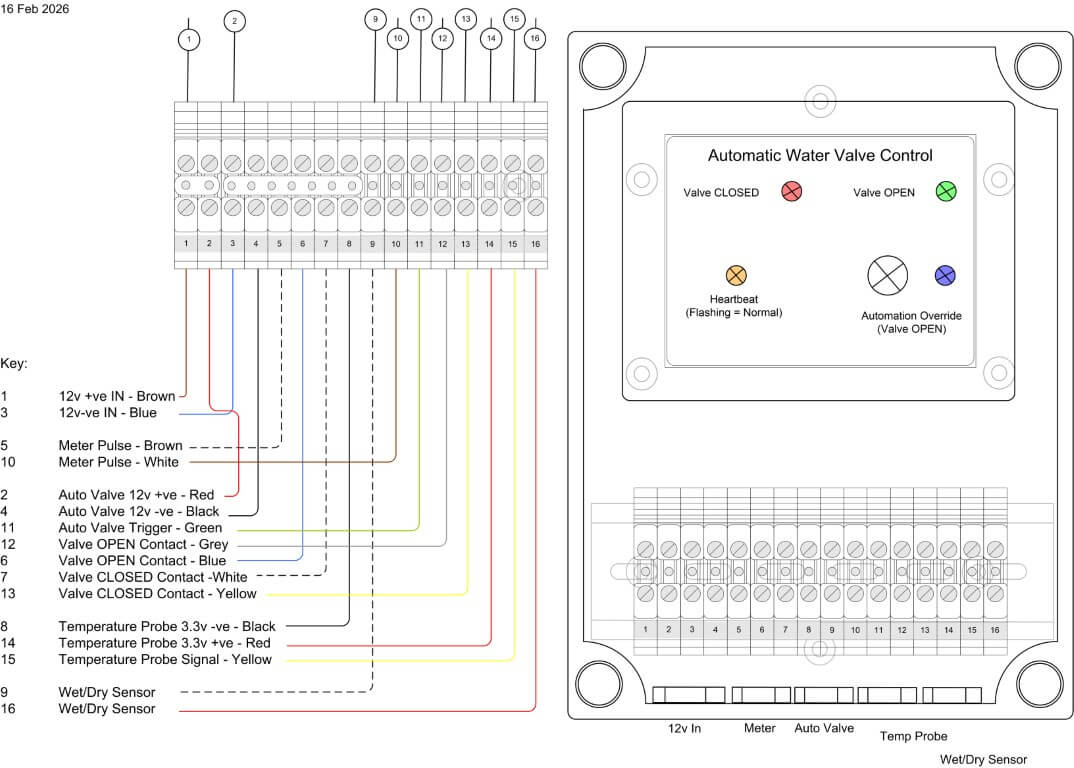
The first version of the controller was within a smaller IP rated enclosure, with field cable terminations made directly to the terminal blocks, however, the practicalities of doing this meant that it would be very difficult to easily remove the controller if maintenance was needed, therefore, version two used a larger IP enclosure and external terminals.

loomed controller

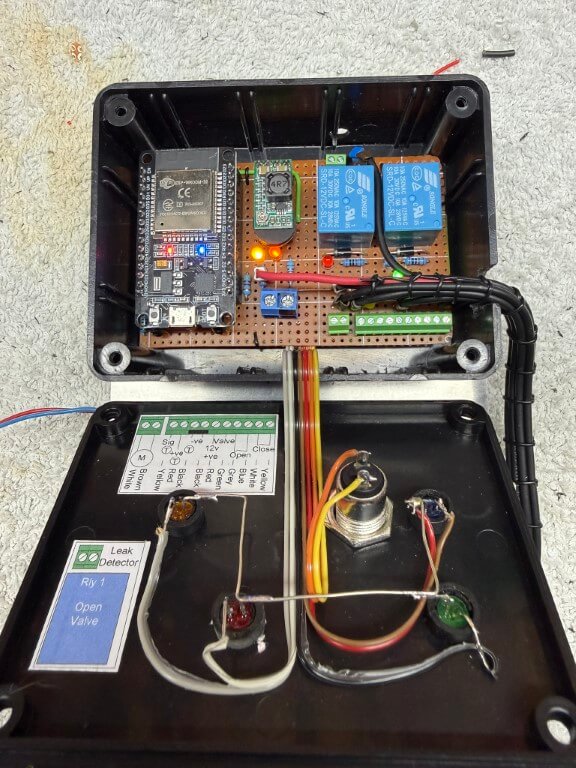
For ease, I simply soldered cables to the underside of the existing terminals and loomed the cables to DIN rail mounted terminals.

Under test

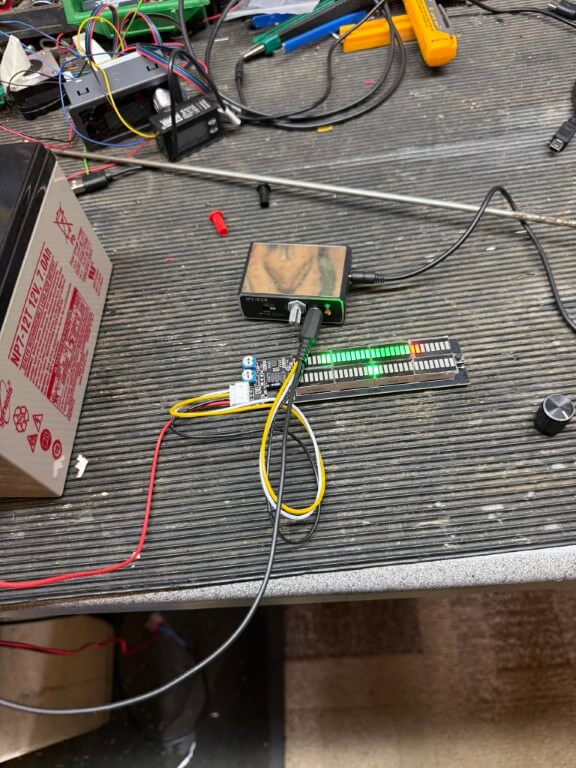
Completed controller within enclosure undergoing testing, the temperature probe for the chamber is fixed to the enclosure, to the right of this is the moisture detector secured inside a plastic cup.

The mouth of the cup will sit on the gravel base of the chamber with the height of the sensor set below the automatic valves motor and electronics, an alert is sent to my phone if moisture is detected.

The following files are of the wiring and code used:

I’ve only got a small amount of tweaking left to do, but essentially the project is finally finished as information and control is flowing to Home Assistant.

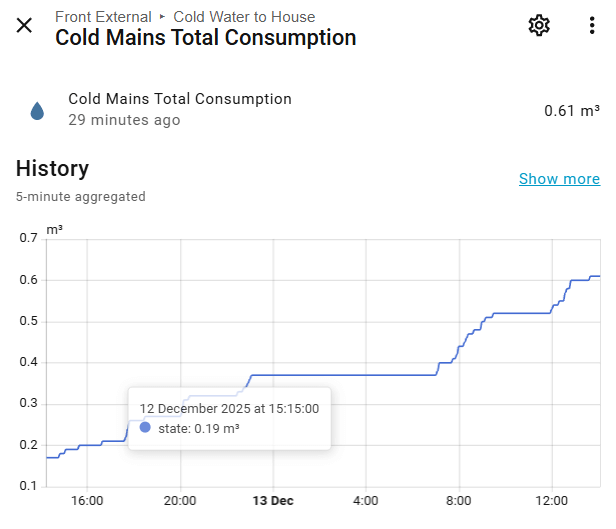
One of things to resolve is getting the Total Consumption value to align with the boundary meters reading, although not absolutely necessary, it would be a nice to have.

After a few months in use, I noticed when the chamber started to fill with rain water and the water sensor operated, the indication to Home Assistant was rapidly turning on and off, to combat this, the YAML code was changed to make the water sensor turn on just before a reading was taken and then off, this also reduces probe corrosion, a futher modification was to add filtering and water detection sensitivity.

I hope you’ve enjoyed following this, a typical example of what seems a fairly easy job, turning into a bit of a pain with lots of ‘re thinks’ along the way 🙂

Tracing a buried plastic water pipe

Updated 29 October 2025

This is part one of a project to install a secondary water meter and automatic shutoff valve to my homes incoming water feed.

The first task was to locate the route my buried plastic (MDPE) water pipe takes to the boundary meter from the house, hopefully I can expose the pipe near to the garage.

The main reason for getting the meter near the garage was to enable easy connection to the Home Assistant interface and to ensure Wi-Fi connectivity to this.

The images show from the boundary meter, (mine on the right!), looking towards the house, whilst the other picture is looking from the house with the assumption that the pipe is buried in a straight line.

The water pipe is 25mm and does not have any buried tracer wires or tracing features, therefore, I cannot use any radio detection avoidance/detection tools to impose a signal.

Excluding Ground Penetrating Radar, I could isolate the water and disconnect the pipe at the stopcock, and from there insert a metal ‘fish’ into the pipes length, giving me the ability to impose a radio signal on this and track it with a Cable Avoidance Tool (CAT), as this was ‘invasive’ and practically, very difficult I opted for the second method.

This method involves connecting a pulsing solenoid valve to an outside tap which causes an audible ‘water hammer’ which can be detected with a sensitive microphone, this is called the ‘Thumper’ method.

thumper

Complete ‘Thumper’ setup, the 12v solenoid valve is from Aliexpress and is pulsed by the circuit contained within the enclosure.

thumper 1

With the water being ‘pulsed’, the next part was to detect to sound and trace the pipes path based on how strong the pulse sounds, bearing in mind that the pipe is buried at least 500mm (should be 750mm, but 500mm was to the base of the existing boundary meter chamber).

listening mic

I bought a high sensitivity microphone and amplifier from Aliexpress for £23.99 which is incredibly good, I did clamp the circular microphone onto a piece of aluminum which had a length of stainless steel thin bar tapped into it, this allowed me to push deeper into the lawn in the hope of hearing the ‘Thumper’ noise.

flags

Each time I heard an audio signal, I moved the probe back and forth to find the strongest signal and marked this with a flag, as you can see, the pipe veered off the straight predicted line.

blue line

Day 1 – Dig (13 Oct 25)

As it was raining slightly and I don’t want my back to go, I decided to take it easy with the digging.

I started with a spades width rectangle hole and went carefully as I didn’t want to damage any services, I did know that the edging stones were cemented in, but was unsure how far this went under the lawn.

dig hole day 1

I didn’t have to dig too far down (300mm) to expose the incoming mains electricity and gas on top of the surface water drain pipework.

I checked the black duct using the ‘Thumper’, but its the electrical supply cable to the house, I did dig another hole to the side of this one, but it just confirmed that the surface water drain carried on to next doors property.

Filled everything back in ready for round two!

filled in 1

Day 2 – Dig (17-19 Oct 25)

I moved 700m nearer to the meter from the first dig and decided to basically trench across the lawn to give me a good chance of locating the pipe.

After digging 800mm deep and 1000m across, there was still no sign of the water pipe and using the ‘Thumper’, I could hear the rhythmic beat using the high gain microphone, but was unable to ‘hone’ in to a strong signal.

dig 2 hole

I could only conclude that the vibrations caused by the ‘Thumper’ was being transposed onto the neighbours water pipe and it was this I was detecting, rather than mine!

Day 3- Dig (20 Oct 25)

I wasn’t sure what to do at this point, I did ask for advice on my towns local Facebook page and had a really helpful reply, following this up, I was given a contact number of an ex-Anglian water guy, but the problem was unless the pipe was leaking detection was not possible with the tools and methods he had.

Prior to posting on Facebook a chap at ‘Man Shed’ suggested using water dowsing to find the pipe, when I got home, I was skeptical, but gave it a go with two bits of brazing rod, and blow me it gave an indication.

dig 3 hole

The far blue flag shows the location of the water meter, so I walked at 900 to this across the grass and drive and plotted when the rods crossed, repeating this I finally ended up with the second blue flag and a box location to dig in the hope I find the pipe.

I did also appear to pick up a sewage pipe which traverses across the front of my house.

concrete cap

Digging down through the drives hardcore I’ve come to a chunk of concrete which could be discarded builder waste or, more hopefully, a cap over the water pipe ducting.

Day 4 – Dig (21 Oct 25)

Oh well! My hopes were dashed when the concrete was broken away and I checked the area with the microphone for signs of an audible signal, but nothing.

concrete broken

No choice but to refill the hole and nip out and get some MOT type 1 to get the levels back, once compacted and covered over, nobody would know.

drive restored

Plan ‘B’

Although the microphone pick up the ‘Thumper’ hydraulic pulses, I decided to build a ‘Pipe Knocker’ which simply hits the pipe using the same controller as the ‘Thumper’ to control a small solenoid, this will be attached directly onto the pipe from the meter.

My idea is that should allow me to hear a stronger pulse working from the meter to the house, rather than from the house to the meter.

pipes exposed

My 25mm feed is on the left and my neighbours is on the right, both directly buried at a depth of 400mm and protected with a layer of sand, I think that due to the close proximity to each other, its not going to be easy to be sure which pipe I’m tracing which ever method I use.

The nuclear and last option will be to expose more of the pipe and cut the pipe to insert a wire with an imposed signal on it that can be accurately tracked by radio detection, giving me a definitive location to dig.

Day 5 – Dig (22 Oct 25)

Bit more digging to break out the concrete giving greater access to the water pipe, this is in preparation to cut the pipe and use trace equipment to find the pipes route.

larger hole

I tried the stethoscope from Amazon to listen for the ‘Thumper’ bit it didn’t work effectively for this application, there was a faint noise, but this soon disappeared as I moved further into the lawn from the meter and the main problem with the high sensitivity microphone was determining any form of direction as the sound generated from the ‘Thumper’ is omnidirectional, therefore, I abandoned the ‘Pipe Knocker’ idea.

stethoscope
Screenshot

Last ditch attempt was to install an LED bar graph on the audio output of the microphones output.

The idea was to give me a visual indication of the strength of sound received by the microphone and enable me to ‘hone’ in the pipes route, alas this failed as the voltage changes to the bar graph were indicated fine for large vibrations but not with the low vibration signals.

Day 6 – (24 Oct 25)

Ok, I admit defeat, I’ve hired the following equipment from HSS:

1 – Cobra with a single core wire tracer which I will attach the cobra, this will be inserted inside the open end of my 25mm water pipe and enable detection of pipe route and depth by the C.A.T.4+

cobra
70715 Duct Rod

2 – C.A.T 4+ radio detection device, tuned to the Genny frequency this device will determine the location and depth of the wire tracer within the plastic pipe.

cat4+
49522 CAT4+

3 – Genny4 transmitter imposes a radio frequency on the tracer wire suitable for the C.A.T. 4+ to detect.

49523 Genny4

4 – I used Amazon to get a WRAS approved direct bury suitable Plasson 25mm Slip Coupling, this will be used to join the MDPE water pipe where it will be cut to allow the cobra and tracer wire to enter the pipe, a slip coupling will be used as pipe movement is restricted, being fixed points at each end. Another plus to a slip coupling is that pipe inserts are not required, so water flow will not be impacted by any restrictions caused by the coupling.

slip coupling

Day 7 – (27 Oct 25)

I don’t think HSS could have cocked this up any better, the whole experience was a pain in the arse, moving on…..

Cutting a long story short the depth of the water pipe at my preferred sub meter location was ~1.5m deep, so no wonder I could find it with my 800mm trench and water dowsing was a right bum steer!

Breaking this down:

pipe cut

The slip coupling length was marked on the pipe before cutting after I had double checked I was on the correct pipe, the house stop cock was off and that the streets isolation valve was holding.

wire trace

I decided against using the hired duct rod (Cobra) until I had tried using a plastic conduit fish tape with a wire attached to push deep into the pipe, this worked effectively with little resistance.

Once sufficient wire was pushed into the pipe to where I would prefer the chamber for the sub meter to go, I attached the Genny4 and with the CAT4+, I traced the route and approximate depth of the detected wire inside the pipe.

coupling

Slip coupling installed and leak tested.

So that’s the end of this blog on finding a plastic water pipe, as you can see I tried a number of different non invasive techniques, but in the end a CAT and Genny was the only way.

The follow on from this blog is one about installing my sub meter and can be found HERE.